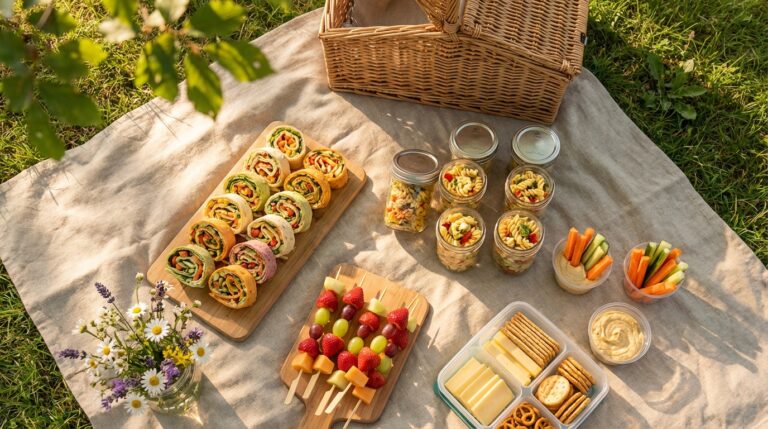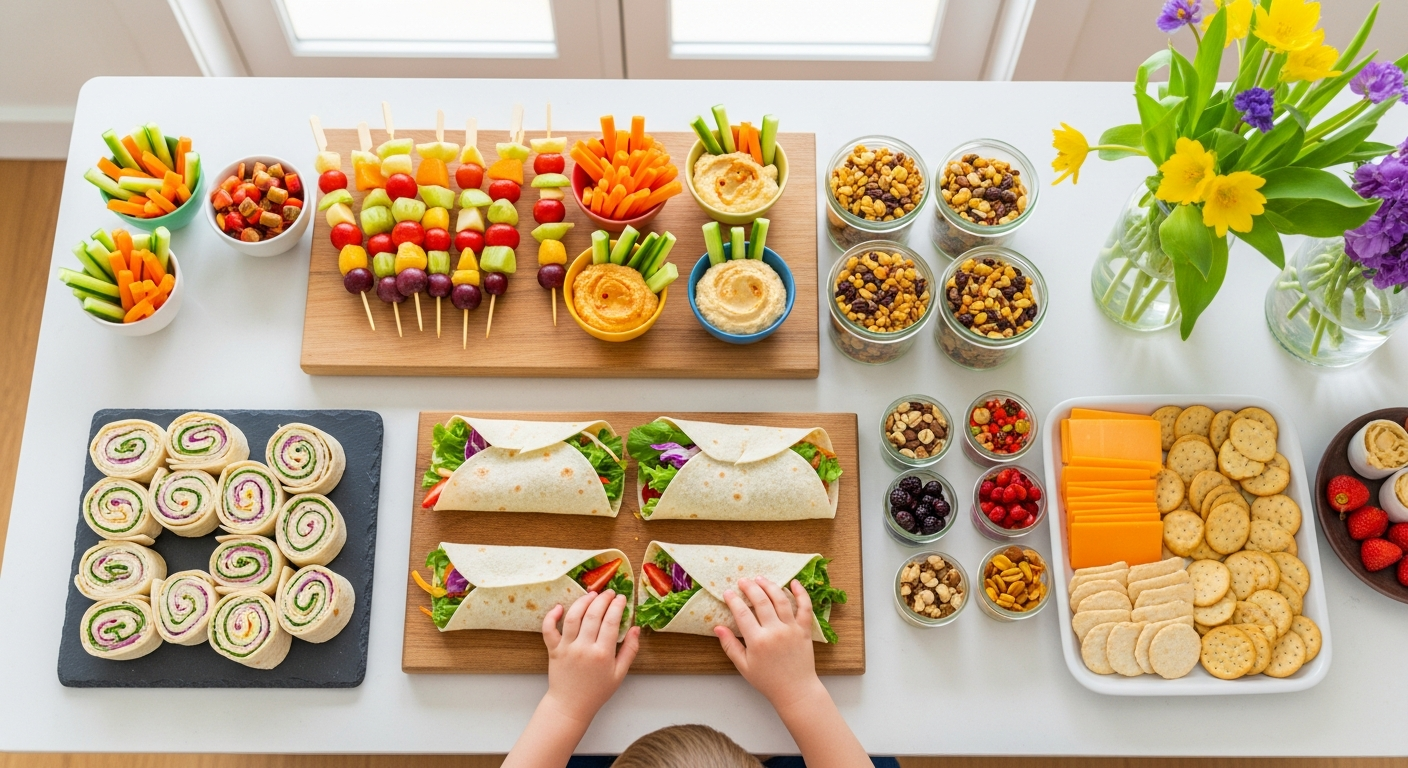
Spring Break Lunches Kids Can Actually Help Make (No Reheating Required)
Discover 8 no-reheat spring break lunches your kids can build themselves, complete with an age-by-age task guide and a 35-minute Sunday prep plan. You'll also get a free printable kit to make mealtime easy and fun.
- Build 8 no-reheat lunches your kids can assemble themselves.
- Download the free Spring Break Kid-Made Lunch Kit for recipes and planners.
- Use the Protein + Produce + Starch formula for balanced, flexible meals.
- Dedicate 35 minutes on Sunday for prep to simplify weekday lunches.
- Follow age-specific cutting and cold-food safety rules for young children.
This post contains affiliate links. As an Amazon Associate I earn from qualifying purchases.
It’s day three of spring break, it’s 11:15 a.m., and the kids are about to ask what’s for lunch. This page gives you eight cold lunches kids can build themselves, an age-by-age table of kitchen tasks, a 35-minute Sunday prep plan, and packing rules for park days. Nothing needs reheating at lunchtime. Six builds need no cooking at all, and two (quesadilla wedges and mini bagel pizzas) are cooked ahead by an adult and eaten cold. The free Spring Break Kid-Made Lunch Kit is right on this page.
In this article (11 sections)
- Safety Cuts and Cold-Food Rules Before You Start
- Why Spring Break Lunches Need a Different Strategy
- The Protein + Produce + Starch Formula
- What Kids Can Do at Each Age
- Spring Break Lunch Ideas Kids Can Make: 8 Cold Builds
- Batch Prep on Sunday: Setting Yourself Up for a Smooth Week
- Packing for Outings: Park Days and Spring Break Adventures
- Handling Picky Eaters During Break
- A Sample Spring Break Lunch Week
- Frequently Asked Questions
- You’ve Got This Week
Safety Cuts and Cold-Food Rules Before You Start
Safety firstThese builds are written for ages 4 and up. For under-4s, quarter grapes and cherry tomatoes lengthwise and cut cheese, deli meat and salami into thin strips. Serve carrot shredded, cooked soft or sliced very thin, never as raw sticks. Cut cucumber and bell pepper into thin strips, or quarter the cucumber rounds; skip whole cucumber rounds. Slice apple very thin or grate it. Spread nut or seed butter thinly and chop raisins. Skip granola, whole nuts, trail mix, croutons and the 1-inch roll-up rounds. Mash or flatten whole chickpeas, slice sugar snap peas thin lengthwise, and grate radish or slice it paper-thin.
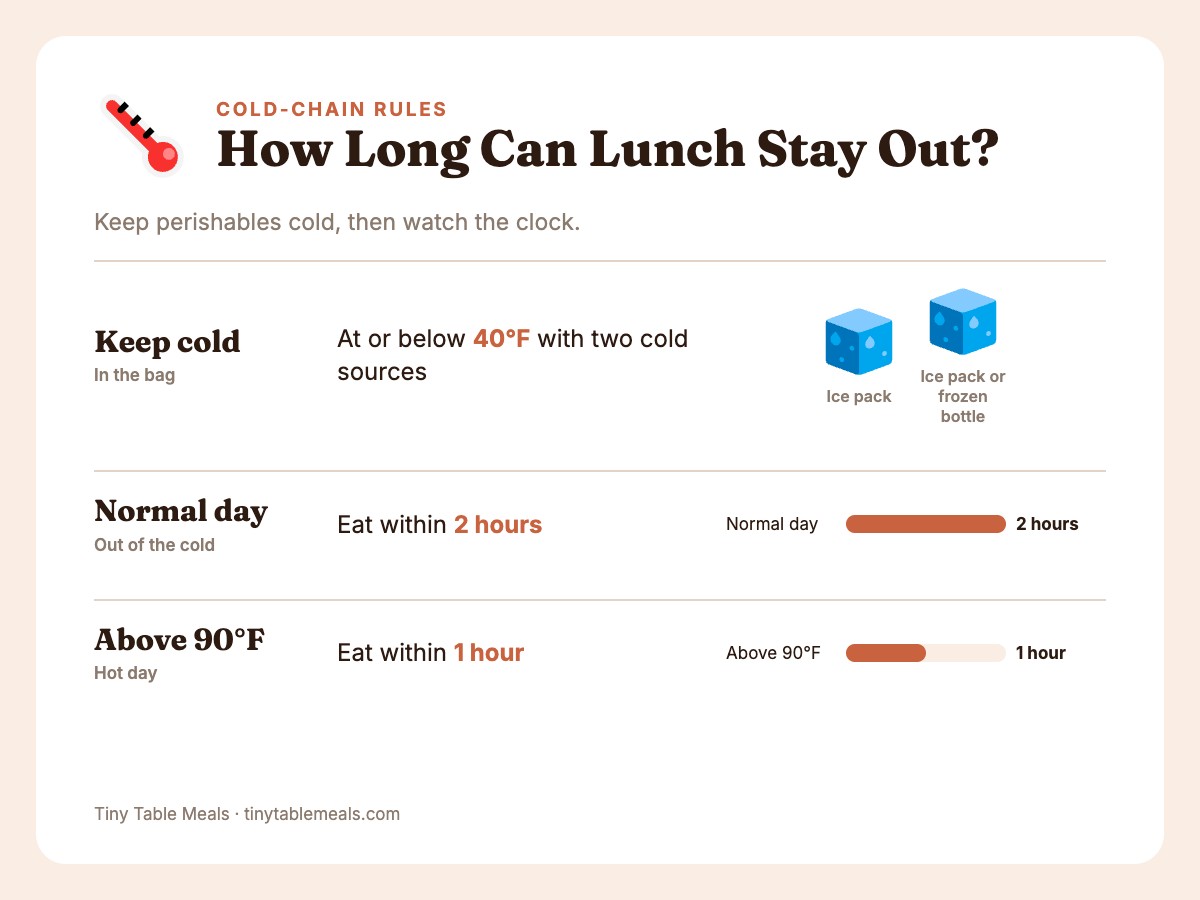
No honey under 12 months; for babies under 12 months, follow AAP feeding guidance instead. Cool hard-boiled eggs promptly and refrigerate within 2 hours. An adult does the cutting for kids under 8 (see the age table below). Perishables stay at or below 40°F and should not sit out more than 2 hours (1 hour above 90°F).
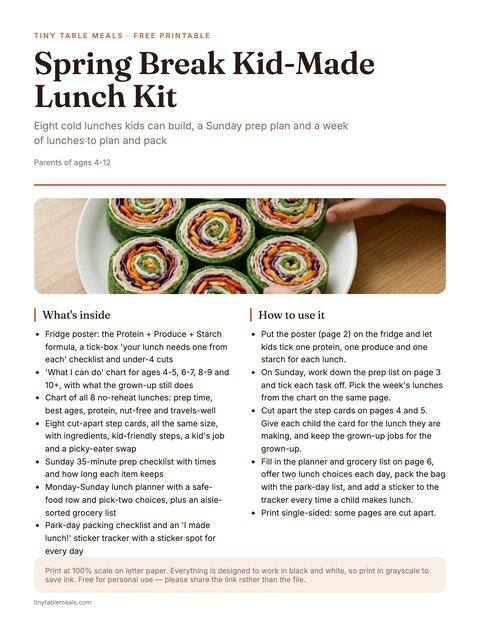
Free printable · 6 pages
Spring Break Kid-Made Lunch Kit
A fridge poster with the Protein + Produce + Starch formula and an age-by-age helper chart, a chart of 8 no-reheat lunches, eight cut-apart step cards, a 35-minute Sunday prep checklist, a Monday-Sunday lunch planner with grocery list, a park-day packing list and an 'I made lunch!' sticker tracker.
Free. Your download link appears right here. You'll also join the Sunday Supper Plan. Unsubscribe anytime. Privacy
Why Spring Break Lunches Need a Different Strategy
During the school year, lunch is handled. Spring break puts it back on your plate, and kids who graze and watch videos all morning often skip lunch, then turn ravenous at 3 p.m. A structured, kid-built lunch gives the day a shape.
I stick to no-reheat lunches because the microwave turns into a battleground when kids help: who pushes the buttons, how long, is it too hot? Cold builds also pack straight into a park or porch picnic. And spreading, layering and rolling feel like real cooking to a six-year-old.
The Protein + Produce + Starch Formula
Every build below follows one framework, and you only need to remember three words: protein, produce, starch.
Protein provides the building blocks for growth and can help keep kids fuller through the afternoon. High-protein meals and snacks for kids don’t have to be complicated. Cheese, hummus, beans, seed or nut butter, Greek yogurt and the occasional deli meat all qualify with zero cooking. Hard-boiled eggs from Sunday prep count too.
Produce brings vitamins, fiber, water content, and color. Schedules loosen during spring break and the candy bowl is easier to reach. Vegetables and fruit at lunch keep a baseline of good nutrition in place when everything else is off-schedule.
Starch provides the energy kids need to run, play, create, and not destroy your house. Whole-wheat bread, whole-grain crackers and whole-grain wraps give more sustained energy than refined options. Even a plain white pita is better than no starch at all.
The formula is flexible: swap any component and the structure still holds, which works for picky eaters and for whatever is in the fridge.
| Component | Examples | Why It Matters |
|---|---|---|
| Protein | Cheese, hummus, hard-boiled eggs, nut/seed butter, Greek yogurt, beans, canned tuna, deli meat (occasionally) | Satiety, growth, brain function |
| Produce | Cucumber, cherry tomatoes, bell pepper strips, apple slices, berries, carrots, peas, snap peas, avocado | Vitamins, fiber, hydration |
| Starch | Whole-grain bread, wrap, pita, crackers, whole-grain tortilla, cooked pasta, rice cakes | Energy, fiber, sustained focus |
| Bonus (optional) | Healthy fat like avocado or olive oil drizzle, dip like ranch or guacamole | Flavor, absorption of fat-soluble vitamins |
Aim for at least one item from each of the first three rows, and you have a balanced lunch without thinking too hard about it.
A word on deli meat: it’s high in sodium, so I keep it as an occasional choice for little ones. For under-4s, cut salami and other deli meat into thin strips or quarters.
What Kids Can Do at Each Age
This spring break, let your kids do the real work. I don’t mean the kind of “help” where you hand over a spoon and take it back two seconds later. Match the task to the age, and accept that lunch will be a little messier than if you made it yourself.
In my experience, kids who help make food are often more willing to try it. You also get a few hands-free minutes.
Here’s what’s safe at each age. One knife rule holds for every build on this page. An adult does all the cutting until age 8. From age 8, kids cut soft foods with a child-safe serrated knife. If a child under 4 is eating too, an adult also makes the smaller cuts listed in the safety box at the top. For a deeper skills ladder, see our teaching kids to cook age-by-age guide.
| Age | Can do | Adult does |
|---|---|---|
| 4-5 | Wash produce, tear lettuce, pour pre-measured items, spread soft fillings, fill containers | All knife work, opening cans, anything hot |
| 6-7 | Spread with a butter knife, peel hard-boiled eggs, layer and roll, mix tuna salad | Cutting, opening cans, stove, broiler |
| 8-9 | Cut soft foods with a child-safe serrated knife, measure, make simple dressings, build a full lunch | Regular knives, stove, oven, broiler |
| 10+ | Build any no-reheat lunch alone, follow a simple recipe, use a small paring knife with an adult nearby | Stovetop and broiler (adult present), hot oil until shown the safe way |
The key shift in mindset here: your job is to set up the workspace and the ingredients, not to do the work. Pull out a cutting board, set out the components, give a brief demo if needed, and then step back. Let the sandwich be imperfect. Let the wrap be stuffed too full. The mess is worth the benefit — both for them and for your sanity during a long week at home.
Spring Break Lunch Ideas Kids Can Make: 8 Cold Builds
These eight lunches are eaten cold and travel well in a bag. Six need no cooking, and an adult cooks the quesadilla wedges and mini bagel pizzas ahead. Each one lists the part kids can make themselves. An adult does the cutting for kids under 8. Builds are written for ages 4+ unless noted, so check the safety box above for under-4 cuts. Here’s the comparison table so you can pick fast.
| Lunch Build | Prep Time | Best Ages | Total Protein | Easy to Make Nut-Free? | Travels Well? |
|---|---|---|---|---|---|
| Rainbow Roll-Ups | 10 min | 4+ | ~14g | Yes | Yes |
| Deconstructed Lunchable | 5 min | 4+ | ~16g | Yes | Yes |
| Greek Pita Pocket | 8 min | 5+ | 15-22g | Yes | Yes |
| Sunflower Butter Sushi | 10 min | 4+ | ~10g | Yes (sunflower butter) | Yes |
| Tuna Cucumber Boats | 10 min | 6+ | ~13g | Yes | Yes |
| Quesadilla Wedges + Dip Bar | 5 min (cooked ahead, served cold) | 4+ | 13-16g | Yes | Yes |
| Spring Chopped Salad Jar | 15 min | 8+ | 14-20g | Yes | Yes |
| Mini Bagel Pizzas | 10 min (bagels toasted ahead) | 5+ | ~14g | Yes | Yes |
“Nut-free” here means easy to make without nuts. Check labels for cross-contact, remember hummus contains sesame, and follow your allergist’s advice if your child has allergies.
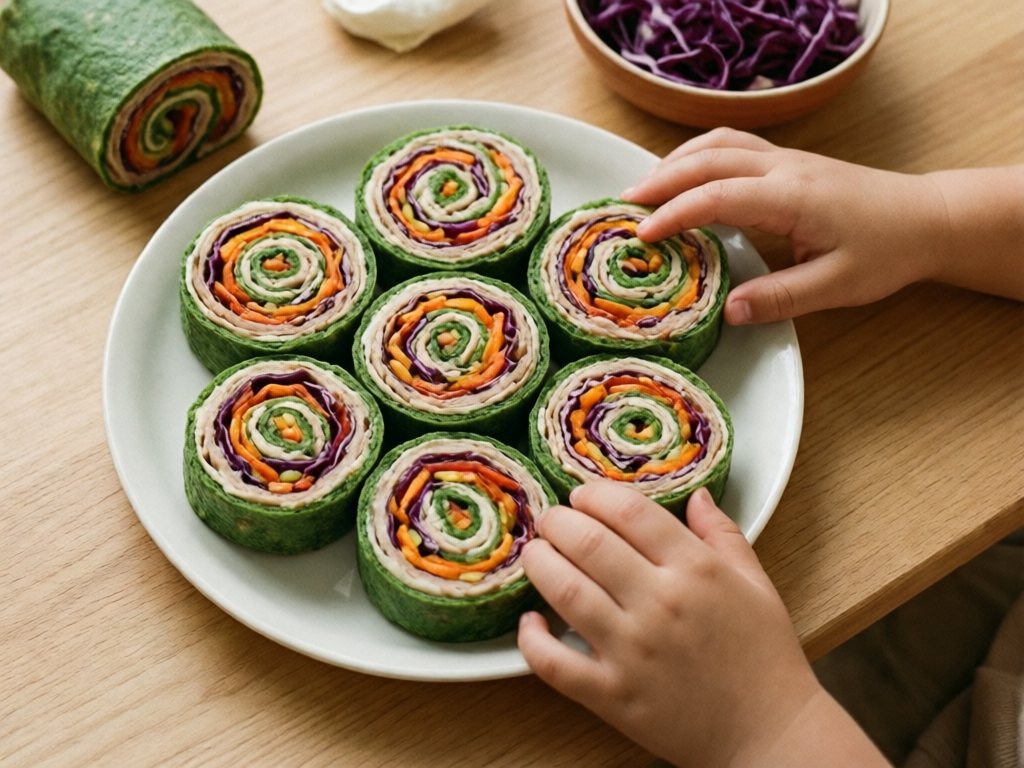
Lunch Build #1: Rainbow Roll-Ups
What you need:
- Large whole-grain or spinach tortillas (the green ones are visually exciting)
- Cream cheese or hummus (about 2 tablespoons per wrap)
- Deli turkey or ham (2-3 slices)
- Shredded or thinly sliced colorful veggies: red bell pepper strips, shredded purple cabbage, julienned carrot, cucumber sticks
- Optional: a handful of spinach leaves
How to build it:
- Spread. Cover the tortilla in a thin, even layer of cream cheese or hummus, leaving about an inch bare at one edge.
- Layer. Add the turkey or ham, then arrange the veggies in a row down the center. Making the “rainbow” is the part kids love.
- Roll. Roll firmly from the side opposite the bare edge, keeping it tight.
- Cut (adult, or ages 8+). Slice in half diagonally, or into 1-inch rounds for eaters ages 4 and up. Ages 8+ can cut with a child-safe serrated knife. For under 4s, cut into halves or strips, never rounds, and keep carrot shredded or very thin. Eat right away, or refrigerate and keep cold until lunch.
Protein: ~14g per wrap | Nutrition notes: A source of vitamin C from bell peppers and beta-carotene from carrots
Best kid tasks: Spreading the cream cheese or hummus, arranging the veggies and rolling the wrap (with some help on the tight roll). Ages 8+ can cut it with a child-safe serrated knife. An adult cuts for younger kids.
TipLet them choose only the veggies they like. A wrap with just turkey, cream cheese, and cucumber still counts.
Lunch Build #2: Build-Your-Own Deconstructed Lunchable
What you need:
- Whole-grain crackers (about 12-15)
- Sliced cheese (cheddar, pepper jack, mozzarella — whatever’s in the fridge); thin strips for under 4s
- Deli meat, folded (salami cut into thin strips or quarters for under 4s)
- Cherry tomatoes, quartered lengthwise for under 4s
- Thin apple slices
- Optional: a peeled hard-boiled egg, sliced
- A small container of hummus or mustard for dipping
How to build it:
- Set out the base. Use a plate or divided container, one section per food.
- Fill the sections. Add crackers, cheese, meat, tomatoes and apple, plus a small cup of hummus or mustard.
- Admire it. Kids love seeing everything laid out like a little charcuterie board.
Protein: ~16g | Nutrition notes: A source of calcium from cheese and fiber from whole-grain crackers, plus produce from the tomatoes and apple
Best kid tasks: An adult slices the cheese, apple and egg ahead. After that, kids ages 5 and up can build this plate on their own. Give them the components and a plate and let them do the whole thing.
TipThis format works well for picky eaters because nothing touches anything else. Sub in whatever each child actually likes; almost any protein, produce and cracker combination works.
Lunch Build #3: Greek Pita Pocket Party
What you need:
- Whole-wheat mini pitas
- Hummus (store-bought is great)
- Cucumber, thinly sliced (thin strips or quartered for under 4s)
- Cherry tomatoes, quartered lengthwise for under 4s
- Kalamata olives, pitted and chopped small (if your kids like them)
- Feta cheese crumbles
- Optional: rotisserie chicken, shredded
How to build it:
- Open (adult, or ages 8+). Slice each pita across the top to open the pocket. Ages 8+ can use a child-safe serrated knife.
- Spread. Add a generous spoonful of hummus inside.
- Stuff. Fill with cucumber, tomatoes, feta and olives, plus shredded chicken if using. Eat right away, or refrigerate and keep cold until lunch.
Protein: ~15g (without chicken) / ~22g (with chicken) | Nutrition notes: Plant protein and fiber from hummus, calcium from feta, healthy fats from olives
Best kid tasks: Spreading hummus inside the pita (a fun tactile task), stuffing the pita with toppings, measuring out olive portions
Why kids love it: Pita pockets feel special, and stuffing them is half the fun.
Lunch Build #4: Sunflower Butter and Apple “Sushi”
What you need:
- 1 large whole-grain tortilla
- 2-3 tablespoons sunflower seed butter, spread thinly (use sunflower butter for nut-free; peanut butter only if your family eats nuts)
- 1 apple, cored and cut into thin sticks
- Optional: a drizzle of honey (never under 12 months), hemp seeds, chopped raisins (skip granola for under 4s)
How to build it (ages 4+):
- Spread. Lay the tortilla flat and cover it with a thin layer of sunflower seed butter.
- Line up the apple. Place the apple sticks in a line about 2 inches from one edge.
- Add extras. Drizzle with honey and sprinkle with seeds if using.
- Roll and slice. Kids roll tightly from the apple side. An adult cuts the roll into 1-inch rounds, or ages 8+ use a child-safe serrated knife. They look like sushi rolls, and kids love that. For under 4s, skip the rounds: cut the roll into thin strips and use very thin or grated apple.
Protein: ~10g | Nutrition notes: Healthy fats and protein from seed butter, fiber and vitamin C from apple, some plant omega-3 (ALA) from hemp seeds if added
Best kid tasks: Spreading the seed butter, arranging the apple sticks and rolling (a good two-person job). An adult cuts the apple and slices the rounds for kids under 8.
Note on nut-free schools: Use sunflower seed butter and check the label for cross-contact with nuts.
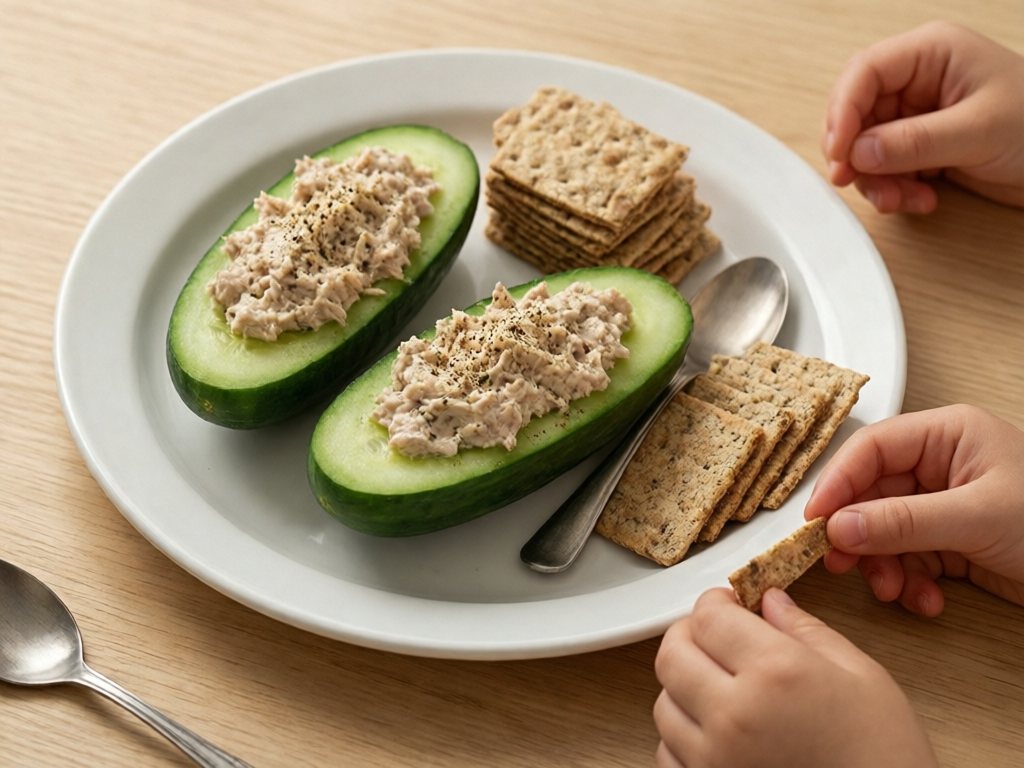
Lunch Build #5: Tuna Salad Crackers and Cucumber Boats
What you need:
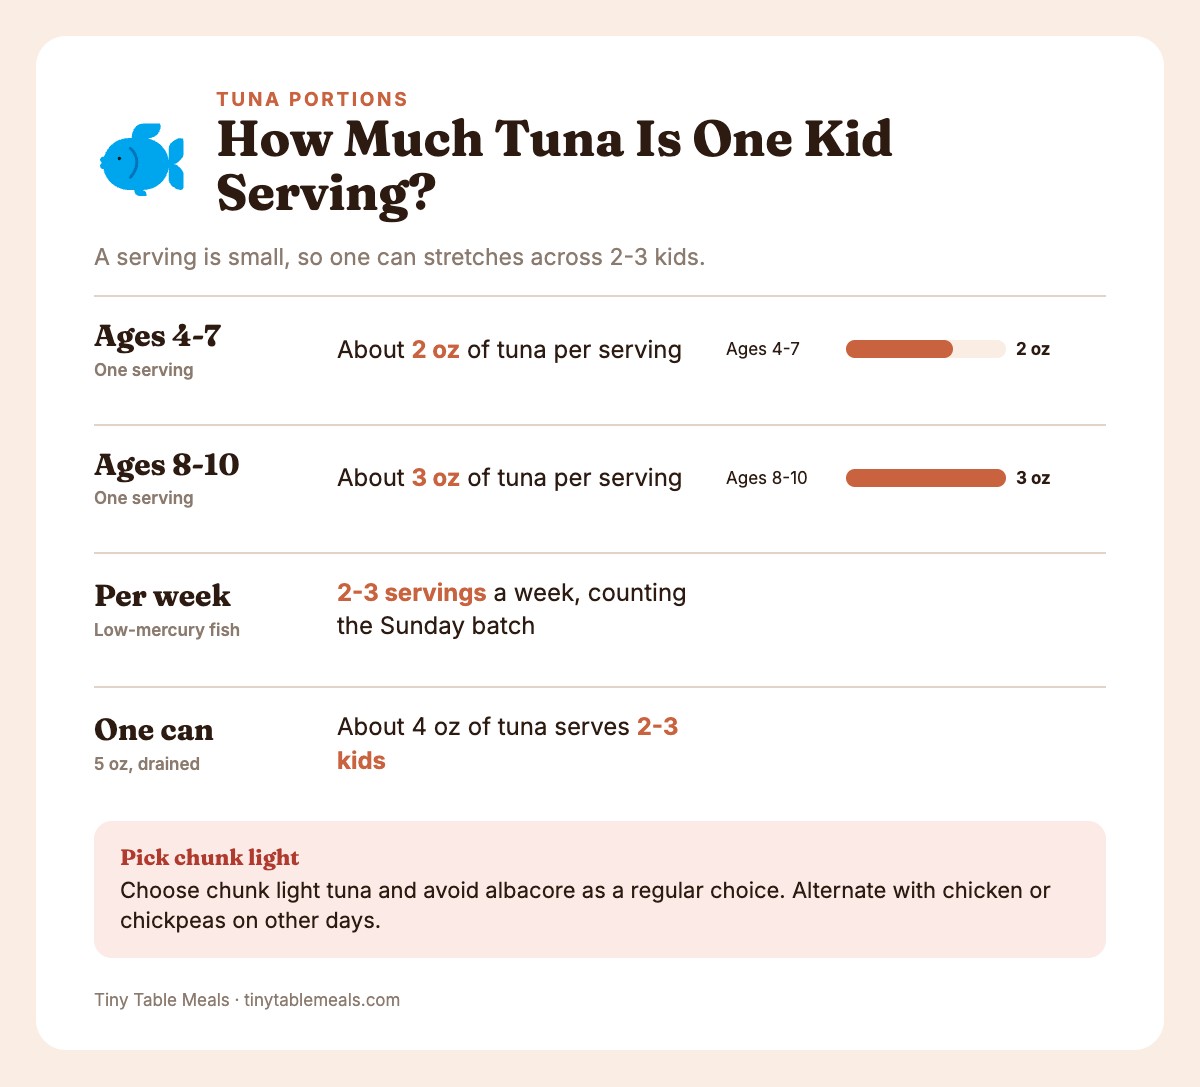
- 1 can (5 oz) chunk light tuna in water, drained (about 4 oz of tuna; serves 2-3 kids)
- 2-3 tablespoons plain Greek yogurt (or mayo — up to you)
- 1 teaspoon Dijon mustard
- Salt, pepper, optional: relish or diced celery
- 1 English cucumber
- Whole-grain crackers
How to build it:
- Mix. Stir the tuna with yogurt, mustard and any mix-ins until combined.
- Carve the boats. An adult cuts the cucumber in half lengthwise, then across into one boat per child. Kids scoop a shallow channel down the center with a spoon.
- Fill and serve. Divide the tuna salad between the boats. That is about 2 oz of tuna per child for 2 kids, and a little less for 3. Serve with crackers on the side.
Protein: ~13g per child serving (about 2 oz tuna, plus yogurt and crackers) | Nutrition notes: Protein and some omega-3 fats from tuna, B vitamins, and water from the cucumber
Best kid tasks: Mixing the salad, scooping out the cucumber with a spoon, loading the boats. An adult opens and drains the can and cuts the cucumber.
Why it works for spring break: The cucumber boats make tuna salad feel special rather than like a boring sandwich. Kids are more likely to eat something they’ve assembled into a fun shape.
Safety firstChoose chunk light tuna and avoid albacore as a regular choice. FDA/EPA advice for kids is 2-3 servings of low-mercury fish a week. A serving is small: about 2 oz for ages 4-7 and 3 oz for ages 8-10 (check the FDA’s current chart). One can of this tuna salad is 2-3 kid servings, not one. Every portion counts toward the weekly total, including the Sunday batch. Alternate with chicken or chickpeas on other days. An adult opens and drains the can.
Lunch Build #6: Cheese Quesadilla Wedges with Dipping Bar (Cook Ahead, Serve Cold)
Quesadillas do need heat, so an adult cooks them ahead. Make them in the morning, the night before or in the Sunday batch (they keep 3 days). Refrigerate them and serve them cold. A pre-made quesadilla sliced into wedges is surprisingly good cold.
What you need:
- Whole-grain flour tortillas
- Shredded cheese (about 1/3 cup per quesadilla)
- Optional add-ins: black beans (rinsed), corn, finely diced bell pepper, baby spinach
- Dipping options: salsa, guacamole, sour cream, Greek yogurt ranch dip
How to build it (adult cooks ahead):
- Fill. Lay a tortilla flat and sprinkle cheese and any add-ins on one half. Fold it over.
- Cook (adult job). Cook in a dry skillet over medium heat for 2-3 minutes per side, until golden and the cheese is melted.
- Cool and chill. Let them cool, cut into wedges and refrigerate within 2 hours.
At lunch: Pull the wedges straight from the fridge and arrange them with small portions of each dip. If you pack them, keep them in the cold bag until lunch. Once out of the cold, eat within 2 hours (1 hour above 90°F).
Protein: ~13g with just cheese; ~16g with black beans added | Nutrition notes: Calcium from cheese, fiber and plant protein from beans, lycopene from salsa
Best kid tasks: Setting out the dipping bar and choosing their combinations. Ages 8+ can cut the cooled quesadilla into wedges with a child-safe serrated knife. An adult cuts for younger kids.
Lunch Build #7: Spring Chopped Salad Jars
This one suits ages 8 and up who are ready to assemble something a bit more involved, or younger kids with significant help.
Safety firstIf a child under 4 is sharing, build them a separate jar or plate. Skip the croutons and crushed crackers. Mash or flatten the chickpeas, and shred the chicken finely. Cut the cucumber into thin strips or quarters, and quarter the cherry tomatoes lengthwise. Slice sugar snap peas thin lengthwise, and grate the radish or slice it paper-thin. Chop the lettuce small.
What you need:
- Wide-mouth mason jars or any tall container (the layering is part of the visual appeal)
- Dressing (keep it simple: olive oil + lemon + pinch of salt, or store-bought ranch)
- Chopped romaine or butter lettuce
- Cherry tomatoes, quartered lengthwise for under 4s
- Cucumber chunks
- Shredded rotisserie chicken or canned chickpeas, rinsed (mashed or flattened for under 4s)
- Shredded parmesan or feta crumbles
- Whole-grain croutons or crushed whole-grain crackers (skip both for under 4s)
- Optional spring additions: sugar snap peas, radish slices, thinly sliced strawberries (for under 4s, slice the snap peas thin lengthwise and grate the radish or slice it paper-thin)
How to build it:
- Dressing first. Pour it in the bottom so the lettuce doesn’t wilt.
- Add protein. Chickpeas or chicken can sit right in the dressing.
- Layer the produce. Harder veggies (cucumber, tomatoes) go next, then softer ones (snap peas, strawberries), then lettuce on top.
- Top and chill. Add cheese and croutons, seal, and refrigerate. Leave the croutons out of an under-4 portion.
- Shake and eat. When ready, shake or dump into a bowl and toss.
Protein: ~20g with chicken; ~14g with chickpeas | Nutrition notes: Complete protein from chicken; fiber, folate, and plant protein from chickpeas; vitamins A and C from romaine; antioxidants from tomatoes
Best kid tasks: Measuring the dressing, adding each layer, shaking the jar before eating
Why it works: The jar format makes salad feel exciting and different. Kids like seeing the colorful layers through the glass and shaking the jar before eating.
Lunch Build #8: DIY Mini Bagel Pizzas (Cook Ahead, Serve Cold)
This one needs a little morning prep, and there are two ways to make it. For the no-broiler version, an adult toasts the bagels and kids top them with fresh mozzarella slices. For the melted version, an adult also broils shredded mozzarella, then chills the pizzas. Either way there is zero heat at lunchtime, and the pizzas are eaten cold.
What you need:
- Whole-grain mini bagels, sliced and lightly toasted in the morning
- Pizza sauce or marinara (about 1 tablespoon per half)
- Cheese: fresh mozzarella slices for the no-broiler version, or shredded mozzarella if an adult melts it ahead
- Toppings: chopped olives, bell pepper strips, mini pepperoni (quartered for under 4s), fresh basil leaves
How to build it:
- Toast (adult job). Toast the bagel halves in the morning.
- Sauce and cheese. Spread the cooled bagels with pizza sauce and top with cheese. With fresh mozzarella slices, stop here and refrigerate.
- Melt if you like (adult job). For shredded mozzarella, broil for 2 minutes. Let them cool and refrigerate within 2 hours.
- Top at lunch. Kids add their own fresh toppings. Once out of the fridge or cold bag, eat within 2 hours (1 hour above 90°F).
Protein: ~14g per serving (2 bagel halves) | Nutrition notes: Calcium from mozzarella, lycopene from tomato sauce, vitamin C from bell peppers
Best kid tasks: Spreading the sauce, choosing and adding toppings, arranging on a plate
TipThe build-your-own toppings are everything. Kids who refuse a pre-made pizza often happily eat the same pizza when they controlled what went on it.
Batch Prep on Sunday: Setting Yourself Up for a Smooth Week
Spring break is five to ten days in a row, and a 35-minute Sunday prep session covers the first half. Plan a quick top-up mid-week. For a fuller meal-prep system, see our toddler meal prep lunches guide, which you can adapt for any age.
Roll-ups, pitas, sushi rolls and mini bagel pizzas are built the morning you eat them, so they are not on this list. Everything below stays at or below 40°F. Here’s the 35-minute plan:
- Wash and dry all produce (6 min). Berries, lettuce, cucumbers. Dry it well before storing, because damp produce spoils faster.
- Pre-slice the slow veggies (8 min). Carrots into sticks, cucumbers into rounds or sticks, bell peppers into strips. These cuts are for ages 4 and up. If a child under 4 eats too, give them their own container: carrot shredded, cooked soft or sliced very thin, and cucumber and pepper in thin strips or quartered. Store each in a container with a paper towel to absorb moisture. These keep 3-4 days.
- Hard-boil a dozen eggs (3 min active). An adult handles the stove. Cool the eggs promptly in cold water and refrigerate within 2 hours. Keep them unpeeled in the fridge for up to 1 week. Add one to a Deconstructed Lunchable, a roll-up or a salad jar.
- Make one can of tuna salad (5 min). Store it sealed; it keeps 3 days. Use it in pitas, on crackers or in cucumber boats. One can is 2-3 kid servings: one lunch for 2-3 kids, or 2-3 lunches for one child. Each serving counts toward that child’s 2-3 fish servings for the week.
- Pre-make 2-3 quesadillas (8 min). An adult cooks them. Cool, wrap in parchment and refrigerate within 2 hours. They keep 3 days. Serve straight from the fridge, or pack them in the cold bag.
- Pre-portion hummus, seed butter and cream cheese (3 min). Fill small containers so no one is double-dipping a carrot stick into the communal tub. Opened hummus keeps about 4-5 days and seed butter up to a week; follow the label for cream cheese. Skip guacamole here. It browns within a day or two, so mash it fresh the day you serve it.
- Set up the lunch station (2 min). Put crackers, the fruit bowl and a “lunch container” spot on a counter or low shelf kids can reach. Cold items stay on a low fridge shelf.
| Prep Task | Time | Lunches It Serves |
|---|---|---|
| Wash and dry all produce | 6 min | All week |
| Pre-slice veggies | 8 min | 3-4 days (stays crisp that long) |
| Hard-boil 12 eggs | 3 min active, 12 min passive | 4-5 days of lunches (eggs keep up to 1 week) |
| Make one can of tuna salad (2-3 kid servings) | 5 min | 2-3 lunches (keeps 3 days) |
| Pre-make quesadillas | 8 min | 2-3 lunches (keeps 3 days) |
| Pre-portion hummus, seed butter, cream cheese | 3 min | Hummus 4-5 days; seed butter up to a week; cream cheese per label |
| Set up the lunch station | 2 min | All week |
| Total active time | ~35 min | First half of break, plus a quick mid-week top-up |
Packing for Outings: Park Days and Spring Break Adventures
Spring break is prime park-day season, and a packed lunch beats a rushed drive-through run when everyone is hangry. These builds are designed to travel. Here’s how to pack them well.
Safety firstPack two cold sources in a pre-chilled insulated bag: two ice packs, or one ice pack plus a frozen water bottle. Perishables like tuna salad, deli meat, dairy, eggs and quesadillas should not sit above 40°F for more than 2 hours, or 1 hour when it’s above 90°F. Toss anything left out longer.
One timing rule for every build. Roll-ups, wraps, pitas and sushi rolls can be assembled that morning. Put them straight into the fridge or the pre-chilled bag and keep them cold until lunch. The 2-hour clock (1 hour above 90°F) starts when the food comes out of the cold.
Pack dense, not voluminous. A pita pocket takes up less space than an open-face arrangement. Salad jars are more efficient than loose bowls. Wraps cut in half fit neatly side by side.
Give everyone a job. At home, kids assemble. At the park, they unpack and set up. Even a 4-year-old can pull their container out of the bag and open it. That frees you to deal with the sunscreen situation without also serving lunch.
Pack extras that don’t need refrigeration. Whole-grain crackers, a banana and a water bottle give you buffer food if someone rejects what you packed or the afternoon runs long.
Spring break lunch packing checklist:
- Insulated bag (pre-chilled)
- Two ice packs (a frozen water bottle can be the second)
- Main lunch container with protein + produce + starch
- Small dip container if relevant (seal tightly)
- Extra crackers or fruit
- Napkins (pack double what you think you need)
- Utensils if needed
- Water bottles for everyone
For more ideas on budget-friendly ways to plan family meals and outings, budget meal planning for families has practical strategies that carry over to spring break.
Handling Picky Eaters During Break
Spring break has a way of amplifying picky eating. Kids are out of routine. They’re eating at irregular times. They’ve been at Grandma’s or had a few extra treats. And suddenly your child who “used to eat wraps” is announcing they don’t eat wraps anymore and only want butter noodles.
First: take a breath. This is developmentally normal and stress is normal, and neither of those things means you’re failing.
Here are the strategies that hold up during the break scramble:
Don’t announce the menu in advance. When kids know what’s for lunch before it’s in front of them, they have time to build resistance. Serve it, explain it briefly (“we’re making pita pockets today — here’s all the stuff you can put in”), and let the interest develop at the table.
The safe food rule. Include at least one food you know your child reliably eats in every lunch. This takes the pressure off — if nothing else works, they’ll eat the crackers or the apple slices or the cheese. Once they’re relaxed, they’re more likely to try something else. Our post on understanding your child’s eating style covers this in more detail.
Involve them in the choice. “We can do roll-ups or a lunchable-style plate today — which one do you want to make?” Giving a choice between two acceptable options gives kids control without opening a free-for-all negotiation.
Deconstructed is usually fine. If your child won’t eat a wrap, serve the exact same ingredients on a plate, separated. Turkey on one side. Cheese on another. Cucumber sticks here. Hummus there. Same nutrition, less meltdown. Many picky eaters find mixed textures hard, and separated plates work better for them.
Expect some days to be harder than others. Spring break is exciting and overstimulating, and that affects appetite unpredictably. Some days kids will eat everything. Some days they’ll eat nothing you offer. As long as they’re eating something and getting water, a bad lunch day is just a bad lunch day — not a pattern.
Don’t cook something special. The lunch is the lunch. Offering to make a separate meal when they refuse communicates that refusal gets rewarded. Serve it, leave it available for 20-30 minutes, then move on. No drama, no second meal. Throw away uneaten perishables from the plate rather than serving them again later.
If your child eats a very narrow range of foods, loses weight, or gags often, talk to your pediatrician or a feeding specialist.
A Sample Spring Break Lunch Week
Here’s a five-day sample week. Protein numbers are rough estimates.
| Day | Lunch Build | Estimated Protein | Key Nutrients |
|---|---|---|---|
| Monday | Rainbow Roll-Ups | 14g | Vitamin C, beta-carotene, B vitamins |
| Tuesday | Greek Pita Pockets with shredded chicken | 22g | Monounsaturated fats (olives), calcium, plant fiber |
| Wednesday | Tuna Cucumber Boats + crackers | 13g | Some omega-3s, B12, protein |
| Thursday | Deconstructed Lunchable | 16g | Calcium, antioxidants, fiber |
| Friday | Sunflower Butter Sushi + fruit | 10g | Healthy fats, vitamin C, potassium |
Average across the week: ~15g protein at lunch (75g over 5 days). These numbers are rough estimates. Swap in the Salad Jar, Quesadilla Wedges or Mini Bagel Pizzas on any day. The Sunday tuna salad is used by Wednesday, inside its 3-day window, and it is the only fish lunch of the week. For comparison, the RDA is about 19g a day for ages 4-8 and 34g a day for ages 9-13.
Mama Munch
Mama Munch is a food-obsessed parent of two who believes every family deserves simple, nutritious meals — even on the busiest weeknights. With a background in nutrition education and years of navigating picky eaters, allergies, and toddler taste buds, she creates practical recipes and meal strategies that actually work for real families.
Frequently Asked Questions
How far ahead can I prep these lunches?
Keep everything at or below 40°F. Cut produce: 3-4 days in airtight containers with a paper towel. Tuna salad: 3 days. Quesadilla wedges: 3 days. Hard-boiled eggs (unpeeled): up to 1 week. Chop veggies ahead, but assemble roll-ups, wraps and pitas the morning you eat them and refrigerate them right away. Kept cold, they are fine until lunch. Once out of the fridge or cold bag, eat within 2 hours (1 hour above 90°F). See the prep table above for the full plan, and plan a quick mid-week top-up.
My kids have a nut allergy. Are these lunches safe?
These builds can be made nut-free. Choose sunflower seed butter for the sushi and check labels for cross-contact. Other allergens show up too: hummus contains sesame, and the builds use dairy, egg, fish, wheat and soy. Follow your allergist’s advice for your child.
What if I have multiple kids with different food preferences?
This is where the “build-your-own” format shines. The Deconstructed Lunchable and the Spring Chopped Salad Jar both have fully customizable components — each child picks what they want. For wraps and pita pockets, set out all the fillings and let each child build their own. Having an assembly station rather than a pre-made plate is the single best tactic for families with varying preferences.
How do I get a reluctant helper actually interested in making lunch?
Give them an age-appropriate task with a clear visual result. “Your job is to arrange the veggies in a rainbow” is more engaging than “help me make lunch.” For younger kids, give them their own small bowl of crackers to count into a container. For older kids, frame it as a challenge: “Can you make the wrap as tight as possible so nothing falls out?” If they’re uninterested today, don’t force it — try again tomorrow with a different task.
These lunches seem like a lot of components. What’s the true minimum I need?
Four things make a solid spring break lunch: whole-grain bread or crackers, sunflower seed butter, a piece of fruit and a cheese stick. Sunflower seed butter keeps it nut-free; check the label for cross-contact. That’s protein (seed butter + cheese), produce (fruit), and starch (bread/crackers). Start there on the days when you have nothing in the fridge, and add more as you get into the rhythm of the week.
What’s the best way to get kids to actually eat vegetables at lunch?
Pair the vegetable with a dip. Kids who won’t touch a plain carrot stick will often eat four of them with ranch or hummus. The texture contrast of something crunchy and cold with a creamy dip is very appealing to most kids. Also: keep portions small and expectations low. For ages 4 and up, three cucumber rounds on the plate is a win if they eat them all. For under-4s, quarter the cucumber or cut it into thin strips, and serve carrot shredded, cooked soft or sliced very thin instead of in sticks. You don’t need them to eat a full salad.
What if my budget is really tight this spring break?
These lunches can be budget-friendly, depending on household size and local prices. The most economical build is the Deconstructed Lunchable, with block cheese, store-brand crackers and whatever produce is on sale. Next come the Sunflower Butter Sushi (tortillas, seed butter and one apple) and the Quesadilla Wedges (tortillas and store-brand shredded cheese).
Canned chunk light tuna is an affordable protein, within the 2-3 small servings a week noted in the tuna build. Canned chickpeas and beans stretch the budget on the other days, and frozen fruit works as a low-cost side.
It also helps to borrow from budget meal planning: plan your spring break lunches around what’s on sale that week rather than the other way around.
You’ve Got This Week
Spring break doesn’t have to mean a week of scrambled last-minute lunches and takeout runs. A simple framework, a little Sunday prep and a willingness to hand over some of the work will feed everyone well. No standing at the stove at noon.
Pick two or three of these lunch builds that appeal to your family and stock the ingredients on your next grocery run. Set up a little lunch station your kids can reach. Then step back. Let them spread, stuff, roll, and arrange. Let them taste-test and customize. Let them be proud of what they made.
The food will be a little messier than if you made it yourself, and the wraps will probably be overstuffed. That’s exactly the point.
For more ideas on building healthy habits with your kids at every age, check out our guide to after-school snacks kids can make. Many of those strategies carry over to spring break lunches.