Toddler-Friendly Meal Prep: A Week of Lunches in Under an Hour
Learn to prep a week of balanced, toddler-friendly lunches in just 75 minutes across two sessions. This guide provides a full menu, prep timeline, grocery list, and safety tips for ages 18 months-4 years, ensuring calmer mealtimes and less daily stress.
- Prep 5 toddler lunches in 75 mins total: 55 min Sunday, 20 min Wednesday.
- Access a full weekly menu, grocery list, and detailed prep timeline.
- Design balanced lunches with protein, grain, fruit, veggie, and healthy fat.
- Follow safe cutting guidelines for foods like grapes and blueberries.
- Choose bento-style, sealed containers for successful meal prep.
This post contains affiliate links. As an Amazon Associate I earn from qualifying purchases.
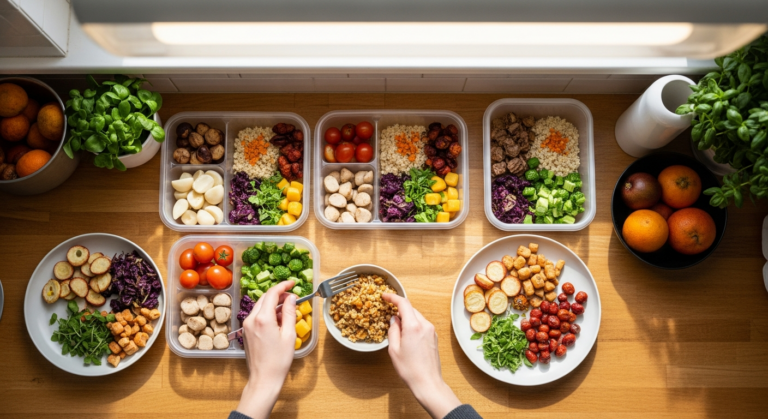
It’s 11:47 a.m. on a Tuesday. Your toddler wants the blue cup, not the green one, and the fridge holds shredded cheese and three baby carrots. This plan fixes that with about 55 minutes on Sunday, then 20 on Wednesday. You get the menu, a timeline, safe storage rules, allergy swaps and a grocery list.
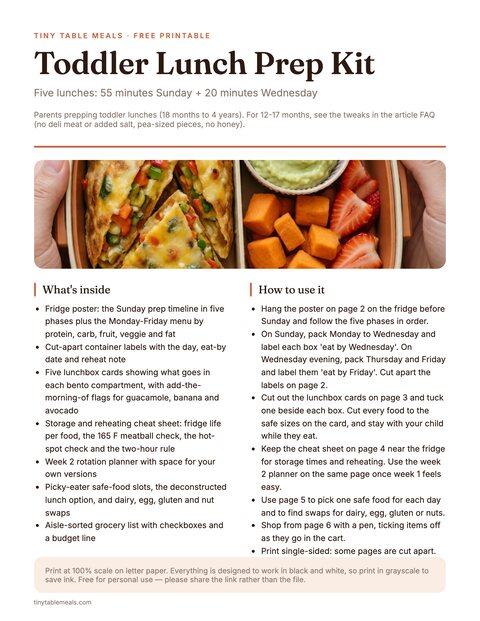
Free printable · 6 pages
Toddler Lunch Prep Kit: A Week in 55 Minutes
A Sunday prep timeline poster with container labels, Monday-Friday lunchbox cards, a storage and reheating cheat sheet, a picky-eater and allergy swap sheet, a week 2 planner and an aisle-sorted grocery list for toddler lunches.
Free. Your download link appears right here. You'll also join the Sunday Supper Plan. Unsubscribe anytime. Privacy
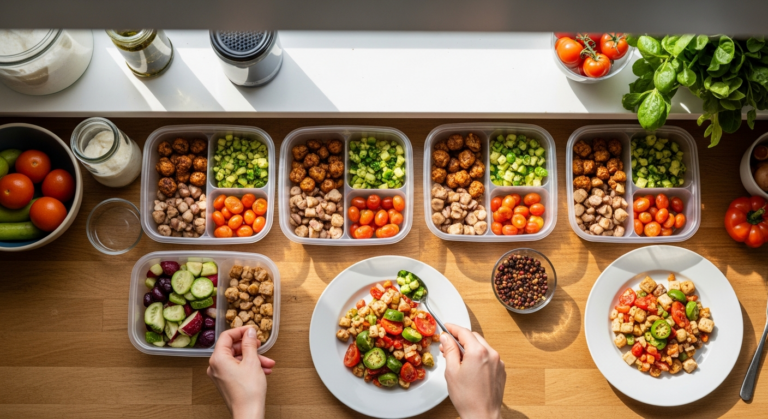
This is a five-lunch plan in two short sessions, about 75 minutes of hands-on time in all. Sunday cooks and boxes Monday to Wednesday. Wednesday evening covers Thursday and Friday. Shopping and cleanup are extra.
In this article (14 sections)
- The Weekly Lunch Menu at a Glance
- Why Meal Prep Works for Toddler Lunches
- What You Need for Toddler Meal Prep
- 5 Days of Toddler-Friendly Lunches: What Goes in Each Box
- The Sunday Prep Session: Step-by-Step in About 55 Minutes
- The Wednesday Evening Session: Cook and Pack Thursday and Friday (About 20 Minutes)
- Storage and Freshness: Keeping Everything Safe Through Friday
- Handling Picky Eaters: Strategies That Work With Meal Prep
- Allergy-Friendly Swaps: Making It Work for Every Family
- Scaling Up: Feeding Multiple Kids or Longer Weeks
- Grocery List: Everything You Need for One Week
- Toddler Meal Prep Tips for Sunday
- Frequently Asked Questions
- Start Your First Prep Week This Sunday
The Weekly Lunch Menu at a Glance
Here’s the whole week in one table. The plan is written for about 18 months and up. For 12-17 months, use the tweaks in the FAQ.
| Day | Main | Sides | Made on |
|---|---|---|---|
| Monday | Turkey and cream cheese pinwheels | Cucumber, tomatoes, blueberries, soft crackers | Sunday |
| Tuesday | Mini turkey-veggie meatballs and pasta | Roasted broccoli, mandarin segments | Sunday |
| Wednesday | Veggie quesadilla triangles | Guacamole, sweet potato, strawberries | Sunday |
| Thursday | Pasta salad cup | Pita triangles, banana, avocado | Wednesday evening |
| Friday | Mini sandwiches | Hummus, soft carrots and pepper, raspberries, animal crackers | Wednesday evening |
Why Meal Prep Works for Toddler Lunches
I won’t promise this saves hours. Once you count the Sunday session, the Wednesday pack, shopping and cleanup, the time is about even with making lunch from scratch every day. The payoff is somewhere else.
- Fewer daily decisions. You decide what lunch is once, on Sunday, not five times at 11:47 a.m.
- A calmer table. When lunch is already made, you aren’t rushing, and a calmer table can help meals go more smoothly.
- Balanced by design. Planning once makes it easier to include a protein, a grain, a fruit, a veggie and some healthy fat in every box.
- Less waste. You buy for a specific plan, so you tend to use what you buy.
What You Need for Toddler Meal Prep
You don’t need a fancy kitchen. Leaky lids and no dividers are what ruin lunches by Wednesday, so the containers matter most.
- 5 bento-style divided boxes, one per weekday, with lids that seal well.
- A few small 4 oz glass containers with snap lids for extras and reheating.
- 2 baking sheets and parchment paper.
- A large pot, a large skillet and a steamer basket.
- A sharp chef’s knife, cutting board and kitchen shears. Keep them out of reach of little hands.
- A box grater or mini chopper for the zucchini.
- An instant-read thermometer for cooking and reheating to 165 degrees F.
- Small cookie cutters for Friday’s sandwiches.
- Plastic wrap, labels and a marker.
I use divided boxes because they keep foods separated, and toddlers love compartments. For a full comparison, see my meal prep containers guide.
5 Days of Toddler-Friendly Lunches: What Goes in Each Box
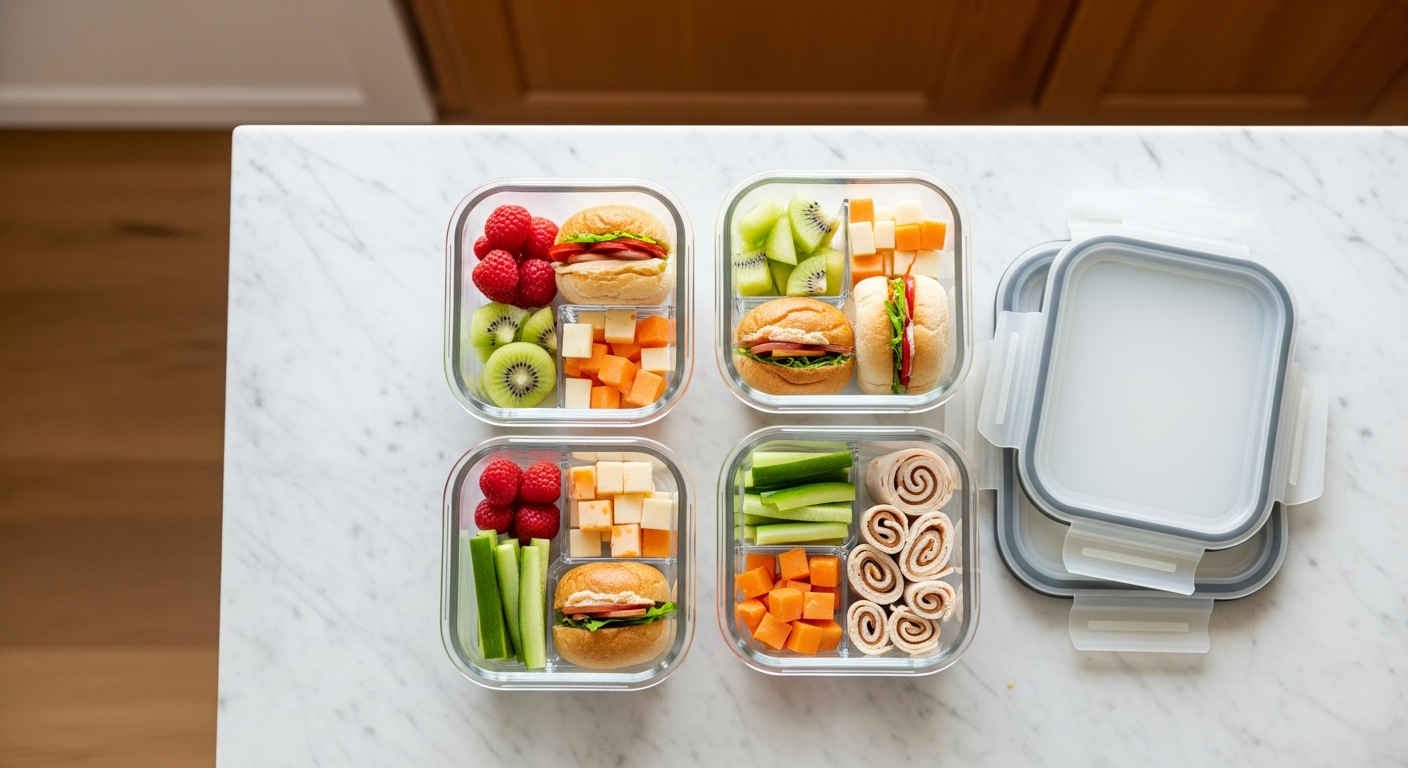
Here’s the full Monday-through-Friday lineup. Every lunch is:
- Balanced. Protein, grain, fruit, veggie and healthy fat go in every box.
- Toddler-safe. Textures and cuts are chosen to lower choking risk. See the table below.
- Make-ahead friendly. Monday to Wednesday are made on Sunday. Thursday and Friday are made on Wednesday evening.
- Served cold or quickly reheated. There’s no assembly at lunchtime.
Safety firstHave your child sit down to eat, and stay with them while they do. Use this table when you cut and pack.
| Food | How to serve it |
|---|---|
| Cherry tomatoes and grapes | Quarter lengthwise until age 4 |
| Blueberries | Halve or quarter until age 4 (flatten for new self-feeders) |
| Raspberries | Halve or flatten until age 4 |
| Mandarin segments | Remove seeds and tough membrane. Cut each segment in half, or in quarters for under 4 |
| Carrots | Steam 8-10 minutes until they squish easily between your fingers |
| Cucumber | Peel and slice thinly |
| Bell pepper | Cook soft or dice finely |
| Peas | Squish or flatten each one |
| Beans and chickpeas | Cook until soft, then mash or flatten each one. Never serve them whole |
| Avocado and banana | Ripe and soft, diced small or sliced thin |
| Cheese | Shredded or pea-sized pieces, not cubes |
| Meatballs | Cut into quarters |
| Pasta | Cook until very soft. For under 4, cut each spiral in half or use a smaller shape such as mini rotini or macaroni |
| Crackers | Soft, easily dissolving types in a measured portion (4-6) |
| Pinwheels | Use soft, thin deli slices. For under 4, cut each round into halves or quarters |
| Sandwiches, quesadilla and pita triangles | For under 4, cut into small bite-size pieces |
| Seed butter | Spread thinly |
What Goes in Each Box
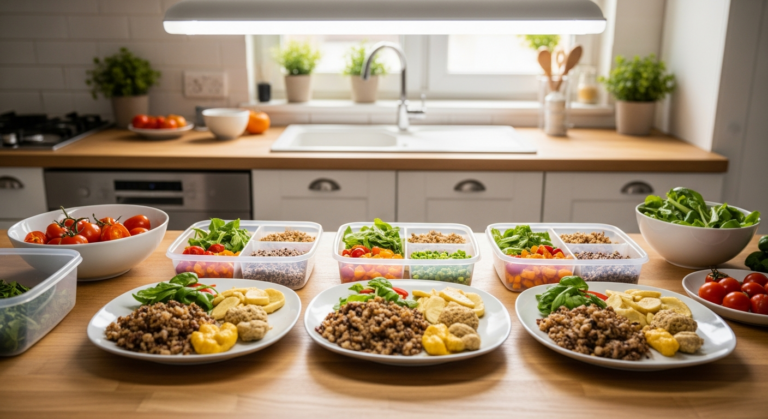
Here’s each box by food group. Cut everything to the sizes in the safety table above. Only Tuesday needs reheating.
| Day | Protein | Grain | Veg | Fruit | Healthy fat | Reheat? |
|---|---|---|---|---|---|---|
| Monday | 3-4 turkey pinwheel rounds | Whole-grain tortilla, 4-6 soft crackers | Peeled, thinly sliced cucumber and quartered cherry tomatoes | Halved or quartered blueberries | Cream cheese | No |
| Tuesday | 4-5 mini turkey-veggie meatballs, quartered | Soft-cooked rotini with olive oil or light marinara | Roasted broccoli florets | Mandarin segments, cut in halves or quarters | Olive oil on the pasta | Yes |
| Wednesday | Cheddar in the quesadilla triangles | Whole-grain tortilla | Finely diced bell pepper and zucchini, soft roasted sweet potato cubes | Strawberry slices | Mild guacamole cup (or fresh guacamole added Wednesday morning) | Optional |
| Thursday | Pea-sized mozzarella pieces | Rotini pasta salad, mini whole-wheat pita triangles | Finely diced cucumber, squished peas, quartered cherry tomatoes | Banana slices (added Thursday morning) | Diced avocado (added Thursday morning), olive oil | No |
| Friday | Thinly spread sunflower seed butter, hummus | Mini whole-grain sandwiches, 4-6 soft animal crackers | Soft-steamed carrot sticks, soft-cooked bell pepper strips | Halved or flattened raspberries, mashed banana in the sandwiches | Seed butter, hummus | No |
Monday: Turkey and Cream Cheese Pinwheels with Cucumber and Tomatoes
Why it works: Pinwheels are easy to grip, and the spiral makes them feel different from a regular sandwich.
Safety firstDeli meat carries a higher listeria risk than meat you cook yourself. Keep the pinwheels at 40 degrees F or below and eat them within 3 days. For extra caution, heat the turkey slices until steaming and cool them before you roll, or use sliced home-cooked turkey.
Tuesday: Mini Meatballs with Pasta and Roasted Broccoli
Why it works: Quartered meatballs are soft and easy to pick up, with no whole round piece. Rotini is easier for little hands than spaghetti when it’s cooked very soft. For under 4, cut each spiral in half or use a smaller shape such as mini rotini or macaroni. This is the one box that needs reheating.
Wednesday: Veggie Quesadilla Triangles with Guacamole
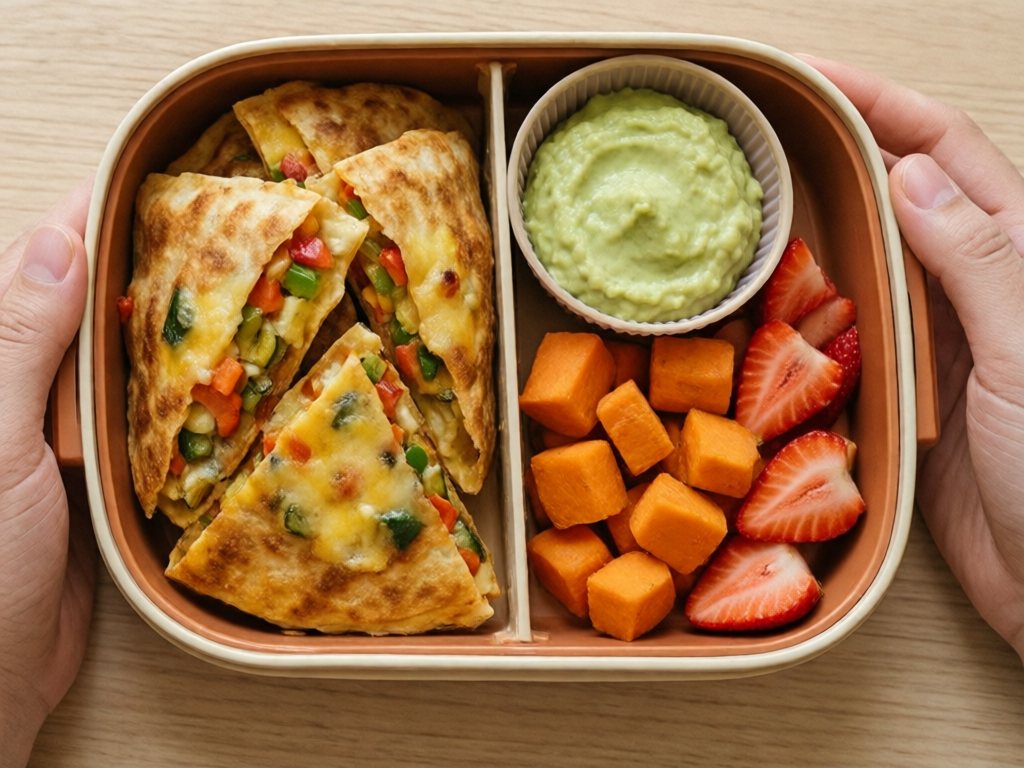
Why it works: The triangle shape is easy to grip and dip, and the quesadilla can be served cold or warmed.
Safety firstThis box is 3 days old on Wednesday, which is the limit for this plan. Keep it in the fridge until lunch. For daycare, pack it in an insulated bag with two ice packs so it stays at 40 degrees F or below until it’s eaten. If it has been warm for more than 2 hours, throw it away.
Thursday: Pasta Salad Cups with Cheese and Veggies
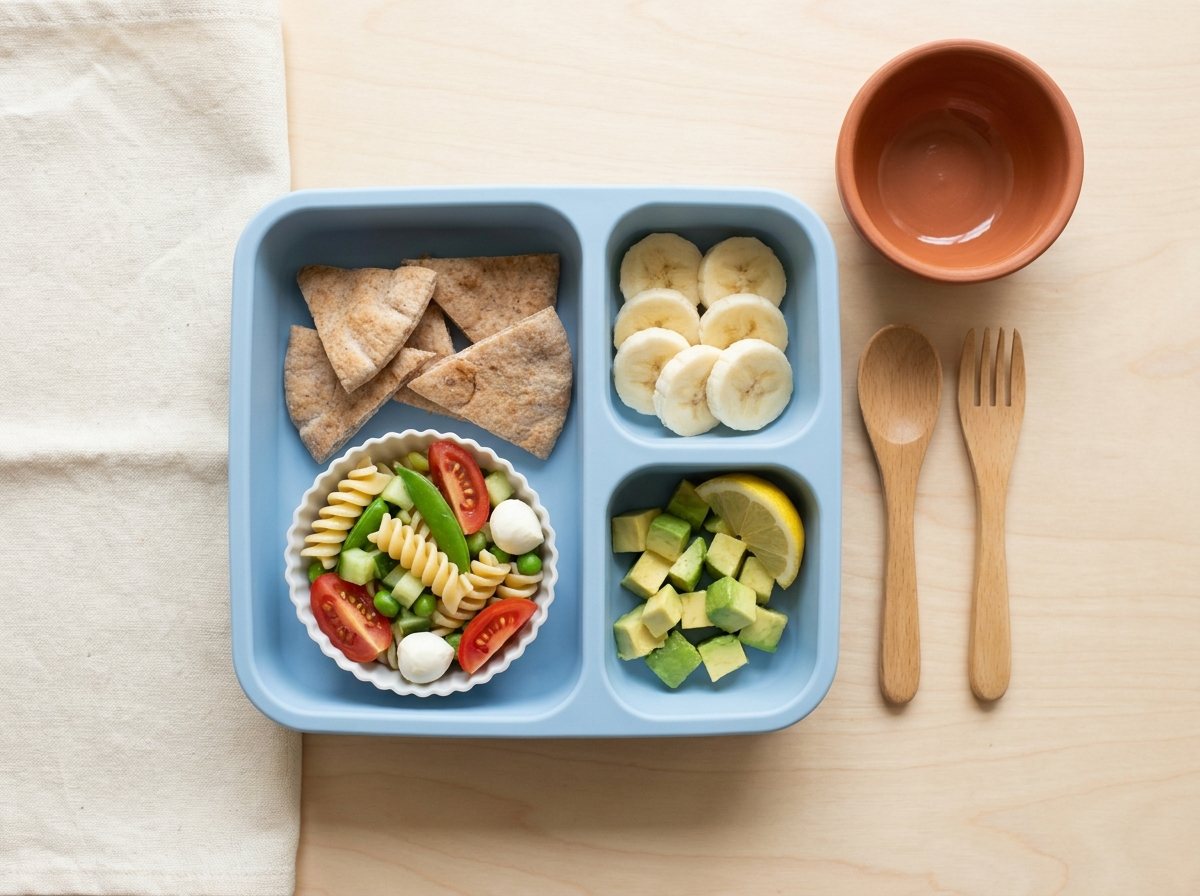
Why it works: The soft textures are easy on developing teeth, and the mix of shapes and colors gives them something to explore.
Friday: Mini Sandwiches with Hummus and Fruit
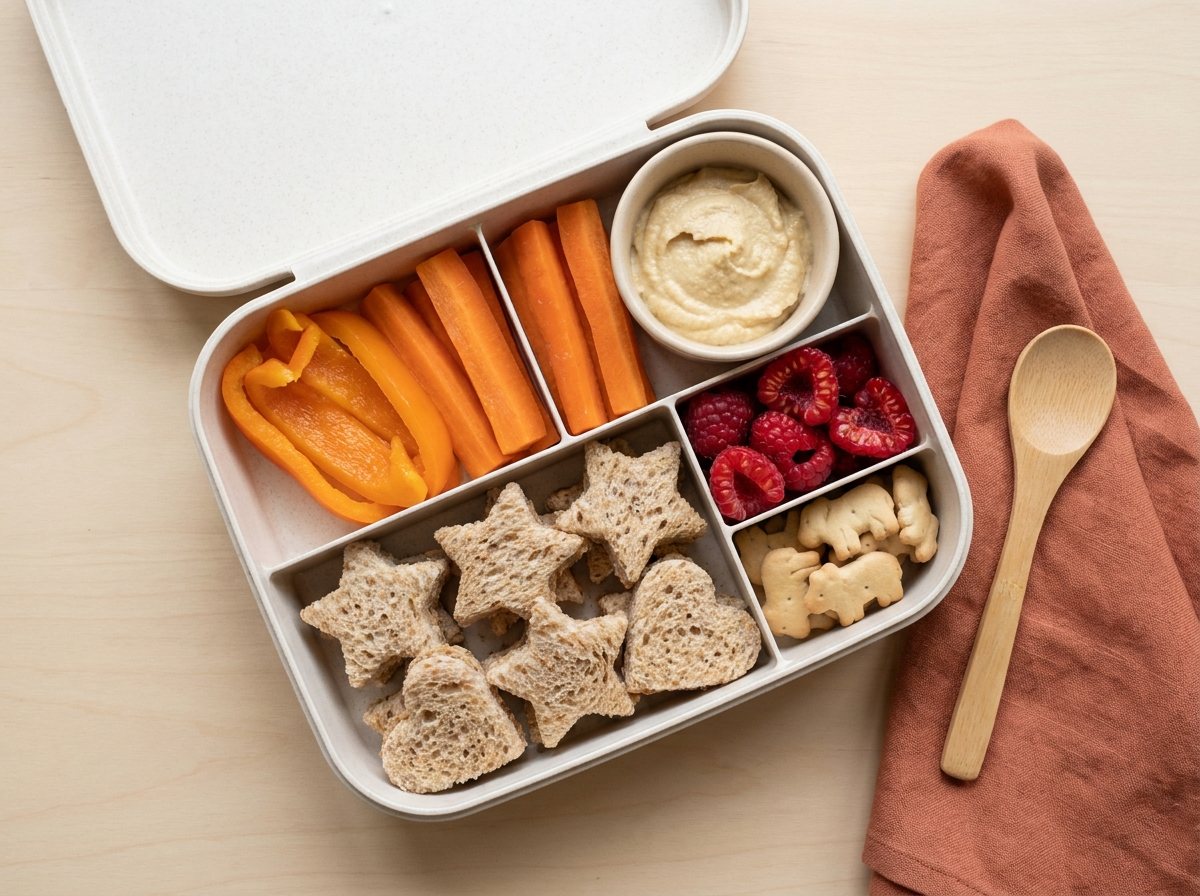
Why it works: Cookie-cutter shapes make a basic sandwich feel new, and hummus gives them something to dip. Hummus contains sesame, so use a sesame-free dip such as mashed avocado if needed.
Nutrition Check: What Every Box Covers
Each lunch aims to cover a protein, a grain, a fruit, a veggie and some healthy fat. Iron is the nutrient to watch. Meatballs, hummus and iron-fortified foods help, and my iron-rich meals and snacks guide has more ideas.
The Sunday Prep Session: Step-by-Step in About 55 Minutes
Sunday is one session of about 55 minutes of hands-on time. It gets Monday through Wednesday cooked and boxed. The Wednesday-evening session (about 20 minutes) covers Thursday and Friday. Shopping and cleanup are extra.
The phases overlap. The 55 minutes is hands-on time. The oven bakes in the background from about minute 15 to minute 40 while you move on to the stovetop, the pinwheels and the produce.
| Minute | What you do | Oven |
|---|---|---|
| 0 | Turn the oven to 400 degrees F. Mix and roll the meatballs. Cut the broccoli and sweet potato | Preheating |
| 15 | Both trays go in. Boil the pasta and cook the quesadillas | Baking |
| 25 | Roll and chill the pinwheels | Baking |
| 30 | Start washing and cutting the produce | Baking |
| 33-35 | Meatballs come out (165 degrees F inside) | Vegetables still roasting |
| 35-40 | Broccoli and sweet potato come out | Off |
| 45-55 | Pack and label the Monday-Wednesday boxes | Off |
This plan uses one cap: cooked food and deli meat are eaten within 3 days, and nothing cooked or cut is kept past 4. That is why Thursday and Friday are made midweek. Your first Sunday may run closer to 75 minutes. The second time goes faster.
Before you start: Pull out all your containers, line them up on the counter, and gather every ingredient. Turn the oven on to 400 degrees F at minute 0. It needs about 10 minutes to preheat while you mix and shape. Having everything within reach is what keeps Sunday to about 55 minutes.
Phase 1: Oven Items (Minutes 0-15, oven preheating)
Start here because these take the longest to cook but require the least active effort.
Mini Turkey-Veggie Meatballs (Tuesday)
You need:
- 1 pound ground turkey.
- 1/4 cup finely grated zucchini, moisture squeezed out.
- 1/4 cup breadcrumbs.
- 1 egg.
- 1/2 teaspoon garlic powder.
- 1/2 teaspoon Italian seasoning.
- A pinch of salt.
- Mix. Combine everything in a large bowl.
- Roll. Shape into small balls, about 30 from 1 pound. You’ll use 4-5 per lunch, so freeze the extras for next week.
- Tray. Place on a parchment-lined baking sheet.
- Bake. Slide into the preheated oven at about minute 15. Bake 18-20 minutes, until cooked through (165 degrees F inside). That puts them out around minute 33-35.
Roasted Broccoli (Tuesday) and Sweet Potato Cubes (Wednesday)
- Spread. On a second baking sheet, put broccoli florets on one half and 1/2-inch sweet potato cubes on the other.
- Season. Drizzle with olive oil and add a tiny pinch of salt.
- Roast. Slide into the oven next to the meatballs for 20-25 minutes, until the sweet potato squishes easily. That puts them out around minute 35-40.
Active time: 15 minutes. Mixing and rolling about 30 meatballs and trimming the vegetables takes about 15 minutes. The trays go in at about minute 15. You then have 20-25 minutes of oven time to work on everything else.
Phase 2: Stovetop (Minutes 15-25)
Pasta for Tuesday
- Boil. Bring a large pot of water to a boil. If you started heating it during the meatball prep, it should be close.
- Cook. Cook 1 cup of dry rotini or fusilli (whole-grain preferred) per package directions, typically 8-10 minutes, until very soft. A piece should squish easily between your fingers. For children under 4, snip each cooked spiral in half with kitchen shears, or use a smaller shape such as mini rotini or macaroni.
- Drain and toss. Drain, then toss with a drizzle of olive oil. Thursday’s pasta is cooked fresh on Wednesday evening.
Quesadillas (Wednesday)
- Heat. While the pasta boils, heat a large skillet over medium heat.
- Fill. Lay out 2 large whole-grain tortillas. Cover one half of each with shredded cheddar and finely diced bell pepper and zucchini.
- Cook. Fold and cook 2-3 minutes per side, until golden and the cheese is melted.
- Cut. Set aside to cool, then cut into small triangles. For children under 4, cut the triangles into bite-size pieces.
Active time: 10 minutes.
Phase 3: Pinwheels (Minutes 25-30)
The oven is doing its thing and the pasta is draining, so this is the moment for the no-cook Monday item.
Turkey Pinwheels (Monday)
- Lay out. Set 2 large whole-grain tortillas on the board.
- Spread. Cover each with a thin layer of cream cheese.
- Layer. Add 3-4 thin, soft slices of deli turkey to each tortilla.
- Roll and chill. Roll tightly, wrap in plastic wrap, and refrigerate. You’ll slice them into rounds when you pack.
Active time: 5 minutes.
Phase 4: Oven Out and Produce Prep (Minutes 30-45)
Start the produce prep below at minute 30. The oven timers go off a few minutes in, so stop and pull the trays when they do.
- Pull the trays. Take the meatballs out after 18-20 minutes of baking, around minute 33-35. Take the broccoli and sweet potato out after 20-25 minutes, around minute 35-40.
- Cool. Let everything cool for 5 minutes on the baking sheets.
- Store. Move the meatballs and broccoli to Tuesday containers. Move the sweet potato cubes to a Wednesday container.
Before the timers go off and while the trays cool, prep your fresh produce:
Fruit and Veggie Prep
- Strawberries (Wednesday). Wash and slice.
- Blueberries (Monday). Wash, then halve or quarter them.
- Mandarins (Tuesday). Segment them and remove any seeds and tough membrane, or open a pre-segmented container. Cut each segment in half, or in quarters for children under 4.
- Cucumber (Monday). Peel and slice it thinly.
- Cherry tomatoes (Monday). Quarter them lengthwise.
Raspberries, carrots, bell pepper and the pasta salad vegetables wait until Wednesday so they aren’t five days old on Friday.
Active time: 15 minutes.
Phase 5: Pack and Label Monday-Wednesday (Minutes 45-55)
Pack the Monday, Tuesday and Wednesday boxes now.
- Monday box. Slice the pinwheels into 3/4-inch rounds. For children under 4, cut each round into halves or quarters. Put them in the main compartment. Add cucumber slices, quartered tomatoes, cut blueberries and soft crackers to the other sections.
- Tuesday box. Cut 4-5 meatballs into quarters and put them in the main compartment. Add the pasta, roasted broccoli and mandarin segments.
- Wednesday box. Put the quesadilla triangles in the main compartment. Add sweet potato cubes and strawberry slices. Add a sealed single-serve guacamole cup. If you make your own guacamole, add it on Wednesday morning instead.
Label each container with its day and “eat by Wednesday.” Wednesday is the last day for all three Sunday boxes. Stack in the fridge with Monday on top.
Active time: 10 minutes.
The Wednesday Evening Session: Cook and Pack Thursday and Friday (About 20 Minutes)
This short session keeps Thursday and Friday inside the 3-day cap. Start the pasta water first, then work down the list.
- Start the pasta and thaw the peas. Put a pot of water on to boil. Cook 1 cup of dry rotini or fusilli per package directions, typically 8-10 minutes, until very soft. While it cooks, put the frozen peas in a small bowl and cover them with hot tap water to thaw. For children under 4, use a smaller pasta shape or snip the cooked spirals in half.
- Start the steaming. Cut carrots into thin sticks and slice bell pepper into thin strips. Steam the carrots 8-10 minutes, until they squish easily between your fingers. Steam the pepper until soft.
- Make the sandwiches. Mash a little ripe banana with a small squeeze of lemon. Spread a thin layer of sunflower seed butter on 2 slices of whole-grain bread and the banana on 2 more. Press together and cut shapes with small cookie cutters. For children under 4, cut the shapes into bite-size pieces. Stack with parchment between layers. The banana will darken by Friday but is safe to eat. If you’d rather it look fresh, leave it out now and add it on Friday morning.
- Make the pasta salad. Drain the pasta and rinse it under cold water until cool. Drain the thawed peas and squish or flatten each one. Add them with finely diced cucumber, quartered cherry tomatoes and pea-sized mozzarella pieces. Toss with 1 tablespoon olive oil and a tiny squeeze of lemon juice.
- Wash the raspberries. Pat them dry. Halve or flatten them for children under 4.
- Pack and label. Fill the Thursday and Friday boxes, label both “eat by Friday” and refrigerate them right away. Leave Thursday’s banana and avocado out for now. On Thursday morning, slice the banana and dice the avocado. Toss both with a small squeeze of lemon to slow browning, then add them to the box.
Total Prep Time for Both Sessions
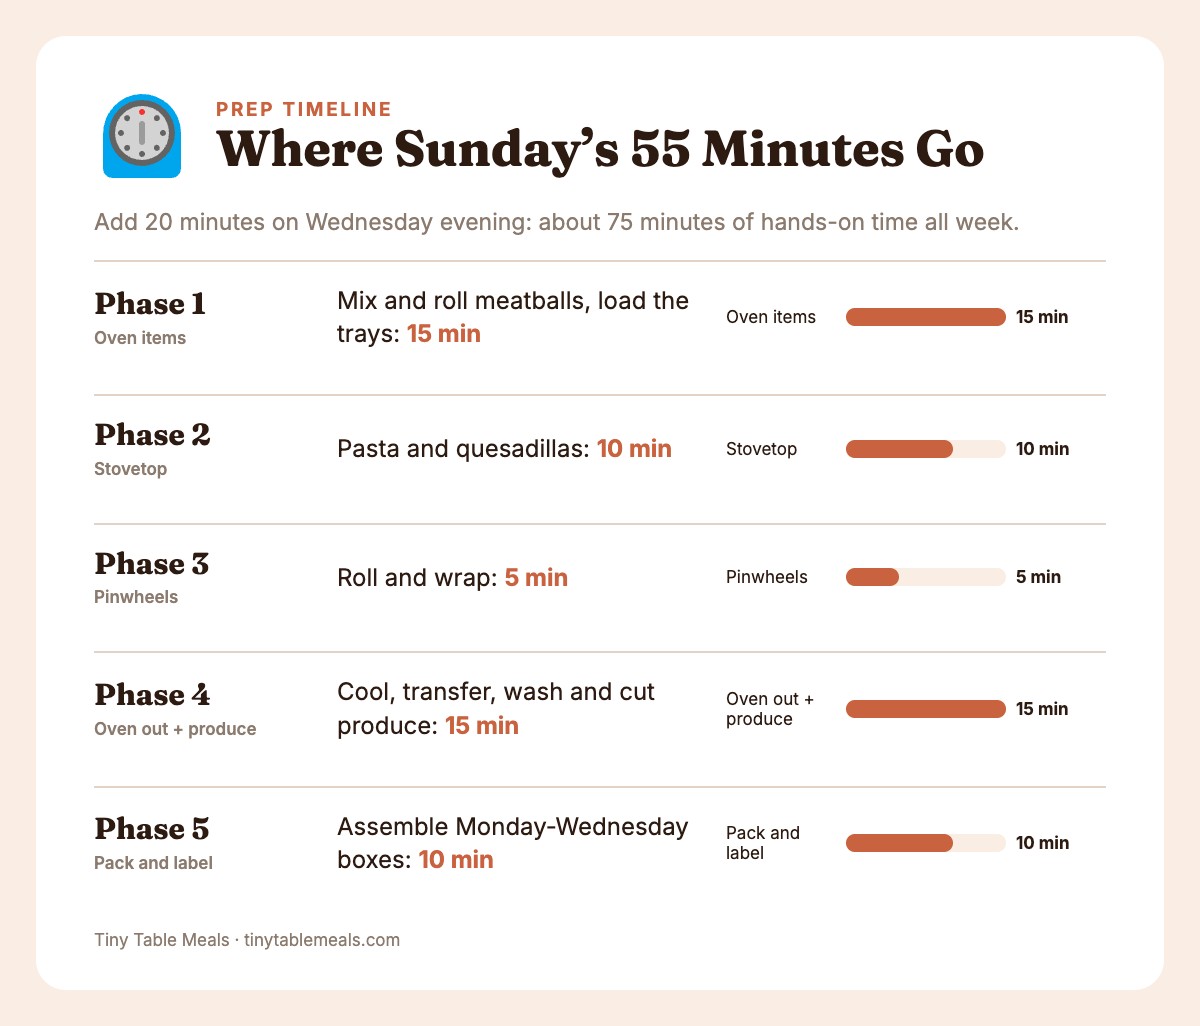
| Session | Active Time | What’s Happening |
|---|---|---|
| Sunday Phase 1: Oven items | 15 min | Mix and roll meatballs, load meatballs, broccoli, sweet potato |
| Sunday Phase 2: Stovetop | 10 min | Pasta, quesadillas |
| Sunday Phase 3: Pinwheels | 5 min | Roll and wrap |
| Sunday Phase 4: Oven out + produce | 15 min | Cool, transfer, wash and cut Monday-Wednesday produce |
| Sunday Phase 5: Pack and label | 10 min | Assemble Monday-Wednesday boxes |
| Sunday total | 55 min | Three boxes ready |
| Wednesday evening | 20 min | Cook pasta, steam carrots and pepper, pasta salad, sandwiches, pack Thursday and Friday |
| Week total | 75 min | 5 complete lunches ready to go |
That’s about 55 minutes on Sunday and 20 on Wednesday, plus shopping and cleanup, and your weekday lunches are ready.
Storage and Freshness: Keeping Everything Safe Through Friday
Toddlers get sick from food-borne bugs more easily, so these rules matter.
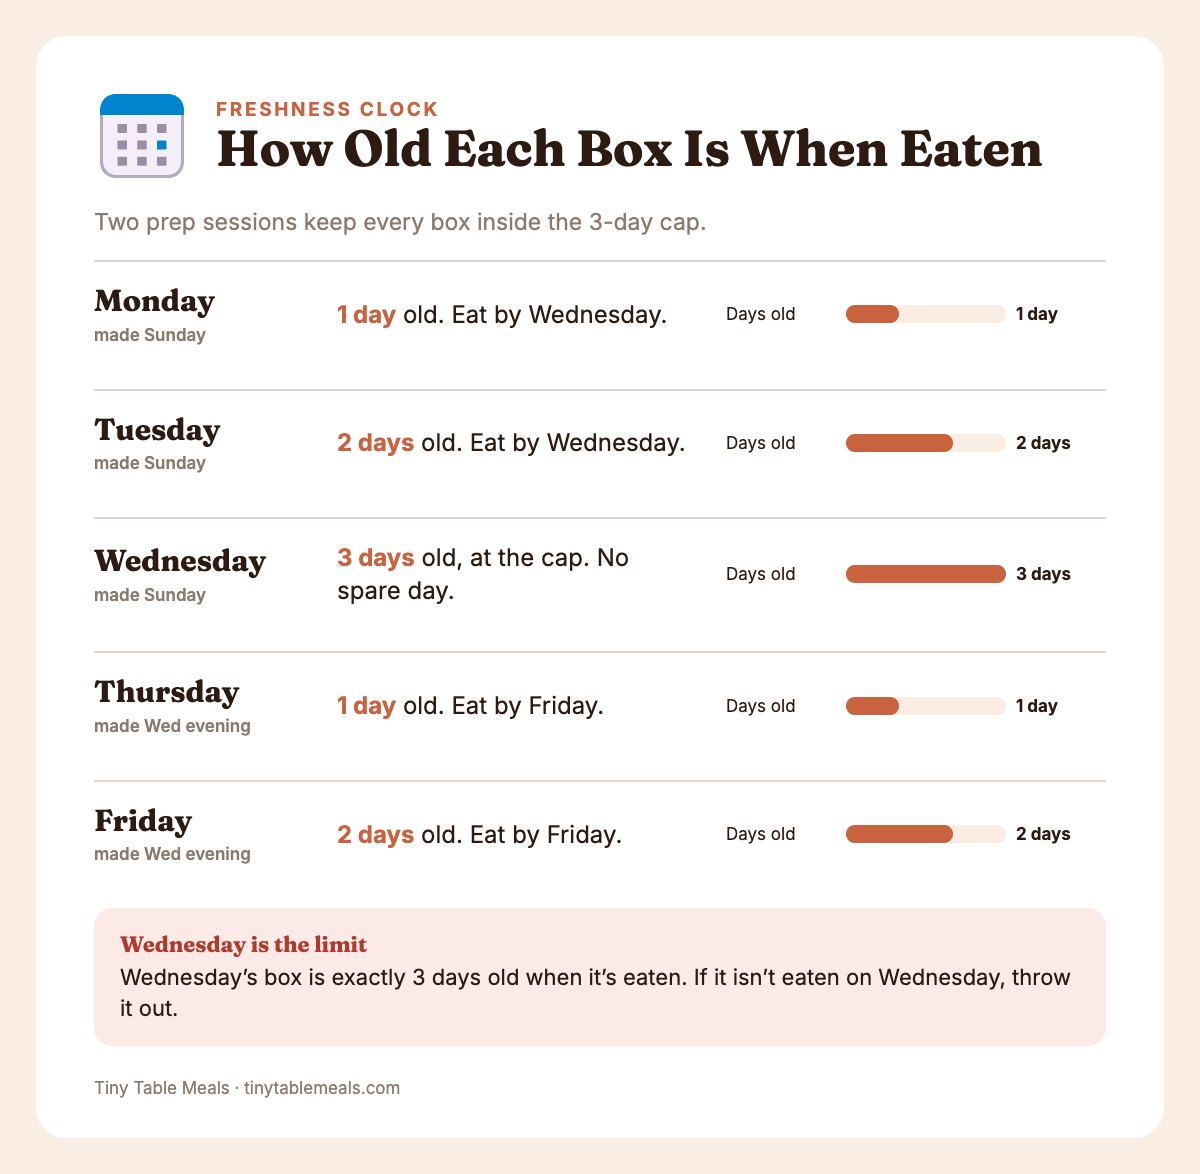
Good to knowMonday to Wednesday boxes are cooked on Sunday and eaten within 3 days. Thursday and Friday boxes are cooked and packed on Wednesday evening and eaten within 2 days. Nothing in this plan is eaten more than 3 days after it is made.
Wednesday’s box is exactly 3 days old when it’s eaten. That includes the quesadillas, the sweet potato and the strawberries cut on Sunday. It sits at the cap with no spare day. If it isn’t eaten on Wednesday, throw it out.
| Box | Made on | Age when eaten | Eat by |
|---|---|---|---|
| Monday | Sunday | 1 day | Wednesday |
| Tuesday | Sunday | 2 days | Wednesday |
| Wednesday | Sunday | 3 days (at the cap) | Wednesday, no spare day |
| Thursday | Wednesday evening | 1 day | Friday |
| Friday | Wednesday evening | 2 days | Friday |
Refrigerator Storage Guidelines
This plan uses one cap. Cooked food, deli meat and assembled lunches are eaten within 3 days. Nothing cooked or cut is kept past 4 days, and that is a limit, not a target.
| Food Component | Fridge Life | Storage Notes |
|---|---|---|
| Cooked meatballs | 3 days | Store in airtight container, reheat to 165 degrees F |
| Cooked pasta | 3 days | Toss with oil to prevent clumping |
| Quesadillas | 3 days | Store flat with parchment between layers. Wednesday’s are 3 days old, so keep them at 40 degrees F or below until they’re eaten |
| Pinwheels (with deli meat) | 3 days | Keep at 40 degrees F or below, wrapped tightly. Deli meat carries a higher listeria risk, so never stretch it past 3 days. Choose low-sodium deli meat |
| Pasta salad | 3 days | Cooked and mixed Wednesday evening, so it’s one day old on Thursday |
| Mini sandwiches (seed butter) | 3 days | Made Wednesday evening, so they’re two days old on Friday. Banana filling may darken but is safe to eat |
| Cut fruit | 3 days in this plan (4 at most) | Store in airtight container with paper towel to absorb moisture |
| Cut vegetables | 3 days in this plan (4 at most) | Store in water (carrots, celery) or airtight with paper towel |
| Hummus | 3 days in this plan (4 at most; follow the label on store-bought) | Keep sealed; stir before serving |
| Guacamole | 2-3 days | Homemade: press plastic wrap onto the surface and add it the morning it’s eaten. Sealed cups: follow the label |
Safety firstKeep your fridge at 40 degrees F or below. Eat cooked food and deli meat within 3 days, and never keep anything cooked or cut past 4 days. Throw away food left out for more than 2 hours (1 hour if it’s hotter than 90 degrees F).
Packing and reheating checklist:
- Pack lunches cold with two ice packs.
- Sending hot food? Preheat the thermos with boiling water, and make sure the food is still hot (140 degrees F or above) at lunchtime.
- Plan for the food to be eaten within a few hours of packing.
- Throw away anything that has been warm for more than 2 hours.
- Reheat to 165 degrees F, then stir and cut open to check for hot spots.
- Let reheated food cool until just warm before serving.
The Thursday/Friday Freshness Strategy
The biggest concern with Sunday meal prep is whether Friday’s lunch will still be good. Here’s how I’ve handled that:
- Monday and Tuesday lunches contain the most perishable items (deli turkey, cooked meatballs).
- Wednesday uses cheese-based protein that holds well mid-week. That box is exactly 3 days old when it’s eaten, so it stays in the fridge or on ice packs right up to lunch.
- Thursday and Friday use no-reheat foods (pasta salad, cheese, hummus, seed butter). They’re still perishable, so they’re cooked and packed on Wednesday evening and kept cold.
- Thursday’s banana slices and avocado, and any homemade guacamole, are added the morning they’re eaten.
- Friday’s mashed banana is the exception. It goes into the sandwiches on Wednesday evening with a little lemon. It darkens but stays safe to eat.
Why two sessions: Food made on Sunday would be 5 days old by Friday, which is well past the 3-day cap. So Sunday covers Monday through Wednesday only. Thursday’s pasta salad and Friday’s sandwiches are made on Wednesday evening (about 20 minutes).
If you’d rather skip the Wednesday session, freeze extra meatballs, quesadillas and sweet potato on Sunday. Thaw them in the fridge overnight and serve those on Thursday and Friday.
Reheating Safely for Toddlers
Only Tuesday’s box needs reheating. Wednesday’s quesadillas can be warmed or served cold, and every other box is served cold.
Good to knowPacking for daycare? Ask whether staff can reheat Tuesday’s meatballs and pasta. If they can’t, reheat at home to 165 degrees F and send it in a preheated thermos. Thermos food needs to still be hot (140 degrees F or above) at lunchtime. If you can’t count on that, pack it cold with two ice packs instead. Fully cooked meatballs are fine cold as long as they stay at 40 degrees F or below. See my hot thermos lunch ideas for more.
- Meatballs: Reheat in the microwave until steaming hot (165 degrees F on an instant-read thermometer). Stir and cut open to check for hot spots, then let them cool until just warm.
- Pasta: Add a splash of water before microwaving 30 seconds to prevent drying out.
- Quesadillas: Best reheated in a skillet for 1 minute per side for crispness, but microwave works too (15-20 seconds).
- Everything else: Designed to be served cold straight from the fridge.
Always cool reheated food until it’s just warm before serving. Microwaves create uneven hot spots that can burn little mouths, so stir, cut open and taste a small bite yourself first.
Handling Picky Eaters: Strategies That Work With Meal Prep
If your toddler refuses half the box, the prep isn’t wasted. Here’s how to plan for that.
The “Safe Food” Strategy
Include at least one accepted food in every single lunch box. If your toddler always eats crackers, every box gets crackers. If they love blueberries, blueberries show up daily. This guarantees they’ll eat something from every lunch, which reduces your stress and theirs.
The remaining compartments are for exposure. Your toddler doesn’t have to eat the roasted broccoli. They just have to see it, smell it, and know it’s there. Feeding research suggests it can take many tries, sometimes 10 or more, before a child accepts a new food. Meal prep is an efficient way to provide those exposures without the daily emotional labor of preparing rejected food.
The Deconstructed Approach
Many picky toddlers reject combined foods but happily eat the same ingredients separately. If your child won’t touch a quesadilla, put the components in separate compartments. Try a pile of shredded cheese, plain tortilla strips, and diced veggies on the side. Same nutrition, different presentation.
The bento box makes this easy because everything already has its own compartment.
Customization Without Starting Over
The components in this system are interchangeable. If your toddler hates pasta salad but loves meatballs, swap Thursday’s protein for extra meatballs. If they won’t touch hummus, substitute cream cheese or yogurt-based dip.
Keep a running list of your toddler’s accepted foods and cross-reference it with the weekly menu. Over time, you’ll build a personalized rotation that minimizes waste and maximizes eating.
Good to knowTalk to your pediatrician if your child eats very few foods, gags often on textures, or you have any growth concerns. For more on low-pressure exposure, see my guide to introducing new foods without pressure. For a full week of picky-eater-friendly meals, see the picky-eater meal plan.
What NOT to Do
- Don’t force it. Pressuring a toddler to eat prepped food because “Mommy spent time making this” tends to backfire. Serve it casually and move on. If the refusals worry you, use the pediatrician note above.
- Don’t stop offering rejected foods. The prep is already done. It costs you nothing to put it in the box again next week.
- Don’t make a completely separate meal. The lunch box IS the meal. If they eat some components and leave others, that’s normal and fine.
Allergy-Friendly Swaps: Making It Work for Every Family
Good to knowRead labels for cross-contact on every packaged item. Hummus contains tahini (sesame), so use a sesame-free dip if needed. Has your child not tried egg, dairy, sesame or wheat yet? Introduce each one at home, one at a time, before packing it. Ask your pediatrician about allergy history. See my guide to introducing allergens.
Food allergies are common in young children, and the most common allergens tend to show up in toddler lunches. Here’s how to change this plan for dairy, egg and wheat. Each swap can bring in a different allergen. Hummus adds sesame, tofu adds soy, and chickpeas are a legume. Check the last column before you use one.
Dairy, Egg and Wheat Swaps
| Allergen | Original item | Swap | Cut/texture note |
|---|---|---|---|
| Dairy | Cream cheese in pinwheels | Dairy-free cream cheese. Use hummus only if your child already eats sesame safely | Spread thinly. Dairy-free cream cheese is often made from soy, coconut or tree nuts, so read the label. |
| Dairy | Cheddar in quesadillas | Dairy-free shredded cheese (check the label; melting varies by brand) | Keep it shredded, not cubed. |
| Dairy | Mozzarella in pasta salad | Diced soft tofu if soy is safe for your child, or mashed chickpeas if your child already eats legumes safely | Mash or flatten every chickpea. Never serve them whole. Tofu adds soy, and chickpeas are a legume. |
| Dairy | Yogurt-based dips | Coconut yogurt. Use extra hummus only if your child already eats sesame safely | Smooth dips only. This swap adds coconut, and hummus adds sesame. |
| Egg | Egg in meatballs | 1 tablespoon ground flaxseed mixed with 3 tablespoons water (let sit 5 minutes to gel), or 2 tablespoons unsweetened applesauce | The meatballs may be a little softer, so handle them gently. Still cut them into quarters. |
| Wheat/gluten | Whole-grain tortillas | Brown rice tortillas or corn tortillas | Cut into small triangles or strips. |
| Wheat/gluten | Whole-grain pasta | Rice pasta, or chickpea pasta if legumes are safe for your child | Cook until very soft. Chickpea pasta is a legume. |
| Wheat/gluten | Whole-grain bread | Gluten-free bread (read the label for other allergens) | Spread fillings thinly. |
| Wheat/gluten | Crackers | Rice crackers or seed crackers | Choose a soft type that dissolves easily. Skip hard, crunchy ones. Seed crackers often contain sesame, so read the label. |
| Wheat/gluten | Breadcrumbs in meatballs | Certified gluten-free breadcrumbs or crushed rice cereal or rice crackers | Crush finely. |
The only recipe containing egg is the meatball mixture.
Nut-Free
This meal plan contains no nut ingredients. I use sunflower seed butter instead of peanut or almond butter. If you use the dairy-free swaps, check that the cream cheese isn’t made from cashews or almonds. Still read labels for cross-contact on bread, crackers and seed butter, and check your school or daycare’s own nut-free rules.
Fewer-Allergen Version
For families managing multiple allergies, here’s a simplified ingredient list. None of the foods on it is one of the nine top allergens: milk, egg, wheat, soy, peanut, tree nuts, fish, shellfish and sesame. That means no hummus, which contains sesame.
Beans are not on the main list below. They are legumes, like peanut and soy, so add them only if your child already eats legumes safely. If your child reacts to peanut or soy, get your allergist’s okay first.
Skip the coconut oil if coconut is a concern. Read the label on every ingredient, since breads, crackers and seed butter can have cross-contact.
- Protein sources: Turkey, chicken and thinly spread sunflower seed butter. Serve seeds only ground or as seed butter.
- Optional add-on: Soft-cooked beans, mashed or flattened, only if your child already eats legumes safely. With a peanut or soy allergy, get your allergist’s okay first.
- Carb sources: Rice, corn tortillas, rice pasta, potatoes, sweet potatoes.
- Fats: Avocado, olive oil, sunflower seed butter, coconut oil.
- Produce: Any fruits and vegetables your child tolerates, cut to the sizes in the safety table above.
Swapping components takes one extra planning step. For more help, see my guide to mealtimes with multiple food allergies.
Scaling Up: Feeding Multiple Kids or Longer Weeks
Meal Prepping for Siblings
If you have a toddler and an older child, this system scales easily. Double the recipes during prep, then portion differently:
- Your toddler gets small pieces, soft textures and smaller portions.
- Your school-age child gets larger portions, crunchier textures and maybe more seasoning.
- Both eat the same base components, so you aren’t making two different meals.
Making It a Two-Week Rotation
Once the first week feels easy, build a second menu on the same prep framework.
Week 2 alternatives:
- Monday: Ham and cheese roll-ups with paper-thin or soft-cooked apple slices.
- Tuesday: Chicken and rice bites with steamed green beans.
- Wednesday: Black bean and cheese roll-ups on soft tortillas. Mash or flatten the beans, and cut the roll-ups to the sizes in the safety table.
- Thursday: Couscous salad with diced veggies and feta.
- Friday: Pita pockets with hummus and shredded vegetables.
Alternate between Week 1 and Week 2, and you have a full month of lunches with only two menus to remember.
Grocery List: Everything You Need for One Week
Here’s your complete shopping list. Check your pantry first. You likely have many of the staples already.
Proteins
- 1 pound ground turkey.
- 6 oz thin-sliced low-sodium deli turkey (or sliced home-cooked turkey).
- 4 oz mozzarella cheese.
- 4 oz cream cheese.
- 1 cup shredded cheddar cheese.
- 1 container hummus (or ingredients to make your own).
- 1 jar sunflower seed butter.
Produce
- 1 medium zucchini.
- 1 head broccoli.
- 1 large sweet potato.
- 1 English cucumber.
- 1 pint cherry tomatoes.
- 1 bell pepper (any color).
- 3-4 medium carrots.
- 1 cup frozen peas.
- 3 bananas.
- 1 pint blueberries.
- 1 pint strawberries.
- 1 pint raspberries.
- 2-3 mandarin oranges (or one can of mandarin segments).
- 2 avocados.
- 1 lemon.
Pantry and Grains
- 1 box rotini or fusilli pasta (whole-grain preferred). For under 4, choose mini rotini or macaroni.
- 1 package whole-grain tortillas (large, for pinwheels and quesadillas).
- 1 loaf whole-grain bread.
- 1 package whole-wheat mini pitas.
- 1 box soft whole-grain crackers.
- 1 small box soft animal crackers.
- Breadcrumbs (1/4 cup).
- Olive oil.
- Italian seasoning.
- Garlic powder.
- Salt.
Other
- 1 egg.
- Single-serve guacamole cups (or make it fresh from the avocados on Wednesday morning).
- Parchment paper.
- Plastic wrap.
- 2 ice packs (for packed lunches).
Prices vary by region and by what you already have, so check your own store before you budget. Expect leftover tortillas, bread, pasta, cream cheese and hummus to carry into next week.
Toddler Meal Prep Tips for Sunday
A few things that make the Sunday session smoother:
TipProtect the prep window. Sunday naptime works for most families: no tiny hands trying to “help” (bless them) and no negotiations about tasting the meatball mix. Or hand the session to the other adult in the house. It’s a contained, clear task with a satisfying result.
TipLeave room for real life. On Monday morning, let your toddler choose the cracker or fruit swap for that day’s box. It gives them ownership without slowing down your cooking. Keep a backup pouch in the fridge too, for the day lunch lands on the floor or your toddler refuses everything.
Mama Munch
Mama Munch is a food-obsessed parent of two who believes every family deserves simple, nutritious meals — even on the busiest weeknights. With a background in nutrition education and years of navigating picky eaters, allergies, and toddler taste buds, she creates practical recipes and meal strategies that actually work for real families.
Frequently Asked Questions
Can I freeze the prepped lunches instead of refrigerating them?
Partly. Meatballs, quesadillas and plain cooked pasta freeze well, but fresh produce, cream cheese pinwheels and assembled sandwiches don’t. Freeze the cooked parts in single portions, thaw them in the fridge overnight, and add fresh produce the morning of.
My toddler is only 12 months old. Is this plan appropriate?
Some of it works, but not all of it as written. The plan is written for about 18 months and up. For 12 to 17 months, make these changes:
- Skip the deli meat and any added salt.
- Swap the pinwheels for soft shredded chicken or small egg roll-ups.
- Cut the meatballs small and soft.
- Cut food into pea-sized pieces for new self-feeders.
- Skip honey.
- Quarter grapes and cherry tomatoes lengthwise, and halve or quarter blueberries. Keep doing this until age 4.
Has your child not tried egg, dairy, sesame or wheat yet? Introduce each one at home, one at a time, before packing it, and ask your pediatrician about any allergy history.
How do I keep food safe if my toddler eats lunch late?
If lunch sits out at room temperature for more than two hours (one hour if it’s hotter than 90 degrees F), it should be discarded. For toddlers at home, serve lunch straight from the fridge or after a quick reheat. If you’re packing lunch for daycare, use an insulated lunch bag with two ice packs. The food should stay at 40 degrees F or below until it’s eaten. Plan for it to be eaten within a few hours of packing, and throw away anything that has been warm for more than 2 hours.
What if my toddler won’t eat cold food?
Some toddlers strongly prefer warm food, and that’s okay. For the cold lunches (pinwheels, pasta salad, sandwiches), take the chill off for just a few minutes. Set the box on the table while you wash hands and get your toddler seated. Keep it brief, because deli turkey, cream cheese and mozzarella are perishable. If lunch gets delayed, put the box back in the fridge. For meatballs and pasta, a quick microwave reheat, then a few minutes of cooling until just warm, works well. If you’re packing for daycare, check whether they can reheat food for you.
I only have 30 minutes on Sunday. Can I still make this work?
Yes, if you buy the slow parts ready-made. Store-bought meatballs, pre-shredded cheese and pre-cut produce take out most of Sunday’s mixing, rolling and chopping. Thursday and Friday are still made on Wednesday evening (about 20 minutes).
Won’t my toddler get bored eating the same lunches every week?
Probably not. Many toddlers like familiar foods. Still, swap in one new item at a time. If a once-loved food keeps coming back untouched, use the two-week rotation in the “Scaling Up” section above.
Is this really cheaper than just making lunch daily?
Often, yes. You buy for a specific plan, so less gets wasted, and a ready lunch means fewer last-minute takeout or convenience buys. Your savings will depend on your grocery prices and how often lunch used to turn into takeout.
Good to knowWant to plan the rest of the week’s dinners too? Try my free weekly meal planner.
Start Your First Prep Week This Sunday
Start this Sunday. Set aside 55 minutes during naptime, put on a podcast, and prep Monday through Wednesday. Add 20 minutes on Wednesday evening for Thursday and Friday. By next Tuesday at 11:47 a.m., lunch is already made.