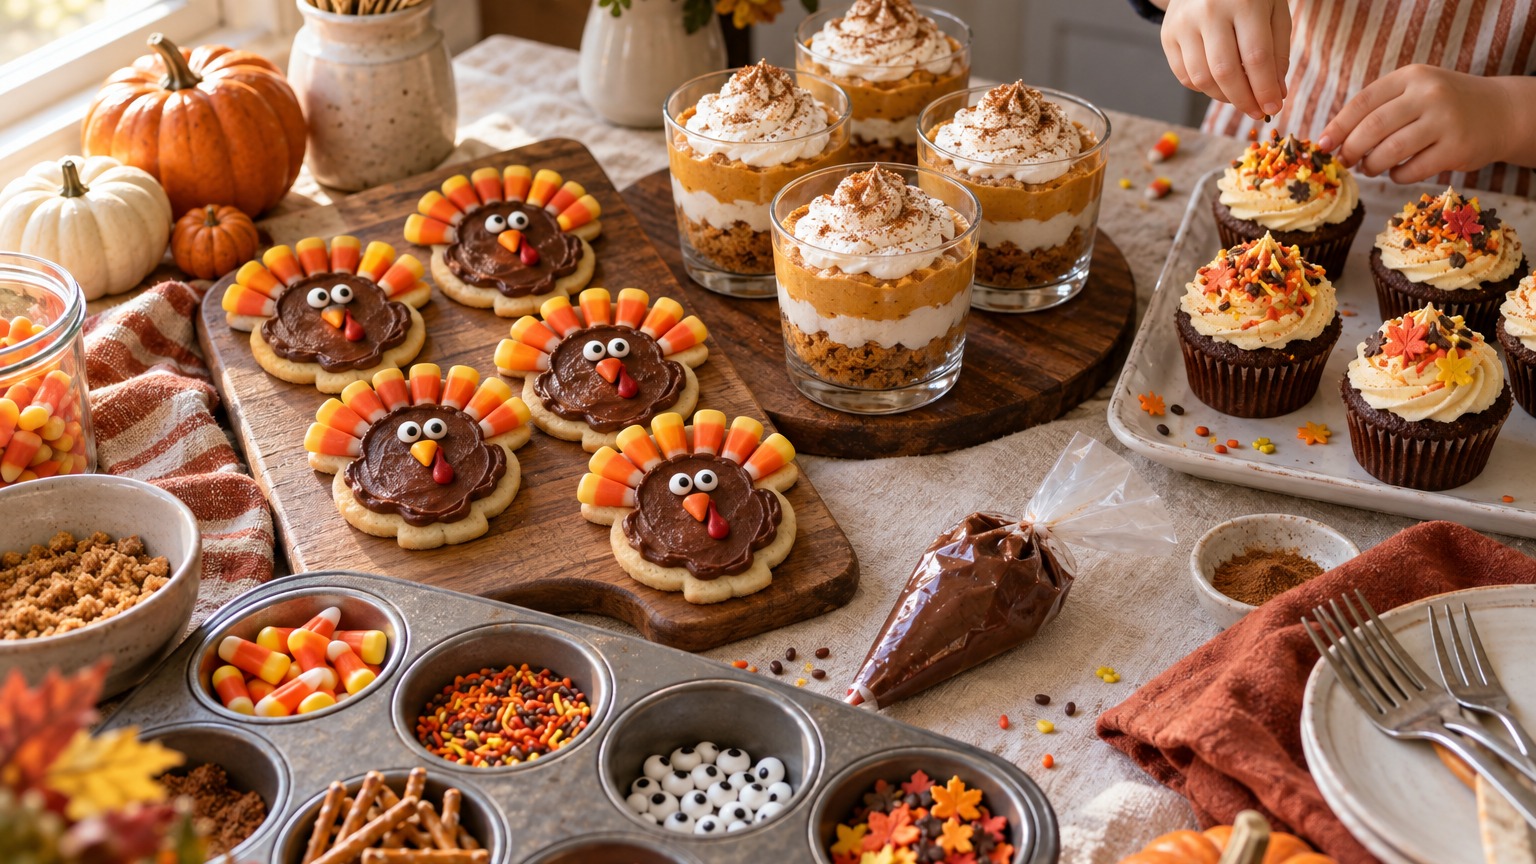
Make-Ahead Thanksgiving Desserts Kids Can Decorate
Discover how to prep Thanksgiving desserts in advance so your kids can handle the fun decorating on holiday afternoon.
- Prep heat- and precision-heavy baking steps before Thanksgiving to keep holiday kitchen chaos low.
- Let kids handle forgiving decorating tasks like spreading, sprinkling, and layering day-of.
- Follow a staggered prep timeline starting 1-2 weeks early to keep work light and ingredients fresh.
- Keep dairy chilled until decorating time and return to the fridge within two hours total.
This post contains affiliate links. As an Amazon Associate I earn from qualifying purchases.
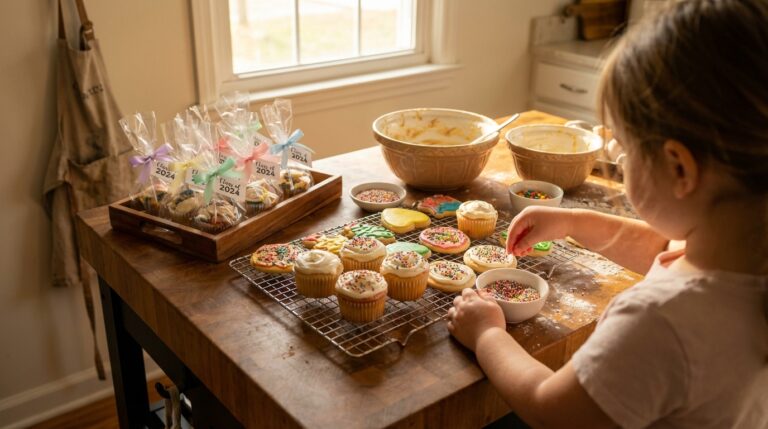
Two Thanksgivings ago, I had a pie crust half rolled out, a turkey to baste, and a five-year-old on a stool saying, “Can I help? Can I help?” on a loop. I handed her a bowl of flour to “stir,” and it ended with a white handprint on the dog.
The next year I made the boring parts ahead (baking, chilling, mixing) and saved only the fun, forgiving part for Thanksgiving Day. My daughter got a real job: decorate the desserts. I finished the gravy in peace.
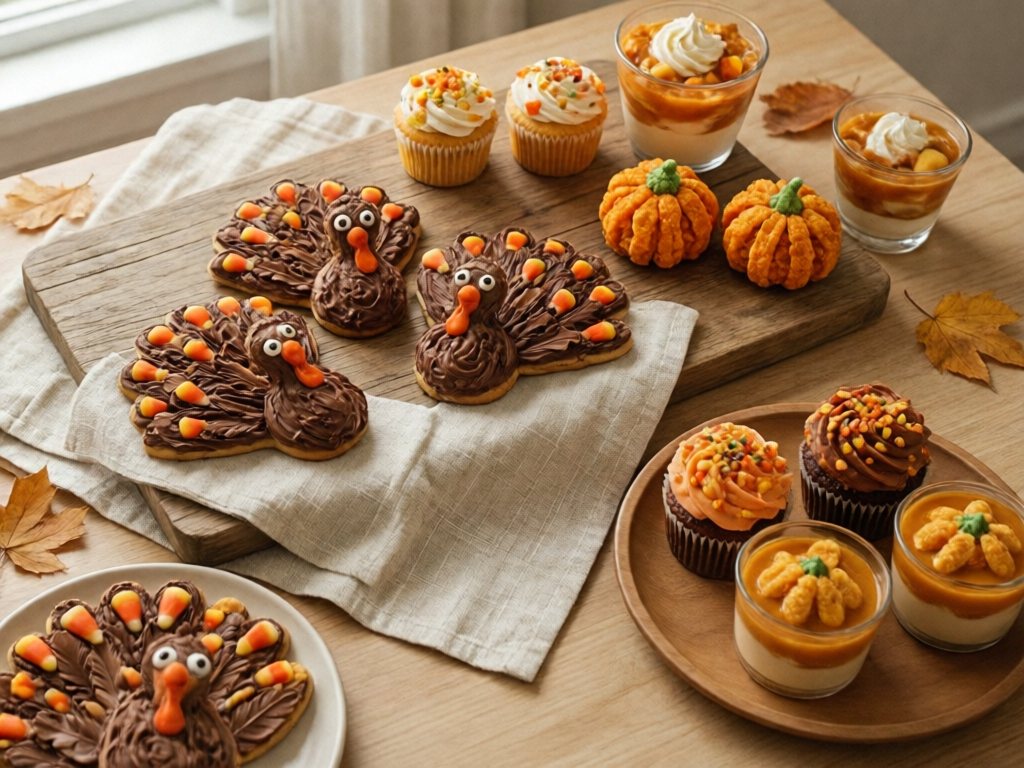
This guide covers seven make-ahead Thanksgiving desserts kids can decorate, a week-by-week timeline, age-by-age jobs, storage times and food-safety tips. Every dessert is split into a make-ahead step for you and a decorate-day-of step for your kid, so the logistics and the “give my kid something to do” problem get solved by the same plan.
In this article (10 sections)
- Why Splitting the Work Makes Thanksgiving Dessert So Much Easier
- The Make-Ahead Timeline at a Glance
- The Desserts: Make-Ahead Step vs. Kid Decorates Day-Of
- Matching the Job to the Age: Who Can Do What
- Setting Up the Decorating Station (and Surviving the Mess)
- Allergies, Swaps, and Food Safety
- How Long Each Dessert Keeps (Storage Cheat Sheet)
- A Sample Thanksgiving Day Dessert Plan
- Frequently Asked Questions
- Make-Ahead Thanksgiving Desserts Kids Can Decorate: The Short Version
Why Splitting the Work Makes Thanksgiving Dessert So Much Easier
Most make-ahead Thanksgiving advice stops at baking the pie the day before. That ignores the real problem in a house with young kids. Between lunch and dinner the kitchen is crowded, the adults are stressed, and a bored 4-year-old wants a job.
The parent’s half is anything that needs precision, heat, or a sharp knife: baking, melting, whipping, chilling, and cutting. Do it during nap time or after bedtime in the quiet days before.
The kid’s half is anything forgiving: spreading, sprinkling, sticking, layering, and arranging. A 3-to-8-year-old can do all of it with real success. A lopsided turkey cookie still looks adorable, and candy corn at weird angles looks like feathers.
Two things I’ve noticed after doing this for a couple of years:
- Kids are often more willing to try what they helped make. A pumpkin parfait they layered themselves feels a lot less scary than one from the store. If your child is a stubborn eater in general, the Picky Eater Quiz can help you figure out where to start.
- Kids feel like part of the holiday. A child who made a dessert has a stake in the meal, and they’ll tell every guest, “I made that.”
One honest caveat: “kid-decorated” does not mean “Pinterest-perfect.” The goal is a happy kid and a dessert table that makes people smile, not matching cookies.
The Make-Ahead Timeline at a Glance
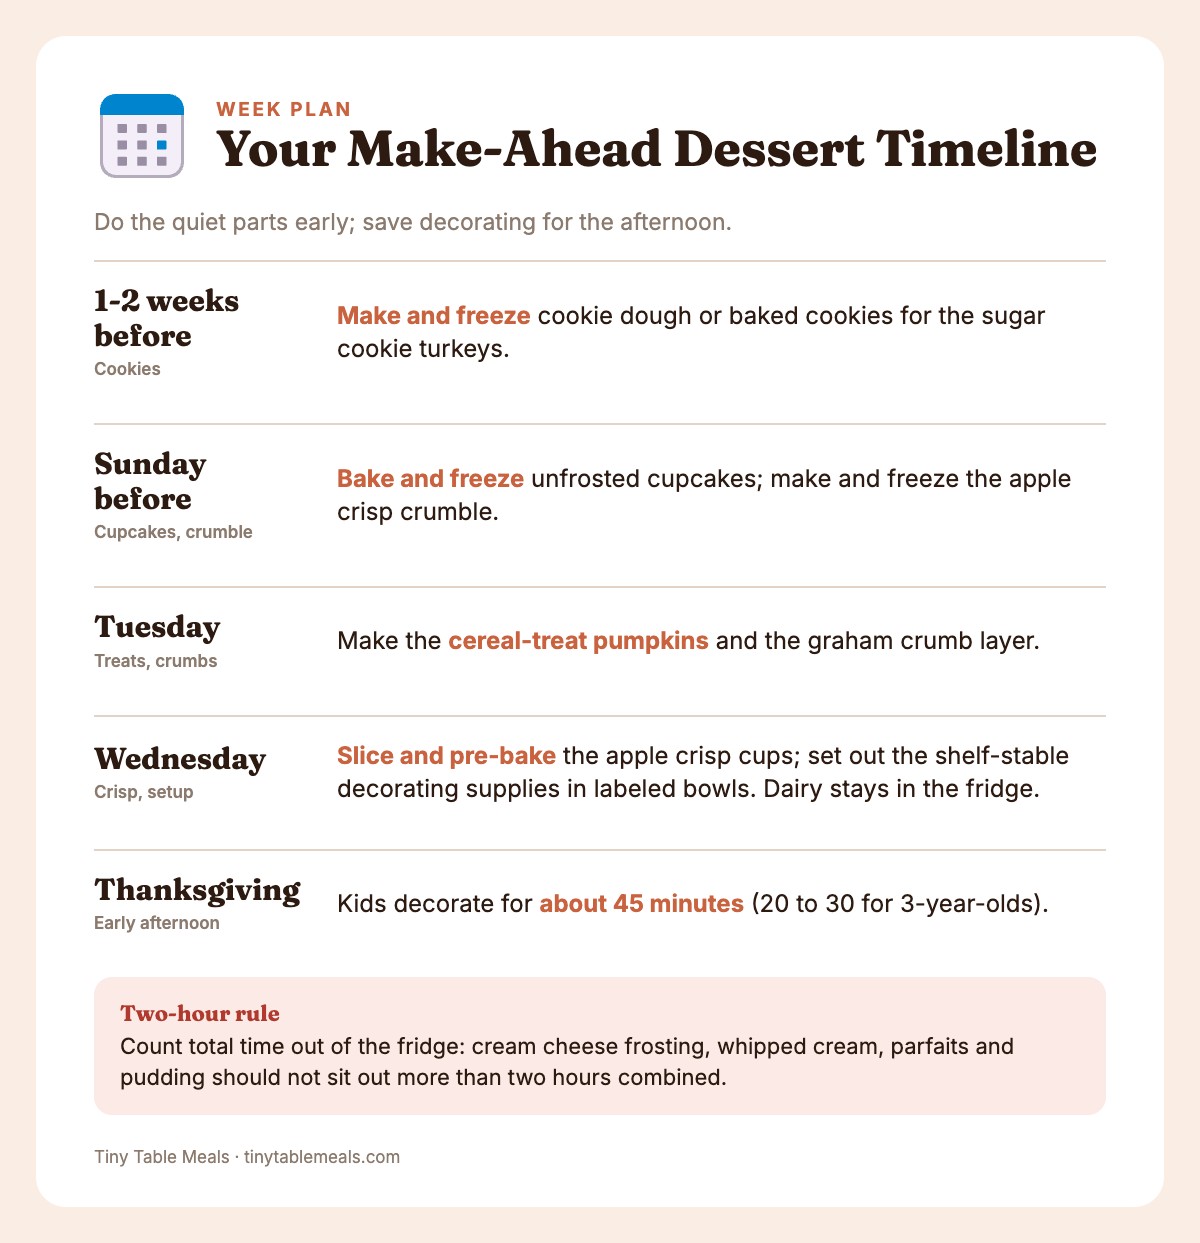
Here’s the schedule I use. It spreads the work across the week so no single day feels heavy. Pick the desserts you want, then slot them in.
| When | Parent job | What it covers |
|---|---|---|
| 1-2 weeks before | Make and freeze cookie dough or baked cookies | Sugar cookie turkeys |
| Sunday before | Bake and freeze unfrosted cupcakes; make and freeze the apple crisp crumble | Fall leaf cupcakes, apple crisp topping |
| Tuesday | Make the cereal-treat pumpkins and the graham crumb layer | Cereal treats, parfait cups |
| Tuesday or Wednesday | Make cream cheese frosting, pumpkin filling, chocolate pudding and the pilgrim hat frosting; crush cookies (or save that job for the kids). Not before Tuesday, so nothing is more than two days old on Thanksgiving | Cupcakes, parfait cups, dirt cups, pilgrim hats |
| Wednesday | Slice and pre-bake the apple crisp cups; set out the shelf-stable decorating supplies in labeled bowls (dairy stays in the fridge) | Apple crisp cups, all desserts |
| Thanksgiving, early afternoon | Kids decorate (about 45 minutes; 20 to 30 for 3-year-olds) | All desserts |
| After decorating | Parent covers and refrigerates until dessert | Everything perishable |
Two rules keep this schedule safe and sane:
- Decorate as late as is practical, but not at the last minute. Decorating around 1 or 2 p.m. gives frosting time to set and keeps your kid busy during the hours you need them occupied.
- Keep dairy chilled until decorating starts, and put it back when the kids are done. Count total time out of the fridge: cream cheese frosting, whipped cream, parfaits and pudding should not sit out more than two hours combined.
If you’re only going to make two or three of these desserts (and honestly, that’s plenty), pick one cookie, one cup, and one cupcake or treat so your kids get different kinds of decorating jobs.
The Desserts: Make-Ahead Step vs. Kid Decorates Day-Of
Each dessert below includes the exact break between your job and your kid’s job, plus the age range it works best for. Serving sizes assume a typical family gathering, so scale up or down.
Here’s how the seven compare before you choose:
| Dessert | Ages | Earliest make-ahead start | Oven on the day | Main allergens as written |
|---|---|---|---|---|
| Sugar cookie turkeys | 4-8 | 1-2 weeks before (frozen) | No | Wheat, egg, milk |
| Pumpkin pie parfait cups | 3-8 | Tuesday | No | Milk, wheat |
| Fall leaf cupcakes | 3-8 | Sunday before (frozen) | No | Wheat, egg, milk |
| Apple crisp cups | 4-8 | Sunday before (crumble) | Yes | Wheat, milk |
| Pilgrim hat cookies | 4-8 | Tuesday | No | Wheat, milk, peanut (if using peanut butter cups) |
| Cereal-treat pumpkins | 3-8 | Tuesday | No | Milk; check the cereal for gluten |
| Harvest dirt cups | 3-6 | Tuesday | No | Milk, wheat |
Allergens are based on the ingredients as written. Brands vary, so always read the labels.
1. Sugar Cookie Turkeys (Ages 4-8)
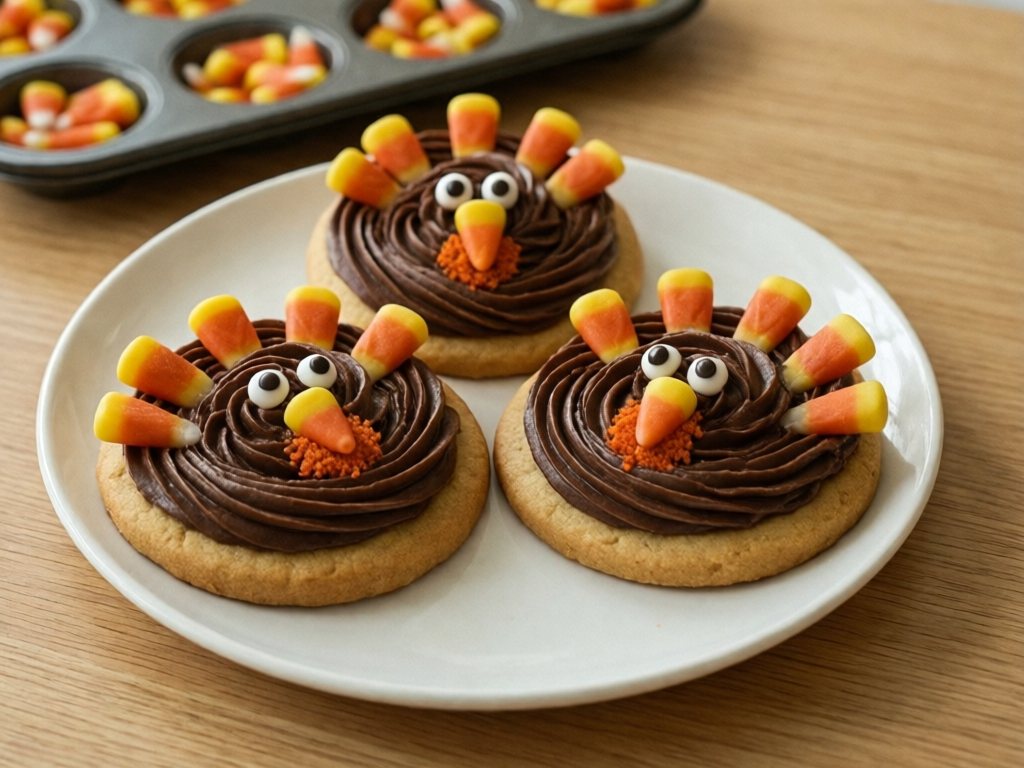
This is the classic, and it’s the one that gets the biggest reaction at the table. A round sugar cookie becomes the turkey’s body, and the feathers are made from candy corn, chocolate frosting, and whatever else your kid decides is a feather.
Make-ahead step (parent):
- Make a basic sugar cookie dough: 3 cups flour, 1 teaspoon baking powder, ½ teaspoon salt, 1 cup softened butter, 1 cup sugar, 1 egg, and 2 teaspoons vanilla. Mix wet, mix dry, combine. Don’t let anyone taste the raw dough, since raw flour and raw egg can both carry germs.
- Divide into two discs, wrap, and chill at least an hour.
- Roll to about ¼ inch thick and cut 3-inch circles. The dough makes about 20 to 24 cookies, so plan one or two per kid plus extras for guests. Bake at 350°F for 9 to 11 minutes, until the edges just barely turn golden.
- Cool completely. Freeze in a flat layer in a sealed container for up to two months, or keep in an airtight container at room temperature for up to three days.
- Whip up a simple chocolate frosting or buy a tub. The night before, spoon it into a few small covered containers (or zip bags with the corner snipped) and refrigerate them. Take them out about 20 minutes before decorating to soften, and count that time toward the two-hour limit.
If cookie baking is your kids’ favorite part of the season, see holiday cookie baking with kids. It has tips on dough, timing, and keeping little hands involved at each stage.
Decorate day-of step (kid):
- Spread a thick layer of chocolate frosting on each cookie with a butter knife or small spatula. Older kids can use a spoon to make swirls.
- Press candy corn into the top edge to make a fan of feathers. Four to six pieces is plenty.
- Add two candy eyes and a candy corn beak. For the wattle, ages 4-5 use an orange sprinkle; ages 6 and up can use a small piece of red licorice instead.
- Let them set for 10 minutes before moving.
TipPut each decoration in its own muffin tin cup so your kid isn’t digging through a pile. A muffin tin also keeps the colors from sliding into each other.
Safety firstCandy eyes and candy corn are for ages 4 and up, and red licorice is for ages 6 and up. For a child under 4, skip this dessert or give them a large flat cookie with frosting and a few big soft decorations, like sprinkles pressed into the frosting. An adult should watch while they work and eat.
2. Pumpkin Pie Parfait Cups (Ages 3-8)
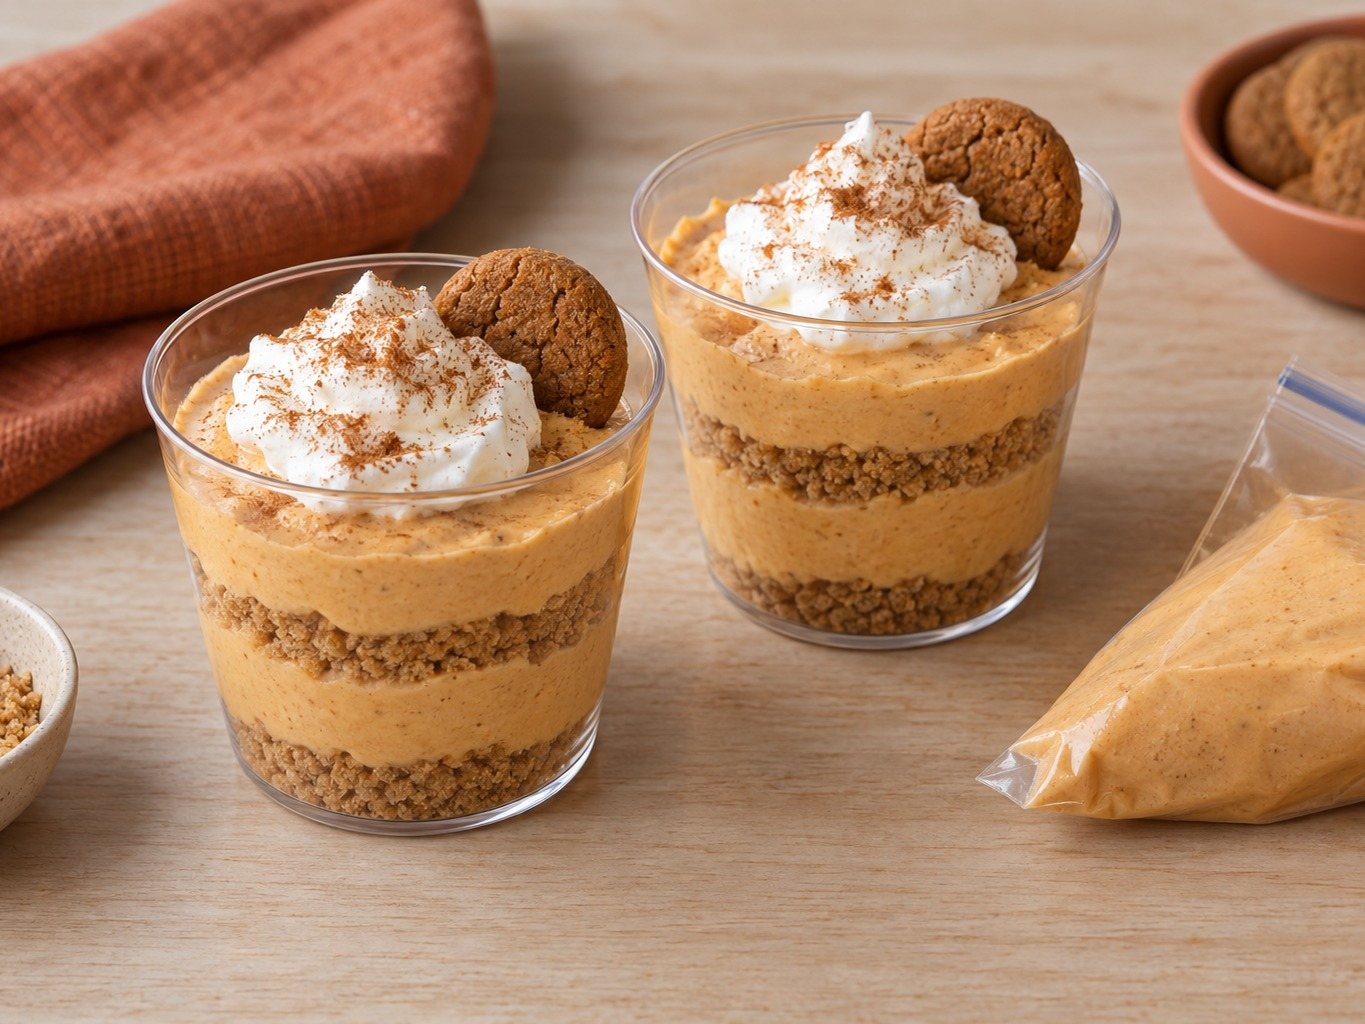
If you want a dessert that tastes like pumpkin pie but doesn’t ask your kids to wait for a crust to bake, this is it. It’s a no-bake layered cup, and the layering is the whole activity, which makes it perfect for the youngest decorators.
Make-ahead step (parent):
- Pumpkin cream filling: Beat 8 ounces softened cream cheese with ⅓ cup brown sugar until smooth. Mix in 1 cup canned pumpkin puree (plain, not pie filling) and 1 teaspoon pumpkin pie spice. Gently fold in 1 cup whipped cream or whipped topping. Refrigerate in a covered bowl for up to two days.
- Graham crumb layer: Crush 1½ cups graham crackers (or use store-bought crumbs) and stir in 4 tablespoons melted butter. Store in a sealed bag at room temperature for up to three days.
- Set out eight 6-ounce clear cups or small jars. Clear is better, since kids love seeing the layers.
Decorate day-of step (kid):
- Spoon two tablespoons of graham crumbs into the bottom of each cup. Press down gently with the back of a spoon.
- Add a big scoop of pumpkin filling. A zip bag with the corner snipped makes this much cleaner for little hands, and kids love squeezing.
- Add another layer of crumbs, then more filling.
- Top with a dollop of whipped cream, a shake of cinnamon, and a mini cookie shaped like a leaf or a small gingersnap. Keep an adult nearby for the youngest, since hard cookies can crack into sharp bits.
Good to knowThe filling contains no nuts as written, but check labels for cross-contact. For a dairy-free version, use a dairy-free cream cheese and coconut whipped topping, which works surprisingly well. For gluten-free, swap in gluten-free graham-style crackers or crushed gluten-free ginger cookies.
3. Fall Leaf Cupcakes (Ages 3-8)

Cupcakes are the most freezer-friendly dessert on this list, and they give kids a big canvas for frosting and sprinkles. The “fall leaf” theme just means orange, red, and yellow toppings, which is easy to pull off with a sprinkle mix.
Make-ahead step (parent):
- Bake your favorite spice or pumpkin cupcake recipe, or doctor up a boxed spice cake mix with a spoonful of pumpkin puree and a pinch of cinnamon. Cool completely.
- Freeze unfrosted cupcakes in a single layer on a tray, then transfer to a freezer bag. They keep well for up to two months. Thaw on the counter for an hour or two on Thanksgiving morning.
- Make cream cheese frosting on Tuesday or Wednesday, so it’s no more than two days old on Thanksgiving: 8 ounces cream cheese, ½ cup butter, 3 cups powdered sugar, and 1 teaspoon vanilla. Store it covered in the fridge and let it sit out for 20 minutes to soften before the kids use it. Those 20 minutes count toward its two-hour limit.
- Divide the frosting into small bowls. A few drops of gel food coloring (yellow, orange, and a bit of red) gives you a fall palette. Or leave it plain and let the sprinkles do the work.
Decorate day-of step (kid):
- Spread or dollop frosting on each cupcake. If you want to do a mini lesson, show your kid how to hold the knife flat and spin the cupcake in their other hand.
- Add a sprinkle mix in fall colors.
- Top with a candy pumpkin (ages 4 and up) or a small cookie leaf. For a “stem,” a parent breaks pretzel sticks into 1-inch pieces ahead of time, and kids 4 and up push one in. Skip the pretzel for under 4, and keep an adult nearby while they decorate and eat.
Best for: Kids who love to get hands-on with the messy part. Put the cupcakes on a rimmed baking sheet so the sprinkle rain goes somewhere useful.
If your kids are the type who want to decorate and bake, you’ll find task-by-task assignments in fall baking with kids, which lays out what each age can handle.
4. Apple Crisp Cups with a Topping Bar (Ages 4-8)
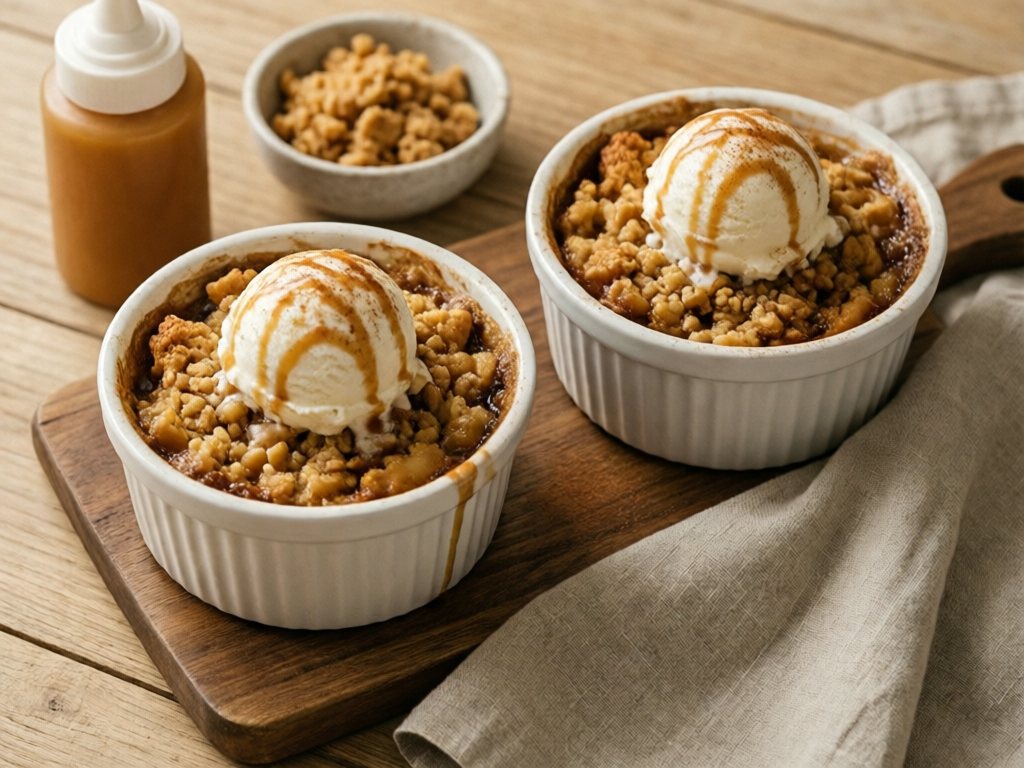
Not everything has to be a cookie. This one is warm, cozy, and shows off a very different kind of kid job: building the topping.
Make-ahead step (parent):
- Up to a month ahead: Make the crumble: 1 cup oats, ½ cup flour, ½ cup brown sugar, ½ teaspoon cinnamon, and 6 tablespoons cold butter, cut in until crumbly. Freeze it in a bag.
- The day before: Peel and thinly slice 6 apples. Toss with 2 tablespoons sugar, 1 tablespoon flour, 1 teaspoon cinnamon, and a squeeze of lemon. Divide among eight oven-safe ceramic ramekins. Skip glass jars, including canning jars, because they can crack or shatter going from the fridge into a hot oven.
- Bake the filled ramekins, covered, at 350°F for 25 minutes to soften the apples. Cool, cover, and refrigerate. (Or fully bake the crisps with topping the day before and skip the kid-built version.)
Decorate day-of step (kid):
- A parent sets the ramekins on the counter for about 20 minutes while the oven preheats, since even ceramic can crack going straight from cold to hot. Meanwhile, the kid sprinkles a handful of the frozen crumble over each one. Kids love this part, since it feels like snow.
- A parent bakes the cups at 375°F for about 25 to 30 minutes, until golden and bubbling, then moves them to a heatproof surface.
- Once the cups have cooled 15 to 20 minutes and are only warm to the touch, the kid adds the finishing touches. That means a scoop of vanilla ice cream or whipped cream, a drizzle of caramel from a squeeze bottle, and a dusting of cinnamon.
Safety firstThis is the one dessert that needs the oven on the day. Use ceramic ramekins, not glass jars, and let them sit out about 20 minutes before they go in. A parent does all the baking and moves the cups. Ramekins stay hot for a long time, so keep little ones away and wait 15 to 20 minutes, until they’re only warm to the touch, before the toppings go on.
If your younger kids prefer apples in their simpler forms, easy apple recipes for toddlers has safe ideas that work for the under-4 crowd.
5. Pilgrim Hat Cookies (Ages 4-8)
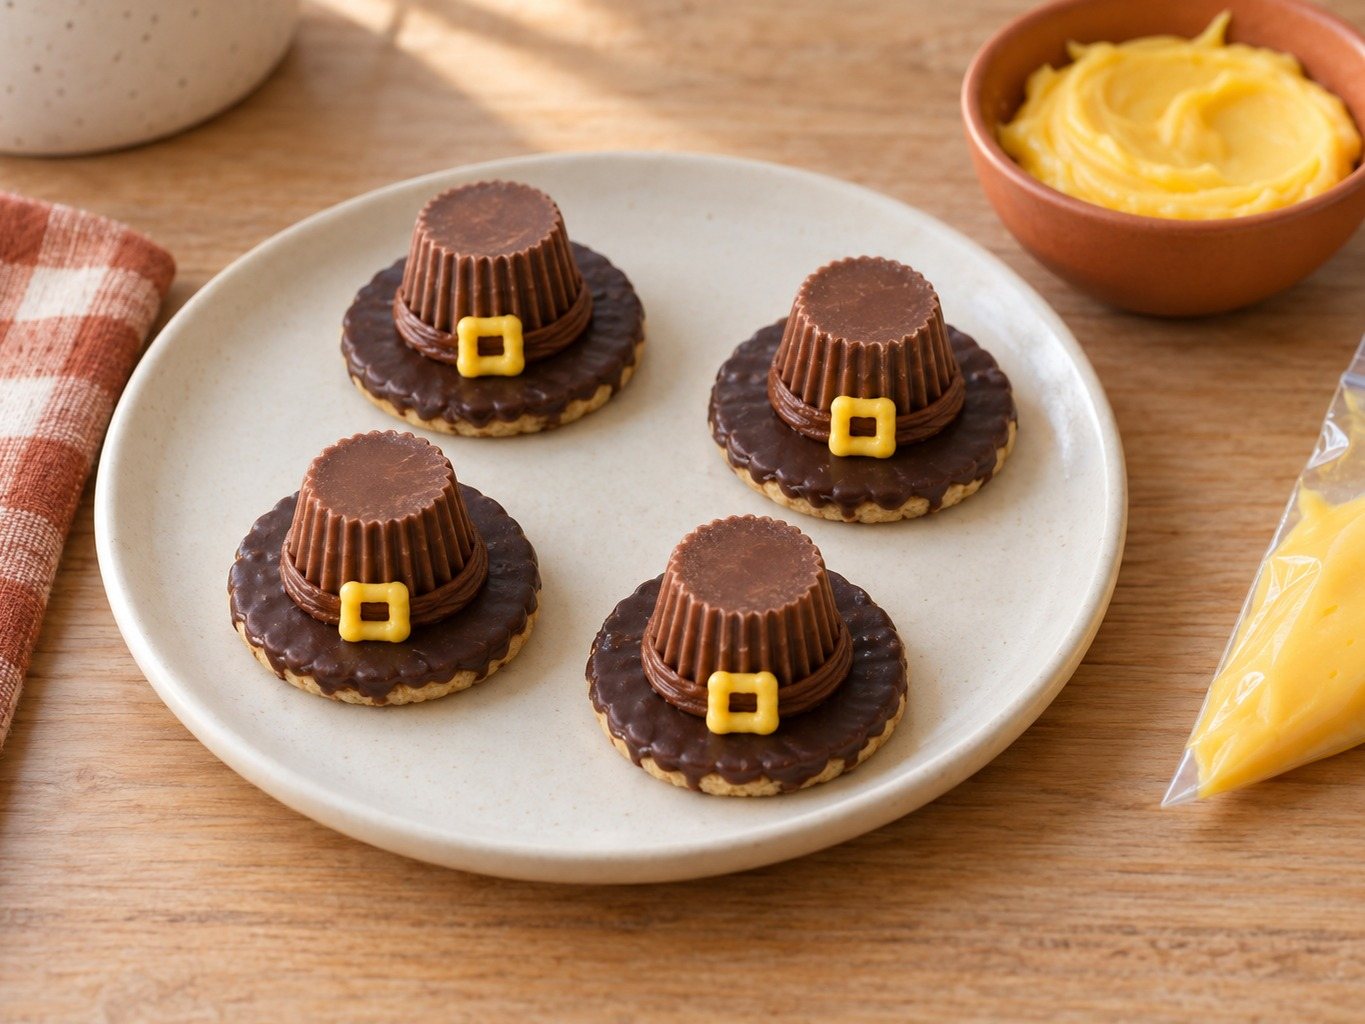
These are the most “just assemble it” dessert on the list, which makes them great for a kid who gets frustrated with fiddly work. The build is five parts, and each one is a sticky job.
Make-ahead step (parent):
- Buy or bake fudge-striped shortbread cookies (the round ones with chocolate on the bottom). You’ll need one per hat.
- Set out a tub of chocolate frosting as the “glue.” For ages 6-8 you can use melted chocolate instead: on the day, a parent melts a cup of chocolate chips with a teaspoon of coconut oil and lets it cool until warm, thick and spreadable. Kids only handle it once it is no longer hot.
- Make a small bowl of yellow frosting for the buckle (a drop of yellow gel color in white frosting works).
- Unwrap mini peanut butter cups, or for a nut-free version, mini chocolate cups or chocolate kisses with a flat bottom.
- Fill a few zip bags with frosting and snip small corners. Keep them and the yellow frosting covered in the fridge until about 20 minutes before decorating.
Decorate day-of step (kid):
- Flip the cookie upside down so the chocolate side faces up, and this becomes the brim.
- Put a dab of chocolate frosting (or cooled melted chocolate, for ages 6-8) in the middle and press the chocolate cup on top as the hat.
- Pipe or spread a stripe of frosting around the base of the cup, then add a small square of yellow frosting or a yellow candy for the buckle.
- Let set for 15 minutes.
Good to knowIf you’re hosting a nut-free table, read every label on the cookies, chocolates, and frosting. “May contain” warnings are common on candy and cookies, and formulas change, so check the packaging each year.
6. Cereal-Treat Pumpkins and Leaves (Ages 3-8)
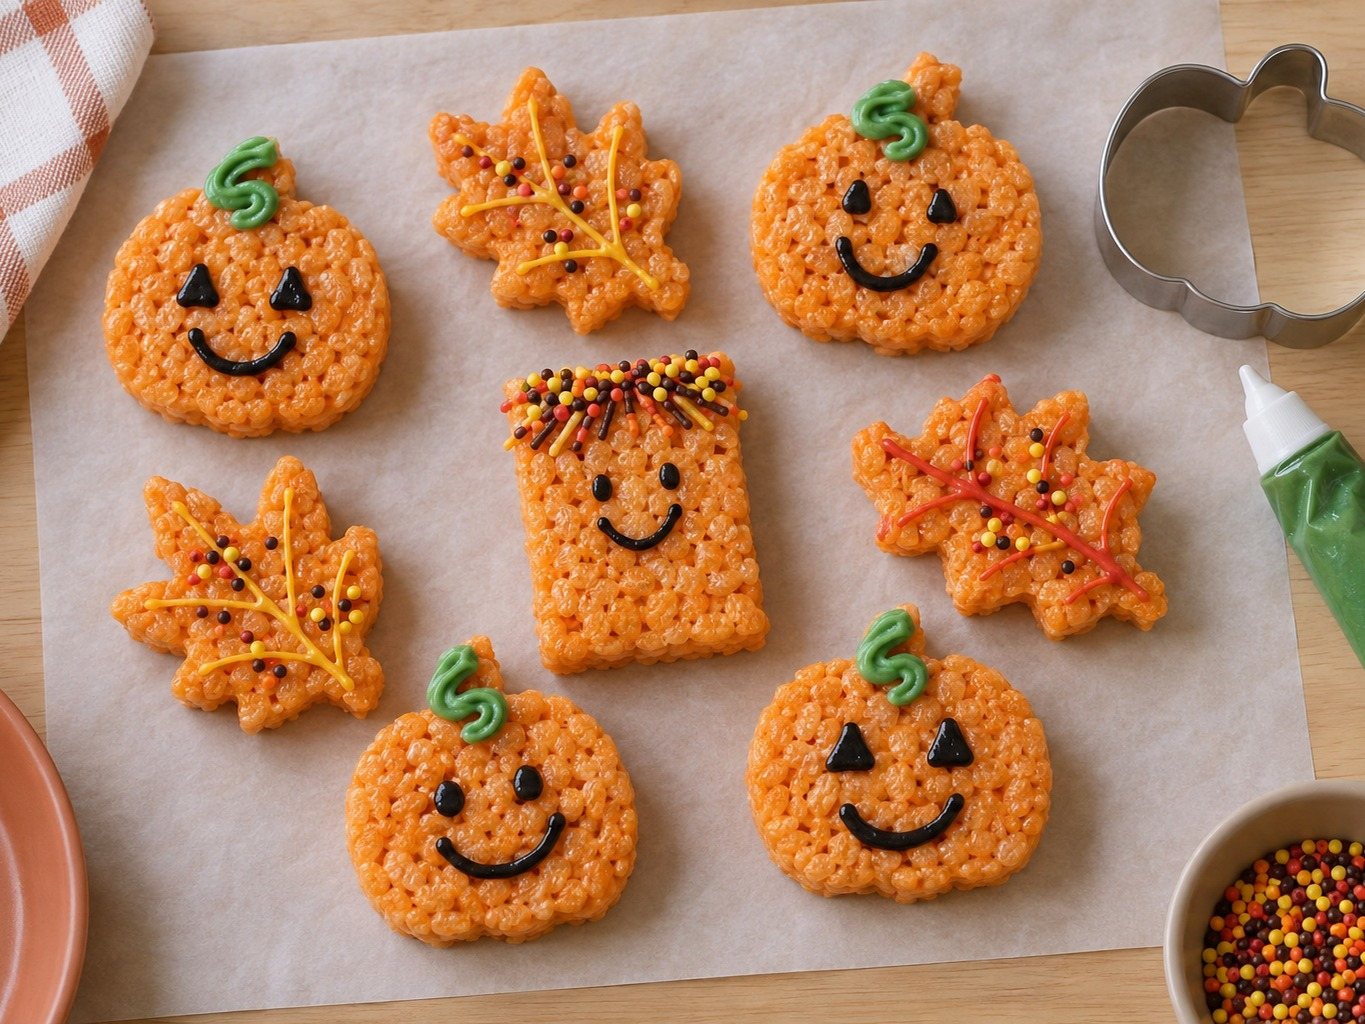
Cereal treats are nearly indestructible, which is why they’re my go-to for a kid who needs a forgiving first dessert project. You bake nothing, and the cut-out shapes come together in minutes.
Make-ahead step (parent):
- Melt 3 tablespoons butter in a large pot. Add 10 ounces of marshmallows (about 40 large, or 5 cups mini) and stir until smooth.
- Stir in a few drops of orange gel food coloring, then fold in 6 cups crispy rice cereal.
- Press into a parchment-lined 9×13 pan using a buttered spatula or a sheet of wax paper. Let cool 30 minutes.
- Cut with pumpkin and leaf cookie cutters. Store layered between parchment sheets in an airtight container for up to two days, so make them Tuesday or Wednesday. Make a few plain rectangles too, since they’re great for kids who want to build a scarecrow face.
Decorate day-of step (kid):
- Use canned frosting in a tube or a thin spread of frosting as the “glue.”
- For ages 4 and up, add a green candy or a small piece of green fruit leather as the stem. For under 4, use a green frosting squiggle or a large green sprinkle pressed into the frosting, with an adult watching.
- Draw faces or patterns with tube icing. Let them turn the rectangle ones into scarecrows with sprinkle hair.
- For a finished look, dip the bottom edge in chocolate. A parent melts it and cools it to warm, and only ages 6-8 dip.
TipButter your hands or the cutters lightly, because these are sticky. This is the one dessert I’d put a bowl of warm water and a towel next to.
7. Harvest Dirt Cups (Ages 3-6)
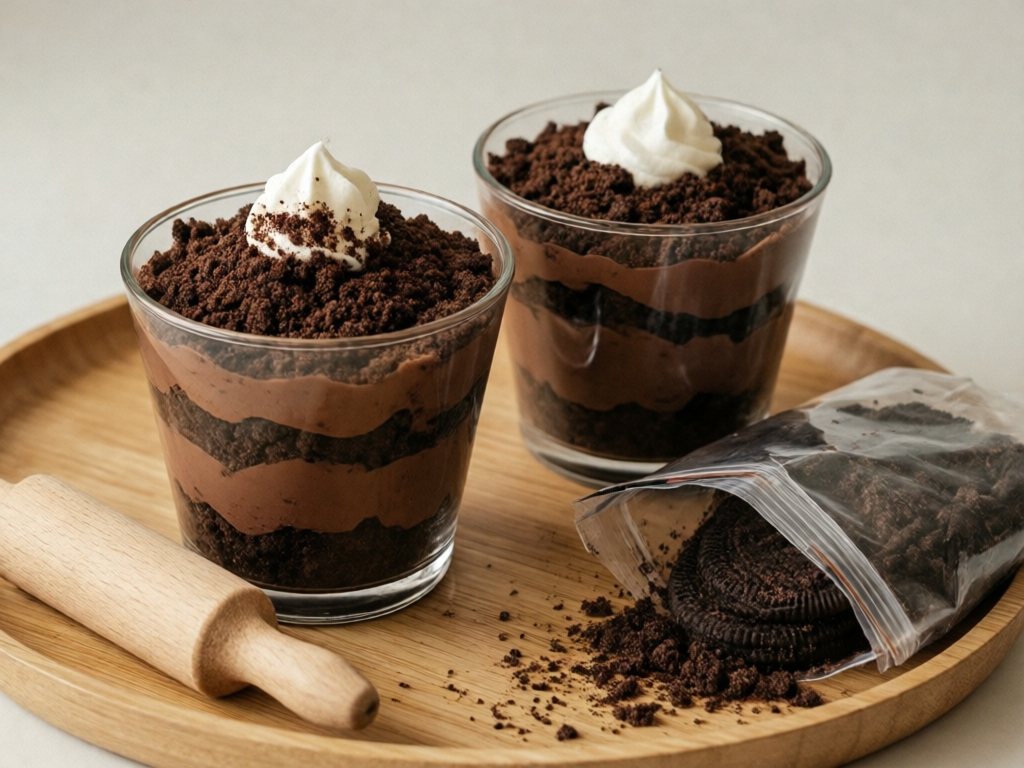
This is the one for the littlest decorators, and it asks almost nothing of the parent. Pudding, crushed cookies, and gummy worms are all that’s required, and the “digging” makes a 3-year-old feel like the head chef.
Make-ahead step (parent):
- Make chocolate pudding from a box (or from scratch) up to two days before. Two 3.9-ounce boxes of instant chocolate pudding mix and 4 cups of milk make about 4 cups, enough for ½ cup of pudding in each of eight 6-ounce cups. Spoon it into a covered container and refrigerate.
- Set out 20 whole chocolate sandwich cookies (2 to 3 per cup) and a sturdy zip bag for smashing. If your child won’t smash, pre-crush the cookies yourself and store the crumbs in a sealed bag.
- Set out clear cups, gummy worms, and candy pumpkins (the little orange ones sold in the fall candy aisle).
Decorate day-of step (kid):
- Smash the cookies in the bag with a small rolling pin or soft mallet, with an adult nearby. This is the best part.
- Spoon about ¼ cup of pudding into each cup, then add a layer of crumbs.
- Add the rest of the pudding (another ¼ cup) and top with more crumbs to make “dirt.”
- For ages 4 and up, press in two gummy worms and a candy pumpkin so it looks like a harvest garden. Younger kids get crumbs or whipped cream on top (see the safety note).
Safety firstSkip the gummy worms and candy pumpkins for children under 4, since chewy candy is a choking hazard even in short pieces. Top those cups with cookie crumbs or a dollop of whipped cream, and stay within arm’s reach while they eat.
Matching the Job to the Age: Who Can Do What
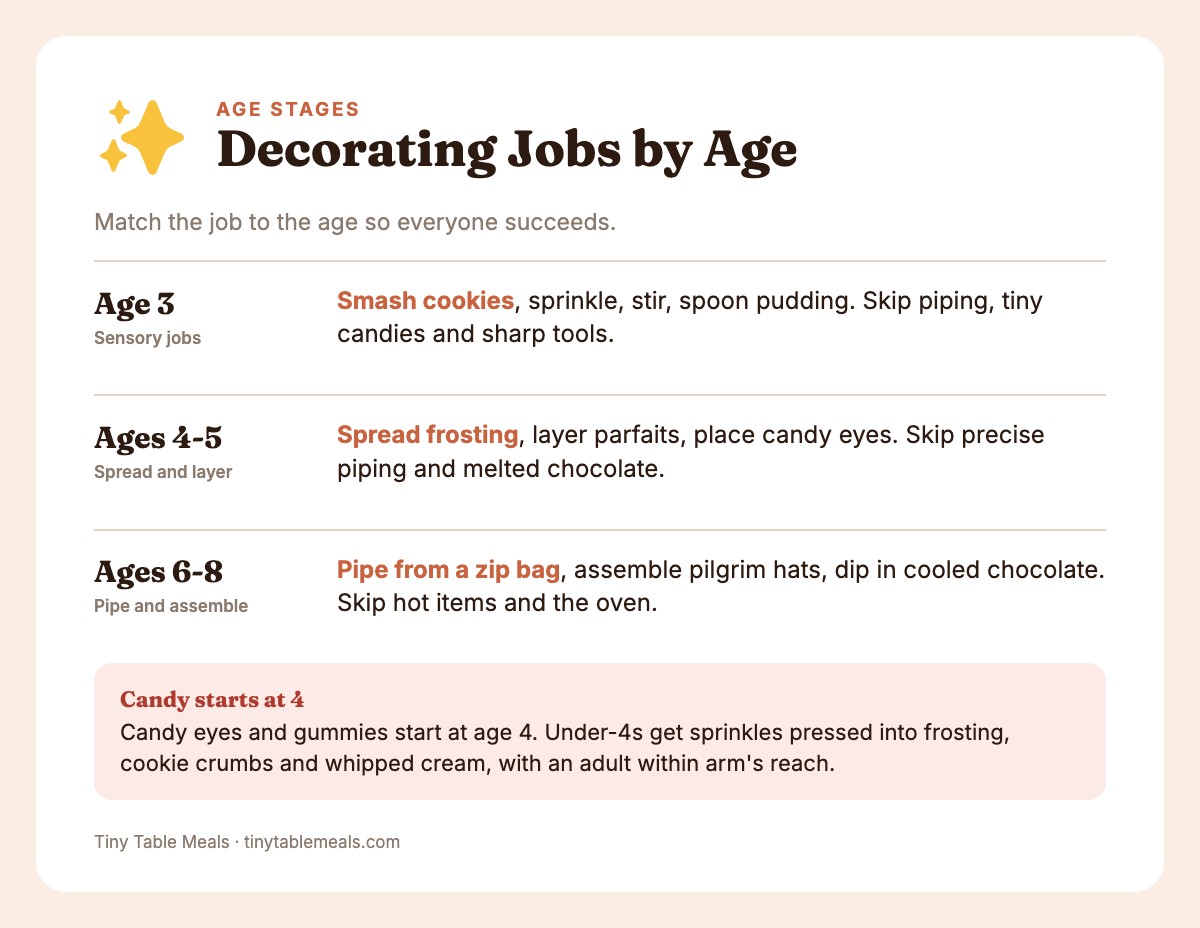
Kids aged 3 to 8 are a wide range, and a task that makes a 7-year-old feel proud can be frustrating for a 3-year-old. Here’s a rough guide for how I assign decorating jobs at our table. If you want a full overview of what kids can handle at each age across all kinds of cooking, my age-by-age guide to teaching kids to cook goes deeper.
| Age | Great jobs | Skip for now |
|---|---|---|
| 3 | Smashing cookies in a bag, sprinkling, stirring, pressing sprinkles or cookie crumbs into frosting, spooning pudding | Piping frosting, tiny candies, anything needing a sharp tool |
| 4-5 | Spreading frosting with a butter knife, layering parfaits, placing candy eyes, using squeeze bottles | Precise piping, melted chocolate |
| 6-8 | Piping from a zip bag, making patterns, assembling pilgrim hats, dipping treats in cooled chocolate, helping younger siblings | Handling hot items, using the oven |
Safety firstCandy decorations, candy eyes and gummies start at age 4. Under-4s get sprinkles pressed into frosting, cookie crumbs and whipped cream, with an adult within arm’s reach.
A few more tips for mixed-age groups:
- Pair older kids with younger ones. An 8-year-old who is “in charge” of the sprinkles for a 4-year-old will take the job seriously, and everyone gets to feel helpful.
- Give each kid a lane. One child does cupcakes, another does parfaits. This stops squabbles about who gets which candy.
- Let them choose. Offering two or three dessert options to decorate gives kids ownership without overwhelming them.
- Set a timer for the activity. Forty-five minutes is plenty for ages 5 and up. After that, attention drifts, and the decorations get weird (in a bad way).
Setting Up the Decorating Station (and Surviving the Mess)
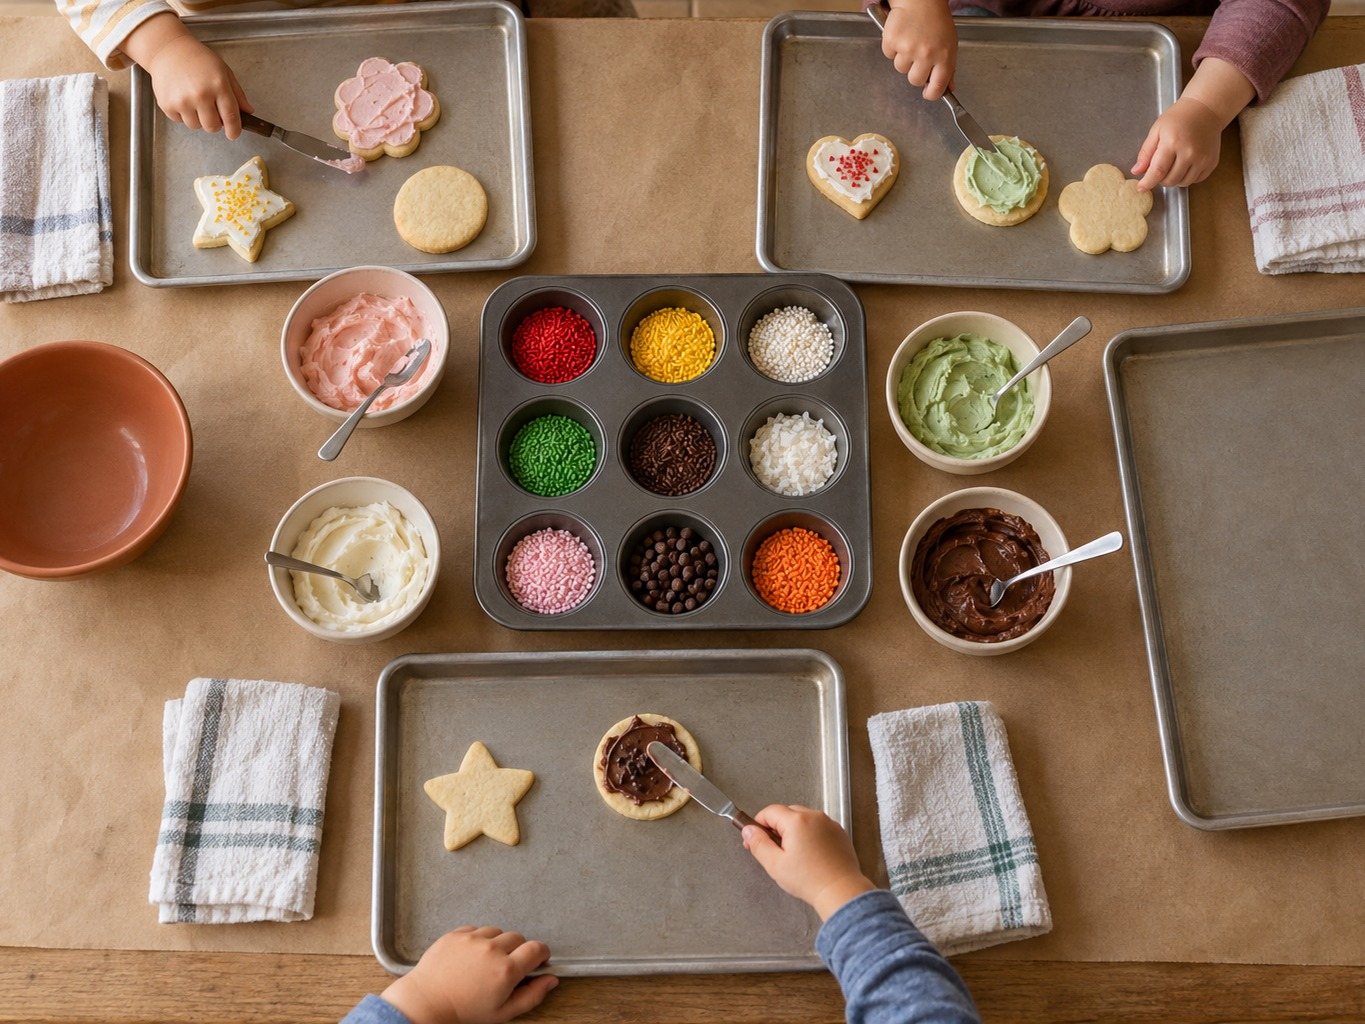
A little setup makes a huge difference. This is the exact process I use.
What to put on the table
- A washable tablecloth or a few sheets of parchment or craft paper taped down
- A rimmed baking sheet under each decorating project to catch sprinkles
- Muffin tins or small bowls for every topping (one cup per color)
- Small spoons, butter knives, and zip bags with snipped corners
- A damp towel at each seat and a trash bowl for wrappers
- A “finished” tray, so decorated desserts have a place to go while they set
How to cut the cleanup
- Cover the table before anyone sits down.
- Put on aprons, or old T-shirts that can go straight in the wash.
- Hand out each topping in a small amount, since refills are easier than spills.
- Keep the pudding, frosting, and anything wet on the side farthest from the sprinkles.
- Do a “last bite” check: before the kids walk away, have them wash their hands and wipe their faces. Frosting on a cousin’s sweater is a story nobody wants to retell.
Create a Thanksgiving dessert board
If you want a finale that feels fancy, let the kids arrange a dessert board. Put the finished cookies, cereal pumpkins, and cupcakes on a large tray or cutting board. Fill the gaps with grapes (quartered lengthwise for children under 4), very thin or cooked apple slices, and clementine segments with the membrane and seeds removed. Kids get to play “designer,” and your dessert table looks like something from a magazine.
If you’re also feeding a pack of kids before dinner, the kid-friendly Thanksgiving appetizers post has finger foods that keep the hungry crowd happy while the desserts come together.
Allergies, Swaps, and Food Safety
Thanksgiving tables often have guests with food restrictions, and kid-decorated desserts mean lots of small hands and open candy bowls. A little planning keeps everyone safe.
Common allergy swaps
| Concern | Easy swap |
|---|---|
| Nuts | Use nut-free chocolates and cookies, and read every label. Skip peanut butter cups in favor of mini chocolate cups. |
| Dairy | Dairy-free cream cheese, coconut whipped topping, and dairy-free butter work in the parfaits, frosting, and cereal treats. |
| Eggs | Use an egg-free sugar cookie recipe or a store-bought egg-free dough. Pudding cups and cereal treats are egg-free already. |
| Gluten | Gluten-free graham crackers, cookies, and cereal. Check the candy labels as well. |
If you have a guest with a serious allergy, the safest approach is to make one separate, clearly labeled dessert in a clean kitchen, with its own utensils and serving dish. Don’t rely on “just picking the nuts off.” For more ideas, the allergy-friendly Halloween classroom treats guide has good swaps you can reuse for Thanksgiving.
Food safety basics for make-ahead desserts
- Two-hour rule: Count the total time out of the fridge, from the moment items leave it. Cream cheese frosting, whipped cream, pudding, parfaits, dirt cups and frosted cupcakes should not sit at room temperature for more than two hours combined, and less if the room is warm. Keep fillings and frosting chilled until decorating starts.
- Wash hands first: Little hands have been everywhere. A quick wash before decorating protects the food and the family.
- No raw tasting: Don’t let anyone taste raw dough or batter, since raw flour and raw egg can both carry germs. Wash hands after handling it. Use heat-treated flour and pasteurized egg only if you make a no-bake edible dough.
- Label and date everything: Masking tape and a marker on every container will save you from the “how old is this?” mystery on Wednesday night.
Pre-decorating safety checklist
Run through this right before the kids sit down:
- Everyone has washed their hands
- Dairy items (frosting, fillings, pudding, whipped cream) came out of the fridge no more than 20 minutes ago, and you’ve noted the time
- Candy is sorted by age: candy eyes, candy corn, gummies and candy pumpkins only at the 4-and-up seats
- Red licorice is only at the 6-and-up seats
- Every candy, cookie and frosting label has been read for nuts, milk, egg and gluten
- Any allergy-safe dessert sits on its own tray with its own utensils
Choking safety for ages 3-4
Safety firstChildren under 4 should not have whole nuts, hard or gummy candy, popcorn, raw apple chunks or whole grapes. Quarter grapes lengthwise. Skip small candies, candy eyes and candy pumpkins for under 4, and stay within arm’s reach while they eat.
If you’re working with a toddler, toddler-safe Halloween snacks has shape and size guidance that carries over to holiday desserts.
How Long Each Dessert Keeps (Storage Cheat Sheet)
Use this to plan what to make first and what to leave for last.
| Dessert | Make-ahead component | Keeps for | Where to store |
|---|---|---|---|
| Sugar cookie turkeys | Baked, unfrosted cookies | 3 days (room temp) or 2 months (freezer) | Airtight container |
| Pumpkin parfait cups | Pumpkin filling and graham crumbs | Filling 2 days; crumbs 3 days | Fridge (filling), pantry (crumbs) |
| Fall leaf cupcakes | Unfrosted cupcakes and frosting | Cupcakes 2 months frozen; frosting 3 days | Freezer and fridge |
| Apple crisp cups | Filled ramekins and crumble topping | Ramekins 1-2 days; topping 1 month frozen | Fridge and freezer |
| Pilgrim hat cookies | Store-bought or baked cookies; frostings | Cookies 3-5 days; frosting 3 days | Pantry and fridge |
| Cereal-treat pumpkins | Cut-out shapes | 2 days | Airtight container, parchment between layers |
| Harvest dirt cups | Pudding and cookie crumbs | Pudding 1-2 days; crumbs 3 days | Fridge and pantry |
Once the kids decorate, anything with cream cheese, whipped cream or pudding goes back in the fridge. Only cookies or treats with shelf-stable frosting (butter or shortening-based chocolate frosting, sprinkles) can sit on the counter under a cake dome, for no more than 2 hours total.
A Sample Thanksgiving Day Dessert Plan
If you want a no-thinking-required version, here’s a realistic plan for a family with two or three kids and a modest dessert table. It uses three of the seven desserts.
| Time | Who | Job |
|---|---|---|
| Wednesday evening (15 min) | Parent | Set out only shelf-stable items: sprinkles, candies, cookies, bowls and muffin tins. Keep the cream cheese and chocolate frostings, pumpkin filling, pudding and whipped cream in the fridge. Leave the cupcakes in the freezer; they thaw in 1 to 2 hours on Thursday morning. |
| Thursday, 12:30 p.m. | Parent | Lay out the tablecloth and decorating supplies. Fill the muffin tin cups with shelf-stable toppings. Put on a movie or a favorite playlist. |
| 12:40 p.m. | Parent | Take the cream cheese and chocolate frostings out of the fridge to soften for about 20 minutes; their two-hour clock starts now. Bring out the fillings and pudding just before the kids start. |
| 1:00 p.m. (45 min) | Kids | Younger kids build dirt cups or parfaits. Middle kids frost the cupcakes. Older kids make turkey cookies and help the little ones. |
| 1:45 p.m. | Parent | Cover and refrigerate anything with dairy. Wipe down the table, get everyone washed up, and take photos of the finished desserts (and the kids holding them). |
| Dessert time | Kids | Let the kids serve the desserts they made. This is the moment they’ll remember. |
This leaves the oven free for the turkey and sides, and your hands free for the real cooking. The plan skips the apple crisp, which needs oven time on the day.
Frequently Asked Questions
What are the best make-ahead Thanksgiving desserts for kids to decorate?
Cookies, cupcakes, pudding or parfait cups, and cereal treats are the easiest. Each can be baked, mixed, or chilled days ahead, so the only job left on Thanksgiving Day is the decorating.
How far ahead can I make Thanksgiving desserts?
It depends on the dessert. Unfrosted cupcakes and baked cookies freeze well for up to two months. Make cream cheese frosting, pumpkin filling and pudding on Tuesday or Wednesday so they’re no more than two days old on Thanksgiving. Cereal treats stay fresh for two days in an airtight container. Save the final decorating for Thanksgiving Day so everything looks and tastes fresh.
What Thanksgiving dishes can kids help make safely?
Kids can safely do the assembly parts of many dishes: layering parfaits, spreading frosting, placing candy, stirring cold mixtures, and crushing cookies in a zip bag. For savory dishes, they can wash vegetables, tear lettuce, and arrange appetizers. Keep hot pans, knives, and the oven as adult jobs. A good rule is that kids handle cold, soft, and sticky tasks while adults handle hot and sharp ones.
How do I keep decorated desserts from getting soggy or melting?
Decorate as close to serving time as you can, ideally a few hours before dessert, and keep anything with whipped cream or cream cheese in the fridge once the kids finish. Let frosting set for 10 to 15 minutes before stacking or moving cookies. For parfaits, add the crumb layer last if you need them to stay crunchy, or keep the crumbs separate and let guests add their own.
What if my child has a food allergy or we’re hosting guests with allergies?
Plan one dessert that is free of your top allergens and keep it completely separate from the others, with clean utensils and its own serving dish. Read every label on candy, cookies, and frosting, since many contain traces of nuts, milk, or eggs. Dairy-free cream cheese and whipped topping, nut-free chocolates, and egg-free dough all make good swaps. When in doubt, ask the guest or their parent what they’re comfortable with.
My 3-year-old keeps eating all the candy instead of decorating. Any tips?
That’s completely normal. Give them a small portion of each topping so there’s less to sneak, plus a “taste bowl” of their own so snacking feels allowed. Fill it only with sprinkles, cookie crumbs, or a spoonful of whipped cream or pudding, and keep candy out of reach.
Choose mostly sensory jobs, like smashing cookies, spooning pudding, and sprinkling. Keep the session to 20 to 30 minutes for 3-year-olds; the 45-minute plan is for ages 5 and up. Stay within arm’s reach while they eat.
Do I need special tools to let kids decorate?
No. Butter knives, small spoons, zip bags with the corner snipped, and a muffin tin for toppings are enough. A rimmed baking sheet under each project catches sprinkles, and a damp towel at each seat handles sticky fingers. If your child loves cooking, you could add a few kid-sized tools, and the gifts for kids who love to cook guide has ideas by age.
Make-Ahead Thanksgiving Desserts Kids Can Decorate: The Short Version
The best Thanksgiving dessert table isn’t the one with the prettiest pies. It’s the one where a 5-year-old points to a lopsided turkey cookie and says, “I made that one,” and the whole room makes a big deal of it.
You don’t need to do all seven desserts. Pick two or three, make the quiet parts ahead during the week, and save the fun part for your kids on the big day. You’ll get a calmer kitchen, a happier child, and a dessert table with real heart. And the next morning, if you’re looking for what to do with all the extra turkey and sweet leftovers, the Thanksgiving leftovers breakfast ideas have you covered.
Happy decorating, mama. The sprinkles will wash out of the carpet eventually.