End-of-School-Year Treats Kids Can Help Bake: 15 Crowd-Pleasing Recipes for Class Parties
Get 15 kid-friendly recipes for end-of-school-year class parties and discover how baking together creates tangible celebrations, builds essential skills, and offers intentional family time. You'll also find age-appropriate tasks for your children.
- Make end-of-year celebrations tangible for your kids through baking.
- Build your child's executive function skills by involving them in baking tasks.
- Create intentional family time and connection by baking together.
- Teach your child generosity by sharing their homemade treats with others.
- Assign age-appropriate baking tasks to keep your child engaged and safe.
The email arrives in mid-April. Subject line: “End-of-Year Class Celebration — Sign-Up Sheet.” You open it, scroll past the paper plates and juice boxes, and there it is: the treats slot. Unclaimed. Waiting for you.
Last year, I panic-bought a tray of grocery store sugar cookies at 7:45 AM on the morning of the party. They were fine. Nobody complained. But my daughter noticed. “Lily’s mom made brownies with sprinkles,” she mentioned casually on the drive home. Not accusatory. Just… observational. The kind of observation that burrows into your brain and lives there.
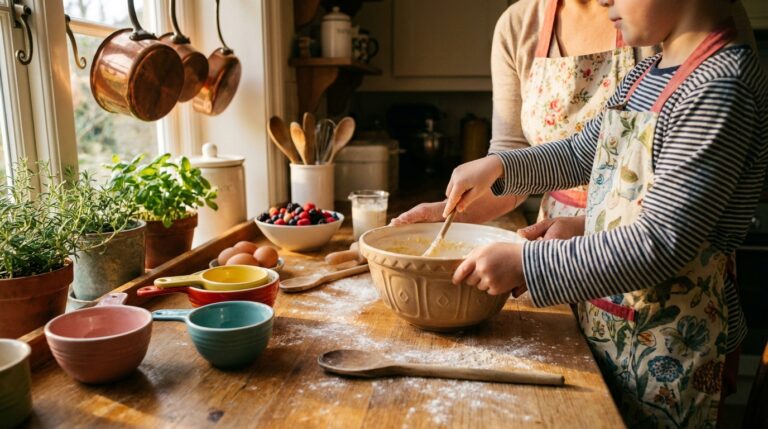
This year, we’re doing it differently. Not because store-bought isn’t perfectly acceptable (it absolutely is), but because baking together before the end of the school year turned out to be one of our best traditions. My kids are proud when they bring something they helped make. They tell their friends, “I cracked the eggs.” They beam when the teacher says it’s delicious. That matters.
So here are 15 recipes your kids can genuinely help bake — with real instructions, allergen notes, and age-appropriate tasks. These aren’t aspirational Pinterest projects that require a pastry degree. They’re crowd-pleasers that work in real kitchens with real kids who want to lick the spoon.
Why Baking Together Matters at the End of the School Year
Before we get into recipes, a quick word about why this is worth the mess.
It’s a Celebration They Can Touch
The end of the school year is abstract for young kids. “You finished first grade” doesn’t mean much to a six-year-old. But mixing batter, pressing cookie cutters, and decorating cupcakes for their friends? That’s tangible. Baking creates a physical celebration they can participate in, be proud of, and share. It transforms “the school year is over” from a concept into an experience.
It Builds Skills They’ll Keep
Every recipe in this guide involves real kitchen skills — measuring, mixing, cracking eggs, reading a recipe, understanding heat safety, and following sequential instructions. These are the same executive function skills your child practices in math and reading. For a deeper dive into what your child can do at each age, our age-by-age cooking guide covers everything from toddlers to teens.
It’s Intentional Time Together
April and May are chaotic. End-of-year testing, field trips, spring sports, teacher gifts, summer camp registration — parents are running on fumes. Setting aside 45 minutes to bake with your child is a forced slowdown. You’re standing next to each other. You’re talking. You’re laughing when the flour poofs everywhere. In the rush of wrapping up the school year, baking together is the pause that makes the whole thing feel intentional rather than just survived.
It Teaches Generosity
When your child bakes something and brings it to share with their entire class, they learn that making something with their own hands and giving it away feels really good. That’s a lesson worth more than any worksheet.
Age-by-Age Baking Tasks: What Your Child Can Actually Do
This is the part most recipes skip, and it’s the part that matters most. If you give a three-year-old a whisk and a bowl of cake batter, you’ll have batter on the ceiling. If you give an eight-year-old only the job of “watching,” they’ll lose interest in four minutes. Match the task to the age.
Ages 2-3: The Sensory Helpers
At this age, baking is a sensory experience, not a precision activity. Expect mess. Embrace it.
What they can do:
- Pour pre-measured ingredients into the bowl (hold the cup with them)
- Stir thick batters with a wooden spoon (hand over hand)
- Press cookie cutters into dough (you position, they press)
- Sprinkle toppings (sprinkles, chocolate chips, shredded coconut)
- Wash fruits for recipes (in a bowl of water — they love this)
- Tear lettuce or herbs (for savory recipes)
What they shouldn’t do yet: Handle anything near the oven, use sharp utensils, or crack eggs (unless you’re okay with shell fishing).
Ages 4-5: The Measuring Crew
Preschoolers can start taking on real tasks with supervision. They’re developing fine motor control and love feeling helpful.
What they can do:
- Measure dry ingredients with cups and spoons (show them how to level)
- Crack eggs (teach the flat-surface method — crack on the counter, not the bowl edge)
- Mix batter with a hand whisk or fork
- Spread frosting or nut butter with a butter knife
- Roll dough into balls
- Count out ingredients (“Put 12 chocolate chips on each cookie”)
- Use a cookie scoop with assistance
Growing skill: Following two-step instructions (“First pour the flour, then stir it”).
Ages 6-8: The Sous Chefs
This is the sweet spot where kids can genuinely contribute to recipes. They’re reading, they understand fractions (sort of), and they have the coordination for more complex tasks.
What they can do:
- Read and follow simple recipes with guidance
- Measure both dry and liquid ingredients independently
- Use a hand mixer on low speed (with supervision)
- Grease pans with butter or cooking spray
- Slice soft foods with a kid-safe knife (bananas, strawberries, butter)
- Operate a toaster oven (with supervision)
- Set a timer
- Pour batter into muffin tins
Growing skill: Understanding cause and effect (“We need baking soda because it makes the cookies puff up”).
Ages 9-12: The Lead Bakers
At this age, your child can manage most of a recipe with you in the kitchen for guidance and oven duties.
What they can do:
- Follow a recipe independently from start to finish
- Operate a stand mixer or hand mixer
- Use a regular knife for most cutting tasks (with knife safety reminders)
- Put items in and take items out of the oven (with oven mitts and supervision)
- Adjust oven temperature
- Double or halve recipes (fractions in action!)
- Decorate with piping bags
- Clean up their station
Growing skill: Troubleshooting (“The batter looks too thick — should I add more milk?”).
15 End-of-School-Year Recipes Kids Can Help Bake
Every recipe below includes the yield, prep time, key allergens, and specific tasks for different ages. All recipes are designed to serve a class of 20-25 kids.
Cookies and Bars
1. Confetti Sugar Cookies
These are the ultimate celebration cookie — buttery, soft, and loaded with rainbow sprinkles that scream “school’s out.”
Yield: 36 cookies | Prep: 15 min | Bake: 10 min | Allergens: Dairy, eggs, wheat
Ingredients:
- 2 3/4 cups all-purpose flour
- 1 tsp baking soda
- 1/2 tsp baking powder
- 1/2 tsp salt
- 1 cup (2 sticks) unsalted butter, softened
- 1 1/2 cups granulated sugar
- 2 large eggs
- 2 tsp vanilla extract
- 1/2 tsp almond extract
- 1/2 cup rainbow sprinkles, plus more for topping
Instructions:
- Preheat oven to 350 degrees F. Line baking sheets with parchment paper.
- Whisk flour, baking soda, baking powder, and salt in a medium bowl.
- In a large bowl, beat butter and sugar until light and fluffy (3 minutes with a hand mixer).
- Beat in eggs one at a time, then vanilla and almond extract.
- Gradually add dry ingredients to wet, mixing on low until just combined.
- Fold in sprinkles by hand.
- Scoop 1.5-tablespoon balls onto baking sheets, spacing 2 inches apart. Press a few extra sprinkles on top.
- Bake 9-11 minutes until edges are barely golden. Centers will look underdone — that’s correct.
- Cool on the baking sheet for 5 minutes, then transfer to a wire rack.
Kid tasks by age:
- Ages 3-4: Pour sprinkles, press sprinkles onto dough balls
- Ages 5-7: Measure flour, crack eggs, scoop dough balls
- Ages 8+: Manage the mixer, follow the recipe, monitor bake time
2. Chewy Chocolate Chip Cookie Bars
Easier than individual cookies because there’s no scooping — just press the dough into a pan and bake.
Yield: 24 bars | Prep: 10 min | Bake: 25 min | Allergens: Dairy, eggs, wheat
Ingredients:
- 2 1/4 cups all-purpose flour
- 1 tsp baking soda
- 1 tsp salt
- 1 cup (2 sticks) unsalted butter, melted
- 3/4 cup packed brown sugar
- 3/4 cup granulated sugar
- 2 large eggs
- 2 tsp vanilla extract
- 2 cups semi-sweet chocolate chips
Instructions:
- Preheat oven to 350 degrees F. Line a 9×13 pan with parchment, leaving overhang for easy removal.
- Whisk flour, baking soda, and salt.
- In a large bowl, stir melted butter with both sugars until smooth.
- Stir in eggs and vanilla.
- Add dry ingredients and stir until just combined. Fold in chocolate chips.
- Press dough evenly into prepared pan. Sprinkle a few extra chips on top.
- Bake 22-25 minutes until golden on top but still slightly soft in the center.
- Cool completely in the pan before cutting into bars.
Kid tasks by age:
- Ages 3-4: Pour chocolate chips, press dough into pan (with help)
- Ages 5-7: Measure sugars, stir batter, sprinkle chips on top
- Ages 8+: Melt butter (microwave, supervised), mix the entire recipe
3. Lemon Sunshine Bars
Bright, tangy, and perfect for a spring celebration. The powdered sugar topping makes them feel fancy.
Yield: 24 bars | Prep: 15 min | Bake: 40 min total | Allergens: Dairy, eggs, wheat
Ingredients:
For the shortbread base:
- 1 cup (2 sticks) unsalted butter, softened
- 1/2 cup powdered sugar
- 2 cups all-purpose flour
- 1/4 tsp salt
For the lemon filling:
- 4 large eggs
- 1 1/2 cups granulated sugar
- 1/4 cup all-purpose flour
- 2/3 cup fresh lemon juice (about 4-5 lemons)
- Zest of 2 lemons
- Powdered sugar for dusting
Instructions:
- Preheat oven to 350 degrees F. Line a 9×13 pan with parchment.
- For the base: Mix butter and powdered sugar until smooth. Add flour and salt, mix until crumbly. Press evenly into the pan.
- Bake the base for 18-20 minutes until barely golden.
- While the base bakes, whisk eggs, sugar, flour, lemon juice, and zest until smooth.
- Pour lemon filling over the hot crust.
- Bake 18-20 more minutes until filling is set (it shouldn’t jiggle).
- Cool completely, then dust generously with powdered sugar. Cut into bars.
Kid tasks by age:
- Ages 3-5: Press the shortbread into the pan, shake powdered sugar through a sieve
- Ages 6-8: Juice the lemons (a citrus press works great for kids), zest with a Microplane (supervised), whisk the filling
- Ages 9+: Manage the full recipe including timing both bakes
4. S’mores Cookie Cups
Individual servings, minimal mess, and they combine three things every kid loves: chocolate, marshmallow, and graham crackers.
Yield: 24 cookie cups | Prep: 15 min | Bake: 14 min | Allergens: Dairy, eggs, wheat
Ingredients:
- 1 package (16.5 oz) refrigerated chocolate chip cookie dough (Pillsbury or Toll House)
- 1 cup mini marshmallows
- 1/2 cup milk chocolate chips
- 1/2 cup crushed graham crackers
Instructions:
- Preheat oven to 350 degrees F. Grease a 24-cup mini muffin tin with cooking spray.
- Cut cookie dough into 24 equal pieces. Press each piece into a muffin cup, forming a small bowl shape.
- Bake 10 minutes until edges are set.
- Remove from oven. Press the center of each cookie down with a small spoon to reform the bowl.
- Drop 3-4 mini marshmallows and a few chocolate chips into each cup.
- Return to oven for 3-4 minutes until marshmallows puff.
- Remove and immediately sprinkle crushed graham crackers on top.
- Cool 10 minutes in the pan, then carefully twist and remove.
Kid tasks by age:
- Ages 3-5: Press marshmallows into cookie cups, sprinkle graham cracker crumbs
- Ages 6-8: Cut and press dough into muffin cups, portion marshmallows and chips
- Ages 9+: Handle the full process including oven steps (supervised)
5. Brown Butter Rice Krispie Treats with Sprinkles
Browning the butter is the secret that elevates these from cafeteria-basic to “can I have the recipe?” good. These are one of the easiest recipes on this list, and my go-to when time is tight.
Yield: 24 squares | Prep: 5 min | Cook: 10 min (stovetop) | Allergens: Dairy
Ingredients:
- 4 tablespoons unsalted butter
- 1 bag (10 oz) mini marshmallows, plus 1 cup reserved
- 1/4 tsp salt
- 6 cups Rice Krispies cereal
- 1/3 cup rainbow sprinkles
Instructions:
- Line a 9×13 pan with parchment. Spray lightly with cooking spray.
- Melt butter in a large pot over medium heat, stirring constantly, until it turns golden brown and smells nutty (3-4 minutes). Watch carefully — it goes from brown to burned fast.
- Add the bag of marshmallows and salt. Stir until completely melted and smooth.
- Remove from heat. Stir in cereal until fully coated.
- Stir in the reserved 1 cup of marshmallows (these create gooey pockets) and sprinkles.
- Press into prepared pan with a greased spatula or wet hands. Don’t press too firmly — lighter pressure means softer treats.
- Cool 30 minutes. Cut into squares.
Kid tasks by age:
- Ages 3-5: Pour sprinkles, pour cereal into the pot (removed from heat), help press into pan
- Ages 6-8: Measure cereal and marshmallows, stir the mixture, press into pan
- Ages 9+: Brown the butter at the stove (supervised), manage the full recipe
No-Bake Treats
These are lifesavers when you don’t have time to preheat an oven or your kid has a baking attention span of approximately seven minutes.
6. Energy Bite Truffles
Healthy enough that you won’t feel guilty about them, tasty enough that kids eat them by the fistful. These double as great after-school snacks too.
Yield: 30 bites | Prep: 15 min | Chill: 30 min | Allergens: Tree nuts (can sub seed butter for nut-free)
Ingredients:
- 1 cup old-fashioned oats
- 1/2 cup peanut butter (or sunflower seed butter for nut-free)
- 1/3 cup honey
- 1/2 cup mini chocolate chips
- 1/3 cup ground flaxseed
- 1 tsp vanilla extract
- Pinch of salt
Instructions:
- Stir all ingredients together in a large bowl until thoroughly combined.
- Refrigerate 15-20 minutes until the mixture firms up slightly.
- Roll into 1-inch balls using your hands (slightly wet hands prevent sticking).
- Place on a parchment-lined tray. Refrigerate at least 30 minutes before packaging.
- Store in the fridge until ready to serve (they soften at room temperature after a couple of hours).
Kid tasks by age:
- Ages 3-5: Stir ingredients, pour chocolate chips, roll bites (this is their favorite part)
- Ages 6+: Measure all ingredients, manage the entire recipe independently
7. Oreo Truffles
Three ingredients. Zero baking. Maximum “wow” factor when you bring these to a class party.
Yield: 30 truffles | Prep: 30 min | Chill: 1 hour | Allergens: Dairy, wheat, soy
Ingredients:
- 1 package (14.3 oz) Oreo cookies
- 8 oz cream cheese, softened
- 12 oz white or milk chocolate melting wafers (Ghirardelli or CandiQuik)
- Sprinkles for decorating
Instructions:
- Crush Oreos into fine crumbs. Easiest method: seal in a zip-lock bag and let your child go at them with a rolling pin. Or pulse in a food processor.
- Mix Oreo crumbs with softened cream cheese until fully combined and the mixture holds together.
- Roll into 1-inch balls. Place on a parchment-lined baking sheet. Freeze for 15 minutes.
- Melt chocolate wafers according to package directions (microwave in 30-second intervals, stirring between).
- Using a fork, dip each truffle into melted chocolate, letting excess drip off. Place back on parchment.
- Immediately add sprinkles before chocolate sets.
- Refrigerate 30-45 minutes until chocolate is fully set.
Kid tasks by age:
- Ages 3-5: Crush Oreos in the bag (so satisfying), roll balls, add sprinkles
- Ages 6-8: Mix the crumb and cream cheese mixture, dip truffles (with coaching)
- Ages 9+: Full recipe including melting chocolate (microwave, supervised)
8. Frozen Yogurt Bark
A perfect warm-weather treat that’s also one of the healthiest options on this list. Make it the night before the party.
Yield: 20-24 pieces | Prep: 10 min | Freeze: 3 hours | Allergens: Dairy
Ingredients:
- 3 cups vanilla Greek yogurt (Fage or Stonyfield)
- 2 tablespoons honey
- 1 cup mixed berries (strawberries, blueberries, raspberries)
- 1/4 cup mini chocolate chips
- 1/4 cup granola
- Sliced bananas, kiwi, or mango (optional)
Instructions:
- Line a large baking sheet with parchment paper.
- Mix yogurt and honey together until smooth.
- Spread yogurt mixture onto parchment in an even layer, about 1/4 inch thick.
- Scatter berries, chocolate chips, granola, and any other toppings evenly across the surface.
- Freeze for at least 3 hours or overnight until completely solid.
- Break or cut into irregular pieces. Store in a freezer bag.
- Transport in a cooler bag with ice packs. It will stay frozen for about 1 hour at room temperature.
Kid tasks by age:
- Ages 3+: This is an ALL-AGES winner. Every kid can spread yogurt and scatter toppings. It’s basically edible art.
Cupcakes and Muffins
9. Funfetti Cupcakes from Scratch
Store-bought mix is fine (truly), but homemade funfetti cupcakes taste noticeably better and aren’t any harder.
Yield: 24 cupcakes | Prep: 15 min | Bake: 18 min | Allergens: Dairy, eggs, wheat
Ingredients:
For the cupcakes:
- 2 1/2 cups all-purpose flour
- 2 tsp baking powder
- 1/2 tsp salt
- 3/4 cup (1.5 sticks) unsalted butter, softened
- 1 1/2 cups granulated sugar
- 4 large egg whites (save the yolks for scrambled eggs tomorrow)
- 2 tsp vanilla extract
- 1 cup whole milk
- 1/2 cup rainbow jimmies (use jimmies, not nonpareils — nonpareils bleed into the batter)
For the vanilla buttercream:
- 1 cup (2 sticks) unsalted butter, softened
- 4 cups powdered sugar
- 2-3 tablespoons whole milk
- 2 tsp vanilla extract
- Pinch of salt
- Extra sprinkles for topping
Instructions:
- Preheat oven to 350 degrees F. Line two 12-cup muffin tins with cupcake liners.
- Whisk flour, baking powder, and salt.
- Beat butter and sugar until light and fluffy (3 minutes).
- Add egg whites one at a time, beating well after each. Add vanilla.
- Alternate adding dry ingredients and milk in three additions, beginning and ending with dry. Mix on low — don’t overmix.
- Fold in jimmies by hand.
- Fill liners 2/3 full. Bake 16-18 minutes until a toothpick comes out clean.
- Cool completely before frosting.
- For buttercream: Beat butter until smooth (2 minutes). Gradually add powdered sugar, one cup at a time. Add milk, vanilla, and salt. Beat on high for 2 minutes until fluffy.
- Frost cupcakes and top with sprinkles.
Kid tasks by age:
- Ages 3-4: Pour sprinkles, fill cupcake liners (with a scoop), add sprinkles to frosted cupcakes
- Ages 5-7: Measure ingredients, crack and separate eggs (demonstrate first), stir by hand
- Ages 8+: Operate the mixer, pipe frosting (use a zip-lock bag with a corner cut off)
10. Banana Chocolate Chip Mini Muffins
These are the “accidentally healthy” option. No one at the class party needs to know there’s no added oil and minimal sugar. They’re just delicious.
Yield: 36 mini muffins | Prep: 10 min | Bake: 14 min | Allergens: Eggs, wheat, dairy
Ingredients:
- 3 very ripe bananas, mashed
- 1/3 cup maple syrup
- 1 large egg
- 1/4 cup plain Greek yogurt
- 1 tsp vanilla extract
- 1 3/4 cups whole wheat flour (or all-purpose)
- 1 tsp baking soda
- 1/2 tsp cinnamon
- 1/4 tsp salt
- 2/3 cup mini chocolate chips
Instructions:
- Preheat oven to 350 degrees F. Grease a 36-cup mini muffin tin (or do two batches in a 24-cup).
- Mash bananas in a large bowl. Stir in maple syrup, egg, yogurt, and vanilla.
- Add flour, baking soda, cinnamon, and salt. Stir until just combined.
- Fold in chocolate chips.
- Fill mini muffin cups 3/4 full.
- Bake 12-14 minutes until a toothpick comes out clean.
- Cool 5 minutes in the pan, then transfer to a wire rack.
Kid tasks by age:
- Ages 3-5: Mash bananas (give them a fork and let them go), pour chocolate chips, fill muffin cups
- Ages 6+: Measure, mix, and manage the full recipe
Savory Options
Not every class party needs dessert. These savory treats are a welcome change and handle allergen concerns well.
11. Pizza Pinwheels
Essentially pizza in a portable, shareable format. These disappear in minutes at every party I’ve brought them to.
Yield: 24 pinwheels | Prep: 15 min | Bake: 15 min | Allergens: Dairy, wheat
Ingredients:
- 1 can (13.8 oz) refrigerated pizza dough (Pillsbury)
- 1/2 cup marinara sauce
- 1 1/2 cups shredded mozzarella cheese
- 1/2 cup mini pepperoni slices
- 1 tsp Italian seasoning
- Marinara for dipping (optional)
Instructions:
- Preheat oven to 375 degrees F. Line a baking sheet with parchment.
- Unroll pizza dough onto a lightly floured surface. Press into a roughly 10×14-inch rectangle.
- Spread marinara evenly over the dough, leaving a 1/2-inch border at one long edge.
- Sprinkle cheese, pepperoni, and Italian seasoning over the sauce.
- Starting from the long edge opposite the border, roll the dough into a tight log. Pinch the seam to seal.
- Using a sharp knife, cut into 1/2-inch thick rounds (about 24 pinwheels).
- Place cut-side down on the baking sheet, spacing 1 inch apart.
- Bake 13-15 minutes until golden and cheese is bubbly.
- Serve warm or at room temperature with marinara for dipping.
Kid tasks by age:
- Ages 3-5: Sprinkle cheese and pepperoni onto the dough
- Ages 6-8: Spread sauce, help roll the log, place pinwheels on the baking sheet
- Ages 9+: Cut the pinwheels (supervised), manage the full recipe
12. Cheddar and Herb Scones
A slightly unexpected option that teachers especially love. These are sophisticated but kid-friendly, and they’re great for budget-friendly family baking since the ingredients are pantry staples.
Yield: 16 scones | Prep: 15 min | Bake: 18 min | Allergens: Dairy, eggs, wheat
Ingredients:
- 2 cups all-purpose flour
- 1 tablespoon baking powder
- 1/2 tsp salt
- 1/4 tsp garlic powder
- 6 tablespoons cold unsalted butter, cubed
- 1 cup shredded sharp cheddar cheese
- 2 tablespoons chopped fresh chives (or 1 tsp dried)
- 3/4 cup cold buttermilk
- 1 large egg
Instructions:
- Preheat oven to 400 degrees F. Line a baking sheet with parchment.
- Whisk flour, baking powder, salt, and garlic powder.
- Cut in cold butter using a pastry cutter or two forks until the mixture resembles coarse crumbs with some pea-sized pieces.
- Stir in cheese and chives.
- Whisk buttermilk and egg together, then pour into the dry mixture. Stir until just combined — don’t overwork.
- Turn dough onto a floured surface. Pat into two 6-inch rounds, about 1 inch thick.
- Cut each round into 8 wedges.
- Place on baking sheet 1 inch apart. Brush tops with a little extra buttermilk.
- Bake 16-18 minutes until golden on top.
Kid tasks by age:
- Ages 3-5: Sprinkle cheese into the bowl, “brush” buttermilk on top with a pastry brush
- Ages 6-8: Measure ingredients, cut butter into flour (with a fork), stir the dough
- Ages 9+: Pat and cut the dough, manage the full recipe
Allergen-Conscious Options
Classroom allergies are a real consideration. Many schools now require nut-free treats, and some go further with dairy-free or egg-free requirements. Here are options that handle the most common allergens while still tasting great. For more allergen-free inspiration, our egg-free breakfast ideas post has adaptable recipes and substitution tips.
13. Nut-Free, Egg-Free Fudgy Brownies
These are the brownies I bring when I don’t know what allergies are in the room. No nuts, no eggs, and somehow still incredibly fudgy.
Yield: 24 brownies | Prep: 10 min | Bake: 25 min | Allergens: Dairy, wheat (can sub GF flour), soy
Ingredients:
- 1/2 cup (1 stick) unsalted butter (or dairy-free butter like Miyoko’s)
- 1 cup granulated sugar
- 1/3 cup unsweetened cocoa powder
- 1/4 tsp salt
- 1/2 tsp vanilla extract
- 1/2 cup all-purpose flour
- 1/4 cup plain yogurt (or dairy-free yogurt)
- 1/2 cup semi-sweet chocolate chips (use Enjoy Life for dairy/soy-free)
Instructions:
- Preheat oven to 350 degrees F. Line an 8×8 pan with parchment.
- Melt butter in a medium saucepan over low heat. Remove from heat.
- Stir in sugar, cocoa powder, salt, and vanilla until smooth.
- Add flour and yogurt. Stir until just combined.
- Fold in chocolate chips.
- Pour into prepared pan and spread evenly.
- Bake 22-25 minutes until the top is set but a toothpick comes out with moist crumbs (not wet batter).
- Cool completely before cutting. These get fudgier as they cool.
Kid tasks by age:
- Ages 3-5: Stir the batter (it’s thick and satisfying), pour chocolate chips
- Ages 6+: Measure cocoa and sugar, manage the full recipe
14. Sunflower Seed Butter Crispy Treats (Top 8 Allergen-Free)
Free of peanuts, tree nuts, dairy, eggs, wheat, soy, fish, and shellfish. These are safe for virtually any classroom.
Yield: 24 squares | Prep: 5 min | Cook: 10 min | Allergens: None of the top 8 (contains sunflower seeds)**
Ingredients:
- 3 tablespoons coconut oil
- 1 bag (10 oz) marshmallows (most brands like Jet-Puffed are top-8-free; check the label)
- 1/3 cup sunflower seed butter (SunButter brand is made in a nut-free facility)
- 6 cups crispy rice cereal (use Nature’s Path Crispy Rice for GF)
- 1/4 cup mini dairy-free chocolate chips (Enjoy Life brand), optional
Instructions:
- Line a 9×13 pan with parchment. Spray lightly with coconut oil spray.
- Melt coconut oil in a large pot over medium heat.
- Add marshmallows. Stir constantly until fully melted and smooth.
- Stir in sunflower seed butter until well combined.
- Remove from heat. Add cereal and chocolate chips. Stir until fully coated.
- Press into prepared pan with greased hands or a silicone spatula.
- Cool 20 minutes before cutting.
Kid tasks by age:
- Ages 3+: Another all-ages winner. Pouring cereal, stirring, and pressing into the pan are tasks any child can help with.
15. Fruit and Yogurt Parfait Cups
When the class has multiple allergies and you want something fresh, colorful, and safe, individual parfait cups are a lifesaver. You can customize each cup if needed.
Yield: 24 cups | Prep: 20 min | Allergens: Dairy (can use coconut or oat yogurt for dairy-free)
Ingredients:
- 4 cups vanilla yogurt (or dairy-free alternative)
- 2 cups granola (check for nut-free if needed; Kind Healthy Grains is nut-free)
- 3 cups mixed fresh fruit (strawberries, blueberries, raspberries, banana slices)
- Honey for drizzling (optional)
- 24 small clear plastic cups (5 oz)
- 24 small spoons
Instructions:
- Wash and prep all fruit. Slice strawberries, halve any large blueberries, slice bananas.
- Assemble cups: 2 tablespoons yogurt, 1 tablespoon granola, a layer of mixed fruit, repeat once more.
- Top with a final sprinkle of granola and a drizzle of honey.
- Cover with plastic wrap or small lids and refrigerate until party time.
- Transport in a cooler bag.
Kid tasks by age:
- Ages 3-5: Layer fruit into cups, sprinkle granola
- Ages 6+: Slice soft fruits, assemble cups independently, manage portions
Allergen-Conscious Baking for Classrooms: A Quick Reference
Before you bake anything for a class party, check with the teacher about specific allergies. Here’s a substitution cheat sheet for the most common ones.
| Allergen | Substitute | Notes |
|---|---|---|
| Eggs | 1 egg = 1/4 cup applesauce, or 1 “flax egg” (1 tbsp ground flax + 3 tbsp water, sit 5 min) | Applesauce works better in bars/muffins; flax eggs work better in cookies |
| Dairy (butter) | Miyoko’s or Earth Balance vegan butter, or coconut oil (solid, measured 1:1) | Coconut oil gives a slightly different texture but works in most recipes |
| Dairy (milk) | Oat milk (Oatly barista is thickest), almond milk, coconut milk | Oat milk is the most neutral flavor for baking |
| Wheat/Gluten | Bob’s Red Mill 1-to-1 GF Baking Flour | This is the most reliable GF swap; no additional xanthan gum needed |
| Peanuts/Tree nuts | SunButter (sunflower seed butter), Wow Butter (soy-based), or tahini | SunButter is the closest texture to peanut butter |
| Soy | Check chocolate chips (many contain soy lecithin); Enjoy Life brand is soy-free | Most butter, flour, and sugar are naturally soy-free |
A critical note: If a child in the class has a severe allergy (anaphylaxis), ask the parent directly what brands and products are safe. Cross-contamination matters — “may contain” warnings on packaging are relevant. When in doubt, recipes 14 (Sunflower Seed Butter Crispy Treats) and 15 (Fruit Parfait Cups with dairy-free yogurt) are your safest bets.
Teacher Appreciation Treats From the Kitchen
End-of-year teacher gifts don’t need to be expensive. Some of the most appreciated gifts I’ve seen are homemade food items — especially because teachers are drowning in mugs and candles.
1. Mason Jar Cookie Mix
Layer the dry ingredients for any cookie recipe in a quart-sized Mason jar. Attach a tag with the wet ingredients and instructions. It’s charming, thoughtful, and your child can help measure and layer.
Layering order for chocolate chip cookies:
- 1 1/8 cups flour (pack it down)
- 1/2 tsp baking soda + 1/2 tsp salt (mixed into the flour)
- 1/3 cup packed brown sugar
- 1/3 cup granulated sugar
- 1/2 cup chocolate chips
Tag instructions: “Add 1 stick melted butter, 1 egg, and 1 tsp vanilla. Mix, scoop onto baking sheet, bake at 350 degrees F for 10-12 minutes. Makes 18 cookies.”
Cost: About $3 per jar.
2. Homemade Granola in a Pretty Bag
Make a double batch of your favorite granola (oats, honey, coconut oil, nuts/seeds, dried fruit). Package in a cellophane bag tied with a ribbon. Include a handwritten note from your child.
3. Infused Honey or Butter
Lavender honey or cinnamon honey butter in a small jar with a wooden dipper is elegant and costs under $5. Your child can help measure herbs and stir.
4. Decorated Sugar Cookies Wrapped Individually
Use the confetti sugar cookie recipe (#1 above), cut into apple or star shapes, wrap each in a cellophane bag with a twist tie, and attach a small card. Let your child decorate each cookie with frosting and write the teacher’s name on the card.
5. “Summer Survival Kit” Basket
A small basket or gift bag with homemade treats + a few store-bought items:
- Homemade lemon bars or brownies
- A bag of good coffee or tea
- A small chocolate bar
- A handwritten note from your child
The note is the part that matters most. One year my daughter wrote, “Thank you for teaching me to read hard words” on a piece of construction paper. Her teacher cried. The brownies were secondary.
Packaging and Presentation Ideas for Class Parties
How you package treats matters almost as much as how they taste — at least in terms of classroom logistics.
Individual Portions Are King
Teachers will love you if every item is already individually portioned. It eliminates the need for cutting, serving, or counting. Options:
- Cellophane bags + twist ties for cookies, brownies, and bars (buy in bulk on Amazon — 100 for about $6)
- Cupcake liners for small treats like energy bites or truffle balls (place 2-3 in each liner)
- Small clear cups with lids (5 oz) for parfaits, pudding, or fruit
- Parchment paper squares for wrapping bars and scones (fold like a present)
- Mini muffin liners for already-baked mini muffins — just send them in the tin or on a tray
Labeling Matters
Always label your treats with:
- The name of the treat
- Major allergens present (or “allergen-free” if applicable)
- Whether it needs to be refrigerated
A simple index card or printed label taped to the container works perfectly. Don’t skip this step — it saves the teacher from fielding 25 “what’s in this?” questions.
Transport Tips
- Cookies and bars: Stack in a single layer in a large Tupperware. Place a sheet of parchment between layers if stacking.
- Cupcakes: Use a cupcake carrier (worth owning; the Cupcake Courier holds 36) or cut slits in a cardboard box lid and nestle cupcakes in the slits.
- No-bake treats: Keep cold until the last possible moment. A cooler bag with two ice packs will keep things safe for 2-3 hours.
- Pinwheels and savory items: Send in a foil-covered 9×13 pan. Simple and effective.
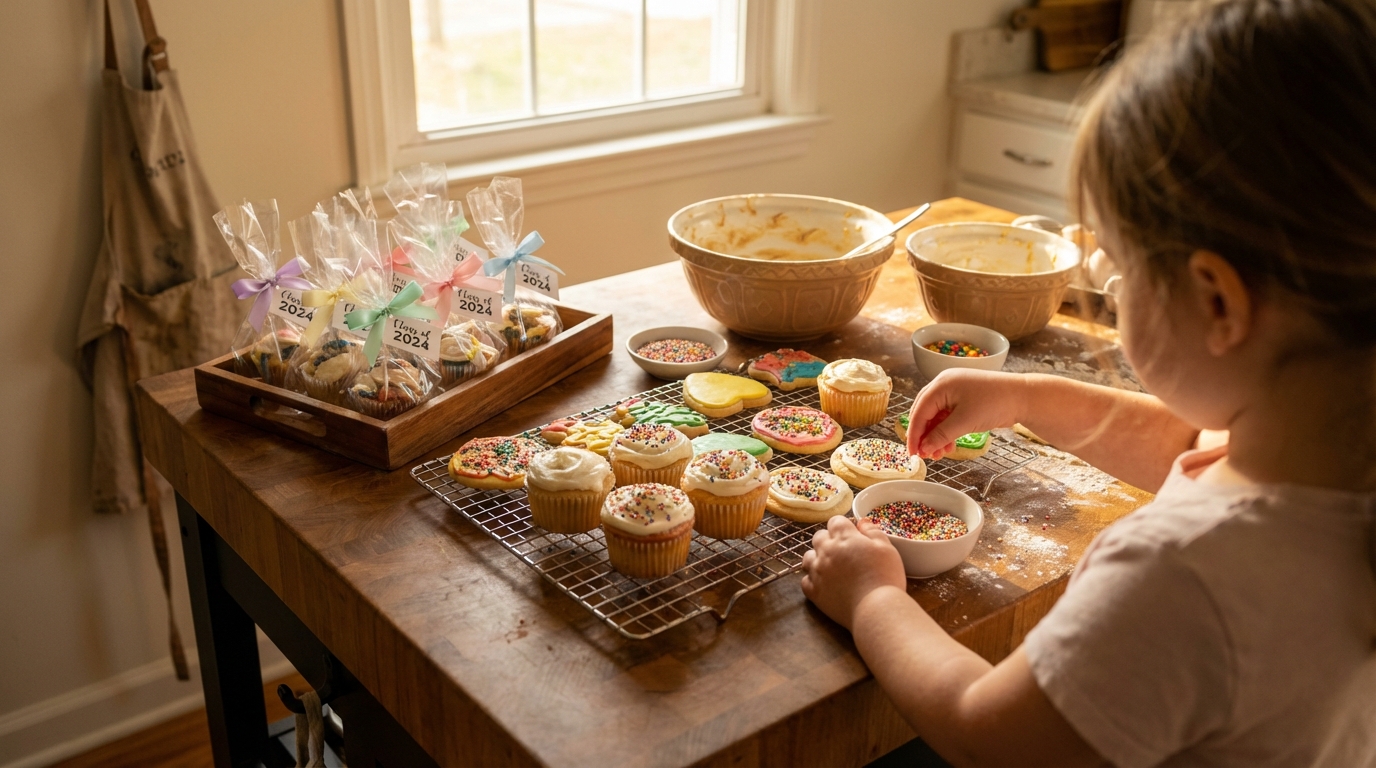
Let Your Child Present Their Work
If possible, send a small sign with the treats: “Made by [Child’s Name] with love!” or “Baked by [Child’s Name] for our class.” A piece of cardstock and a marker is all you need. Kids beam with pride when their classmates see their name attached to the treats. It’s a small thing that turns a plate of cookies into a personal gift.
Frequently Asked Questions
How far in advance can I bake treats for a class party?
Most cookies and bars can be baked 2-3 days in advance and stored in an airtight container at room temperature. Cupcakes are best baked 1 day ahead and frosted the morning of (or the night before if stored in the fridge — bring to room temperature before serving). No-bake treats like energy bites and Oreo truffles can be made up to a week ahead and refrigerated. Frozen yogurt bark should be made the night before. Pizza pinwheels are best same-day but can be baked the night before and stored in the fridge — reheat in a 350-degree oven for 5 minutes.
What if I don’t know the allergies in my child’s classroom?
Ask the teacher directly — they’re required to know. If you can’t get an answer in time, your safest options are the Sunflower Seed Butter Crispy Treats (recipe #14, free of all top 8 allergens) or the Fruit and Yogurt Parfait Cups (recipe #15, dairy-free if you use coconut yogurt). You can also send a separate “safe” option alongside your main treat — for example, a plate of regular brownies plus a small container of fruit for any child who can’t have them.
My child is too young to use the oven. Can they still meaningfully help?
Absolutely. Children as young as 2 can stir, pour, sprinkle, press, roll, mash, and decorate. Those tasks aren’t token participation — they’re real contributions that develop motor skills and confidence. The no-bake recipes (energy bites, Oreo truffles, frozen yogurt bark, fruit parfaits) require zero oven use and are fully manageable for young children with adult supervision. Focus on the process, not the product. A three-year-old who proudly stirred the batter made those brownies, even if you handled everything else.
How many treats should I bring for a class of 25?
Plan for 1.5 servings per child — so about 36-38 pieces for a class of 25. This accounts for seconds, an extra for the teacher, and one or two that inevitably get dropped. Most of the recipes in this guide yield 24-36 pieces, so one batch of most recipes covers it. For cupcakes or larger items, one per child plus 3-4 extras is plenty.
Is it okay to bring store-bought treats instead?
One hundred percent yes. Store-bought treats are always acceptable, and anyone who judges you for it is not someone whose opinion you need. That said, if you want to involve your child, a simple compromise is to buy a plain base (store-bought cupcakes, unfrosted sugar cookies) and let your child decorate them at home. They get the pride of participation, and you get the convenience of not baking from scratch. Some schools actually prefer store-bought treats with ingredient labels for allergen verification — check your school’s policy.
What are the best treats to ship or send with a child on the bus?
You want sturdy, non-perishable, individually wrapped items that can survive a bumpy bus ride and sitting in a cubby for a few hours. Best options: cookies, brownies, Rice Krispie treats, and scones. Avoid anything with frosting that could smear (cupcakes are tricky), anything that needs refrigeration (yogurt parfaits, Oreo truffles), or anything fragile (lemon bars can crumble). Package in a hard-sided container, not a paper plate covered in foil. If your child rides the bus, the cookie bars (recipe #2) and brown butter Rice Krispie treats (recipe #5) are your most bus-proof options.
Can I halve these recipes if my child’s class is small?
Every recipe here can be halved successfully. The only tricky one is the cupcake recipe, where halving the egg whites can be imprecise — use 2 egg whites instead of calculating half of 4. For cookie and bar recipes, halving is straightforward. Use a 9×9 or 8×8 pan instead of 9×13 for bar recipes, and reduce bake time by 2-3 minutes. The no-bake recipes halve perfectly with no adjustments needed.
How do I involve my child without the process taking three hours?
Pre-measure all ingredients before inviting your child to help. Seriously, this is the single biggest time-saver. Set out every ingredient in small bowls or cups, like a cooking show. Then your child’s job is to pour, mix, and assemble — not wait while you hunt for the baking powder. With everything pre-measured, most of these recipes take 20-30 minutes of active kid involvement. The oven time is your break.
Sending Them Off With Something Sweet
Here’s what I’ve learned after five end-of-school-year parties: the treats matter less than the making. My daughter doesn’t remember what she brought to her kindergarten party last year, but she remembers that we made something together the night before. She remembers cracking eggs “all by herself.” She remembers licking the spatula.
The end of the school year is bittersweet for parents. Your child is growing up, moving on, leaving a teacher they loved, saying goodbye to friends who might be in a different class next fall. Baking together is a small way to mark the moment — to slow down, get flour on the counter, and celebrate what your child accomplished this year.
It doesn’t need to be fancy. It doesn’t need to be Pinterest-worthy. It just needs to be made with your kid, wrapped with a little care, and sent off with pride.
That’s a pretty good end to any school year.