Freezer-to-Instant-Pot Dump Meals for Busy Families
Learn how to quickly prepare freezer-to-Instant Pot dump meals using frozen ingredients, saving you time on busy nights. This guide provides essential cooking times, recipes, and a formula for quick, easy dinners.
- Cook separated frozen meat in your Instant Pot without thawing.
- Add 50% more pressure time for frozen meat if converting recipes.
- Always use a thermometer to ensure meat reaches safe internal temps.
- Utilize the provided frozen-start cooking time chart and recipes.
- Check your Instant Pot manual to confirm it allows cooking frozen meat.
This post contains affiliate links. As an Amazon Associate I earn from qualifying purchases.
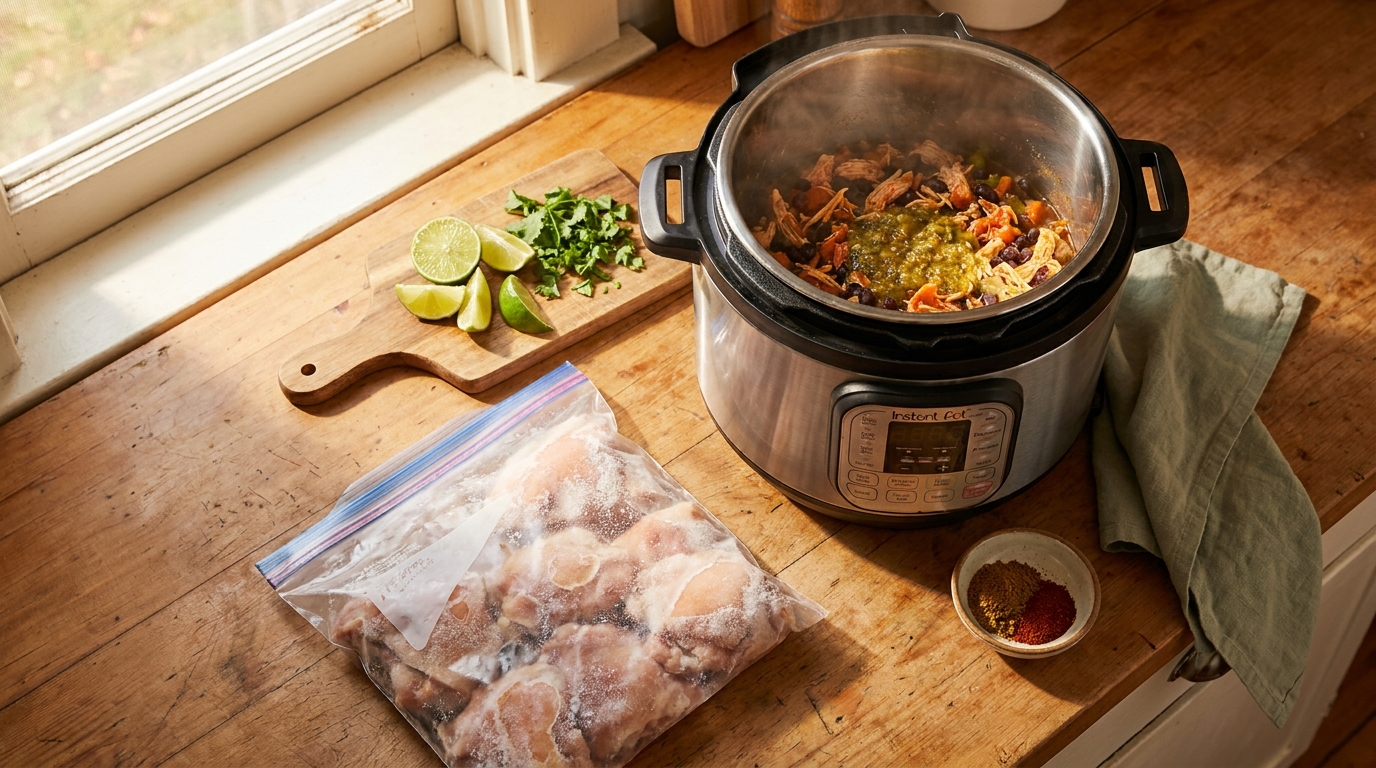
Last Tuesday at 4:45 I had a 6:00 soccer pickup and nothing thawed. Separated frozen chicken thighs went into the Instant Pot with salsa and black beans while I hunted for shin guards. Dinner was on the table by 5:30.
Below you’ll find a frozen-start cook-time chart by protein, a four-part dump formula, seven family recipes, a sample week and a troubleshooting table. Unlike a slow cooker, an Instant Pot can cook separated frozen pieces without thawing, as long as your manual allows it and you check the temperature.
Free printable · 6 pages
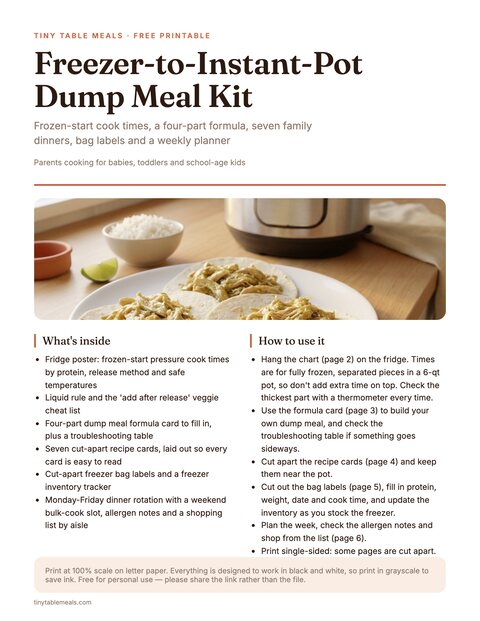
Freezer-to-Instant-Pot Dump Meal Kit
A fridge cook-time chart for frozen proteins, a fill-in dump meal formula card with troubleshooting, seven cut-apart recipe cards, freezer bag labels with an inventory tracker, and a Monday-Friday dinner planner with an aisle-by-aisle shopping list.
Free. Your download link appears right here. You'll also join the Sunday Supper Plan. Unsubscribe anytime. Privacy
In this article (10 sections)
- Can You Cook Frozen Meat in an Instant Pot?
- Instant Pot Frozen Chicken, Beef and Pork Cooking Times (Chart)
- Instant Pot vs. Slow Cooker for Frozen Dump Meals
- The Four-Part Formula for Any Frozen Dump Meal
- Building Your Freezer Stash: How to Pack Meals So They Cook Evenly
- Food Safety and Doneness Temperatures
- 7 Frozen Dump Meal Recipes for the Instant Pot
- Troubleshooting: Mushy Veggies, Underdone Centers, and Other Fixes
- Sample Week of Freezer-to-Instant-Pot Dinners
- Frequently Asked Questions
Can You Cook Frozen Meat in an Instant Pot?
Often, yes. USDA advises following your pressure cooker manufacturer’s directions for frozen meat, so check your manual first. If it allows frozen starts, plan on extra time and a thermometer check.
Frozen pieces need more time under pressure, and the pot takes longer to come up to pressure. If you’re converting a recipe written for thawed meat, add about 50% to the pressure time: thawed boneless chicken thighs take about 8 minutes, frozen ones 12-14.
The chart below is already written for frozen starts, so use those times as they are. Don’t add another 50% on top; check the temperature and add a few minutes only if you need to. Pressure build and release time is extra.
That’s a different kind of convenience than a slow cooker, where you thaw the meat the night before and dump everything in before school drop-off. If you’ve ever pulled a rock-hard brick of chicken out of the freezer at 7 am, you know the problem. With an Instant Pot you can decide at 5:15 pm to cook something that’s been frozen since March.
Instant Pot Frozen Chicken, Beef and Pork Cooking Times (Chart)
This is the part to screenshot, print, or stick on your fridge. Times are for high pressure, except fish (low), starting from fully frozen, separated pieces. Always verify with a thermometer at the thickest part and add time if needed, because every pot and freezer runs a little differently.
Good to knowTimes are starting points for a 6-qt pot and fully frozen, separated pieces, so the frozen start is already built in. They haven’t been tested in every pot size and model, and larger pots take longer to come to pressure, so your manual and your thermometer have the final say. Allow another 10-25 minutes for the pot to come to pressure, plus release time.
Safety firstKeep kids away from the steam vent. Use a long utensil or a towel to turn the valve, and never force the lid open.
| Protein | Frozen Format That Works Best | High-Pressure Cook Time | Release Method | Safe Internal Temp |
|---|---|---|---|---|
| Boneless, skinless chicken breasts (2-3 lbs) | Individually frozen or flat in a single layer | 12-15 min | 5-10 min natural, then quick release | 165°F |
| Boneless, skinless chicken thighs (2 lbs) | Individually frozen or flat layer | 12-14 min | 5-10 min natural, then quick release | 165°F |
| Bone-in chicken thighs or drumsticks (2-3 lbs) | Single layer, not stacked in a solid block | 14-17 min | 10 min natural, then quick release | 165°F |
| Ground beef or ground turkey (1.5-2 lbs) | Frozen flat in a bag (“hockey puck” method) that lies on the pot floor in one layer; split bigger batches into two flat packs | 10-15 min; then open, break apart, confirm temp and add 2-3 min if not reached | Quick release | 160°F (beef) / 165°F (turkey) |
| Beef stew meat or cubed chuck (1.5-2 lbs) | Frozen in individual 1-1.5″ cubes, not one solid block | 20-25 min | 10-15 min natural | 145°F is the safety floor; tender at about 195-205°F |
| Pork tenderloin (1-1.5 lbs) | Whole, individually wrapped | 8-12 min; verify 145°F in the center with a thermometer and add 3-5 min if not reached | 10 min natural | 145°F, rest 3 min |
| Pork shoulder, chunks no thicker than about 3″ (up to 3 lbs total) | Cut before freezing; frozen separated, not fused. Best thawed in the fridge overnight before cooking | Thawed: 45-50 min. From frozen, only if your manual allows: 60-70 min. Verify with a thermometer in several chunks | 15-20 min natural | 145°F minimum for safety; 195-205°F for shreddable pulled pork (tenderness, not safety) |
| Bone-in pork chops, 1″ thick (4 chops) | Single layer, not stacked | 15-18 min | 5 min natural, then quick release | 145°F, rest 3 min |
| Frozen meatballs, homemade or store-bought (1.5 lbs) | Pre-formed, about 1-1.5″ across, frozen individually | 6-8 min; larger meatballs need 2-3 min more | Quick release | 165°F in several meatballs (160°F is enough for homemade all-beef) |
| Shrimp, peeled and deveined (1 lb) | Loose-frozen, not clumped | 1-2 min | Quick release | Opaque and curled |
| Firm white fish fillets, 1″ thick (1 lb) | Individually wrapped | 4-6 min, low pressure | Quick release | 145°F, flakes easily |
Safety firstPork shoulder is the highest-risk row in this chart, so my default is to thaw the chunks in the fridge overnight and cook them 45-50 minutes. Cook it from frozen only if your manual allows a cut this size. Keep the batch to about 3 lbs, make sure the chunks are separated and not fused, and check the temperature in several chunks.
A few notes on using the chart:
- The “hockey puck” method for ground meat is essential. A dense brick overcooks outside while the center stays frozen. Freeze ground meat flat in a bag, about ¾-inch thick, in a shape that lies on your pot floor in one layer. If a 1.5-2 lb batch won’t fit that way, freeze it as two flat packs and snap them into large pieces in the pot rather than stacking whole slabs. After pressure cooking, release the pressure and open the lid. Break the meat apart and check for 160°F beef or 165°F turkey, and add time if it isn’t there yet.
- Cut before you freeze, not after. This is the most common mistake. A rock-solid pork shoulder is hard to cut safely, and cooking it whole leaves the center underdone. Cut, portion, and then freeze.
- Bone-in cuts take a little longer than boneless, because they are thicker and denser. Budget an extra 2-3 minutes.
- When in doubt, check the temperature, then add 2-3 minutes if needed. Undercooking is the main risk with frozen starts. Lean cuts and seafood (chicken breast, tenderloin, fish, shrimp) dry out or turn rubbery if overcooked, so don’t add time before you’ve checked.
Instant Pot vs. Slow Cooker for Frozen Dump Meals
If you’ve made our slow-cooker dump-and-go recipes, the idea is familiar: protein, sauce and aromatics in one pot. The mechanics are different, so don’t copy a slow-cooker recipe straight into your Instant Pot.
A slow cooker gives low heat over many hours, so thaw meat in the fridge first. Frozen meat warming slowly can sit in the 40-140°F danger zone too long. An Instant Pot uses high pressure in a short window, so separated frozen pieces can work if you add time and check the temperature.
| Instant Pot (pressure cook) | Slow cooker | |
|---|---|---|
| Heat and time | High pressure, 30-120 min total | Low and steady, 6-8 hours |
| Start from frozen? | Yes, with separated pieces, extra time and your manual’s OK | No, thaw in the fridge first |
| Liquid | Thin liquid required to build pressure | Less needed |
| Delicate vegetables | Add after pressure release | Hardy vegetables can go in at the start |
Two habits carry over from the chart. Cut big roasts into chunks no thicker than about 3 inches before freezing so the center reaches a safe temperature in the shorter window. On long cooks, save the vegetables for the end. Thawed chuck roast can share a slow-cooker pot with carrots and potatoes for eight hours, but after an hour under pressure they turn to mush.
Once you’ve got the technique down, our Instant Pot family recipes collection shows how the same pot handles fresh-start meals.
The Four-Part Formula for Any Frozen Dump Meal
With the chart in hand, a formula is more useful than more recipes. Every frozen Instant Pot dump meal has four parts:
- Protein (from the chart above) — this determines your base cook time.
- Liquid — your manual’s minimum (often 1 cup), more for grains. Broth, salsa, canned tomatoes with their juice, coconut milk or a simple sauce all work; keep thin liquid on the bottom and thick sauces on top.
- Aromatics and seasoning — garlic, onion (fresh or frozen diced), spice blends, a spoonful of soy sauce or Worcestershire, whatever gives the dish its personality.
- Delicate add-ins, added after pressure cooking — quick-cooking vegetables, dairy, fresh herbs, anything that would turn to mush or curdle under 20+ minutes of pressure.
The Liquid Ratio That Actually Matters
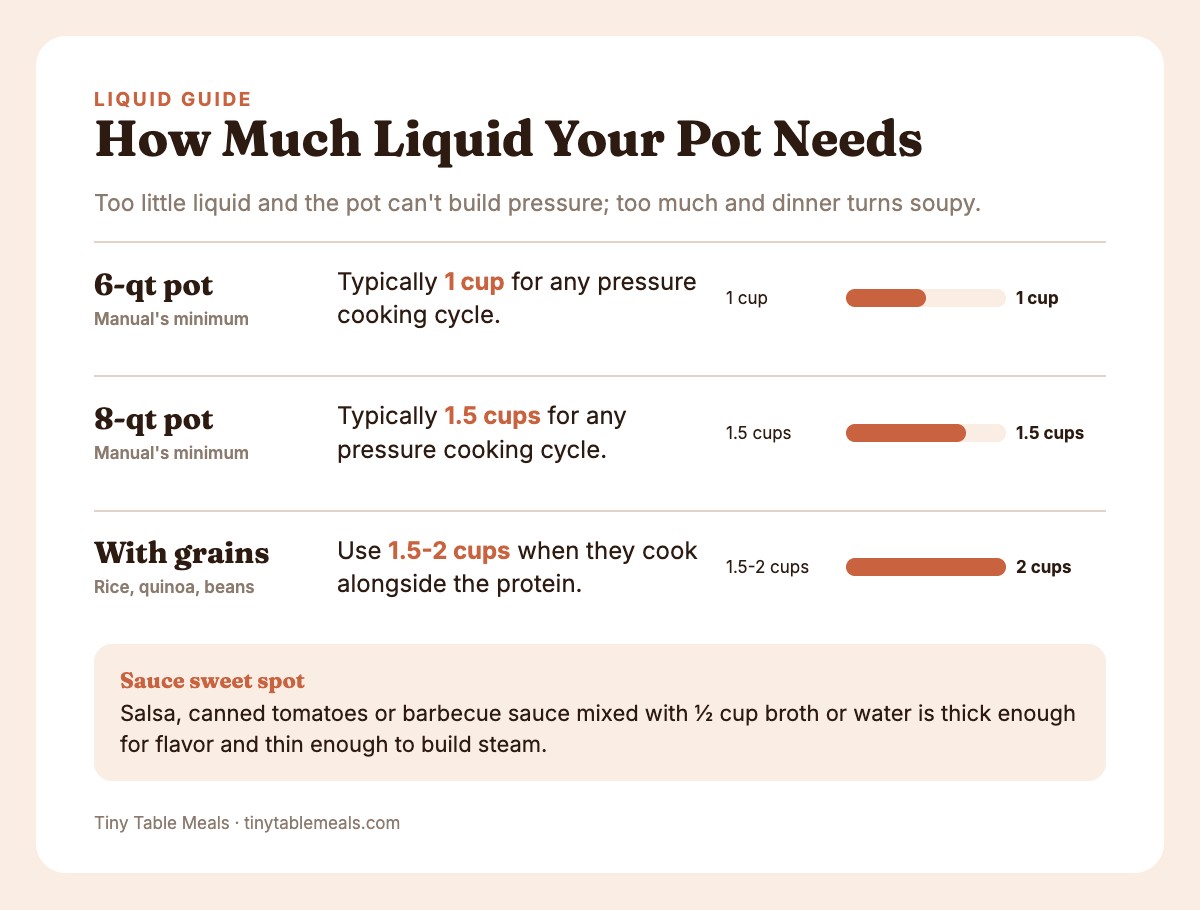
Most first-time frozen dump meals go wrong here: too little liquid to build pressure, or so much that the meal turns soupy and bland. Use these amounts:
- Your manual’s minimum for any pressure cooking cycle, typically 1 cup for a 6-qt and 1.5 cups for an 8-qt. The pot needs it to come up to pressure at all.
- 1.5-2 cups if you’re also cooking rice, quinoa, or dried beans alongside the protein.
- Sauces like salsa, canned tomatoes, or barbecue sauce mixed with ½ cup broth or water usually hit the sweet spot — thick enough for flavor, thin enough to build steam.
When unsure, add a bit more liquid. A thin sauce can be simmered down on sauté mode for five minutes or thickened with a cornstarch slurry. A Burn notice means releasing pressure, scraping the pot and restarting.
Use natural release for foamy or starchy contents such as rice, beans and grains, so the liquid doesn’t spit out of the vent.
TipLayer in this order: broth or thin liquid first, then the protein in a single separated layer, then tomatoes, beans and other thick ingredients on top, unstirred.
Adding Vegetables Without Turning Them to Mush
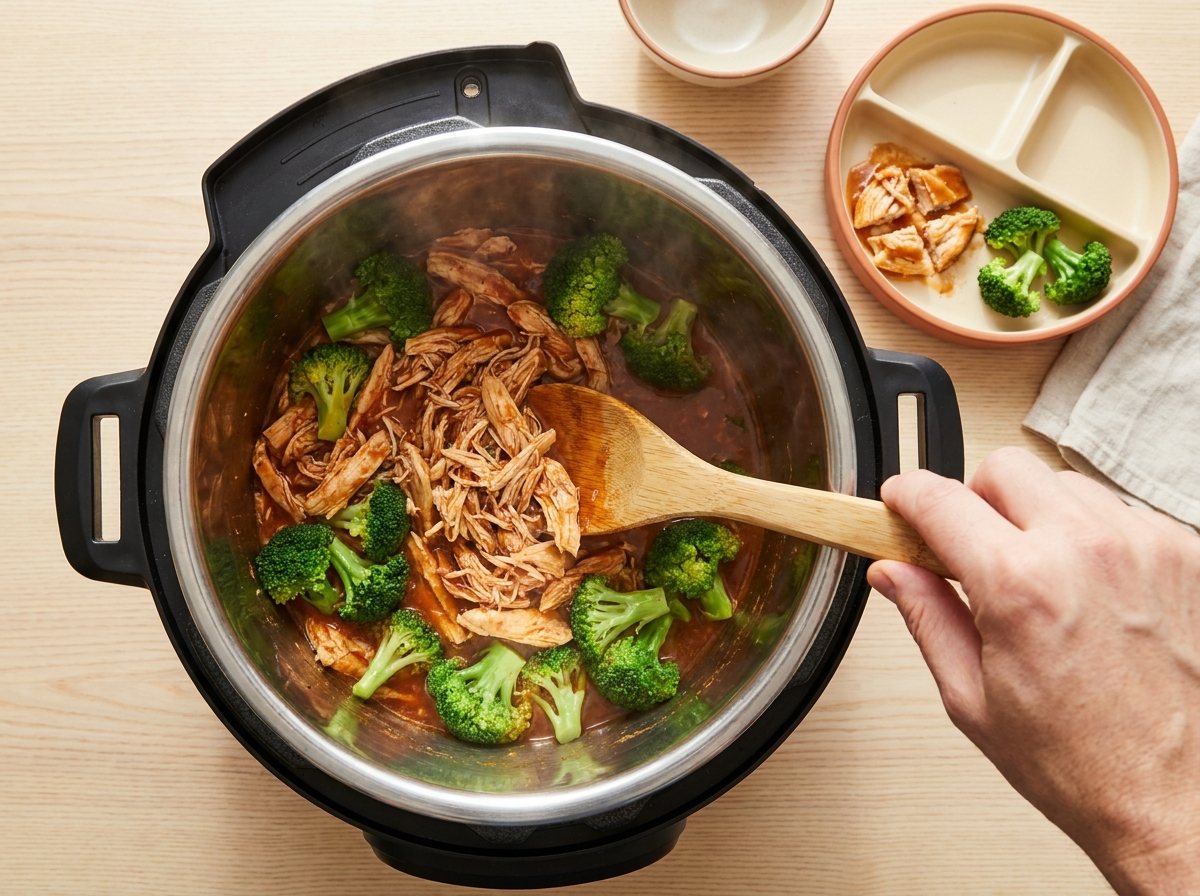
Frozen broccoli, peas or green beans dumped in with the protein at the start will be gray and lifeless by the end of a 15-20 minute cook. Instead:
- Hardy vegetables (potatoes, carrots cut into large chunks, winter squash) can go in at the start of cooks up to about 20 minutes. On long cooks like pulled pork they turn to mush, so cook them separately.
- Everything else (broccoli, green beans, zucchini, bell peppers) should be stirred in after you release pressure. Sauté for 2-4 minutes with the lid off, stirring often and scraping the bottom so nothing scorches, until they’re steaming hot and tender-crisp. For babies and toddlers, keep going until a piece squishes easily between your fingers.
- Frozen peas go in last. Stir them through on sauté for 1-2 minutes, just until they’re steaming hot. For babies and children under 4, mash or flatten them first, because whole peas are a choking hazard.
Building Your Freezer Stash: How to Pack Meals So They Cook Evenly
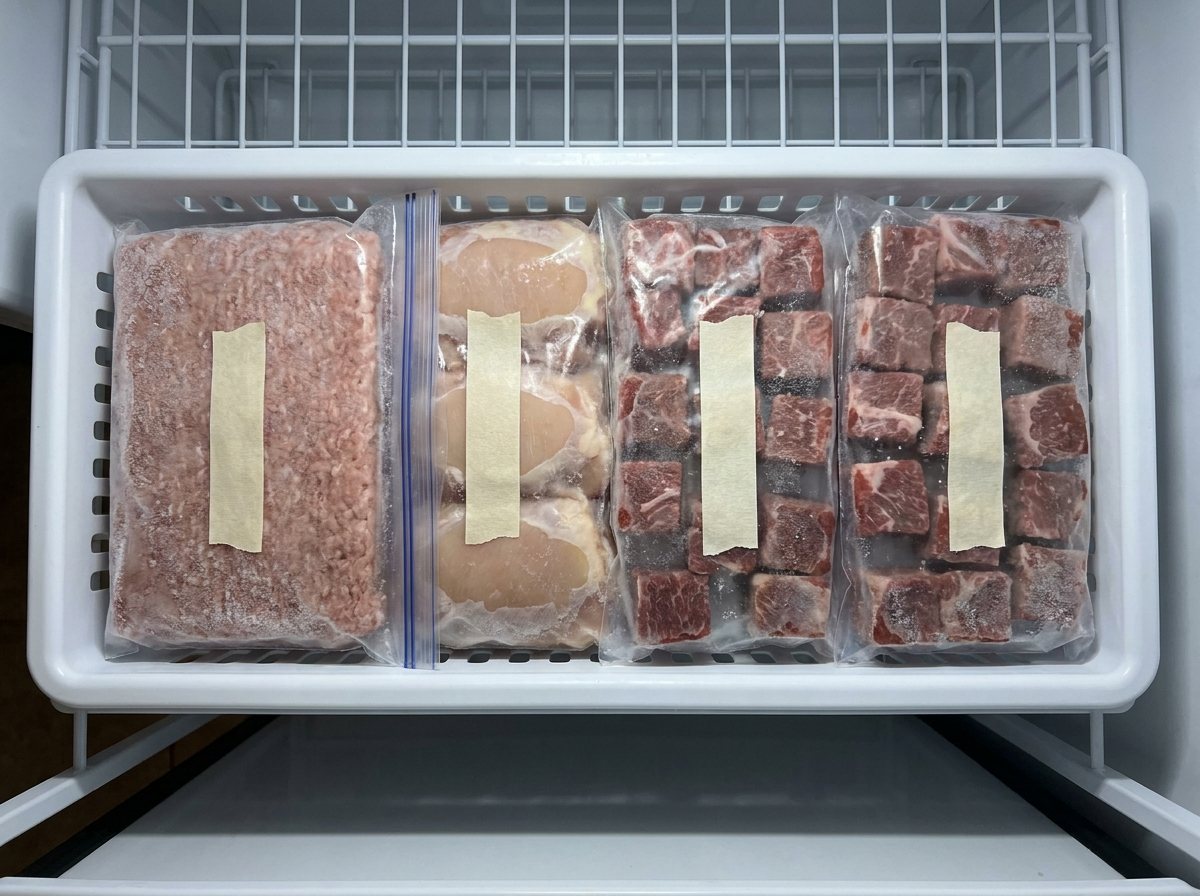
The whole system depends on how you freeze things in the first place. Our guide to batch cooking proteins covers stocking the freezer; here’s what matters for Instant Pot cooking:
- Freeze flat, not in a clump. Lay ground meat, chicken thighs or stew cubes flat in a gallon freezer bag and press out the air. A thin, even layer cooks more predictably than one dense block.
- Portion before freezing, not after. Decide what “one dinner” looks like now — 2 lbs of chicken thighs, a pound and a half of stew meat — and bag it that way. You should never need to hack apart a frozen block to get dinner started.
- Label with protein, weight, and date. A sharpie and a piece of masking tape is all you need: “Chicken thighs, 2 lbs, frozen 9/15.” When you’re standing at the freezer at 5 pm, you want to grab and go, not guess.
- Pre-portion sauces and seasoning blends separately if you like to batch that part too. Small bags or jars of taco seasoning, barbecue sauce or curry paste make the “aromatics” step grab-and-go.
- Keep a running freezer inventory list on the fridge or in your phone notes. At 5 pm you’ll know you have chicken thighs to build dinner around, instead of digging through frost.
A well-stocked dump-meal freezer has 4-6 proteins, 2-3 sauces or seasoning bases, and a bag of chopped onion, carrot and celery for flavor. That’s enough variety to avoid “chicken again” fatigue without a chest freezer.
Before you freeze anything:
- Flatten or separate pieces so nothing freezes in a solid clump
- Portion one dinner per bag
- Cut roasts into chunks no thicker than about 3 inches
- Label protein, weight and date
- Bag sauces and seasoning blends separately
Food Safety and Doneness Temperatures
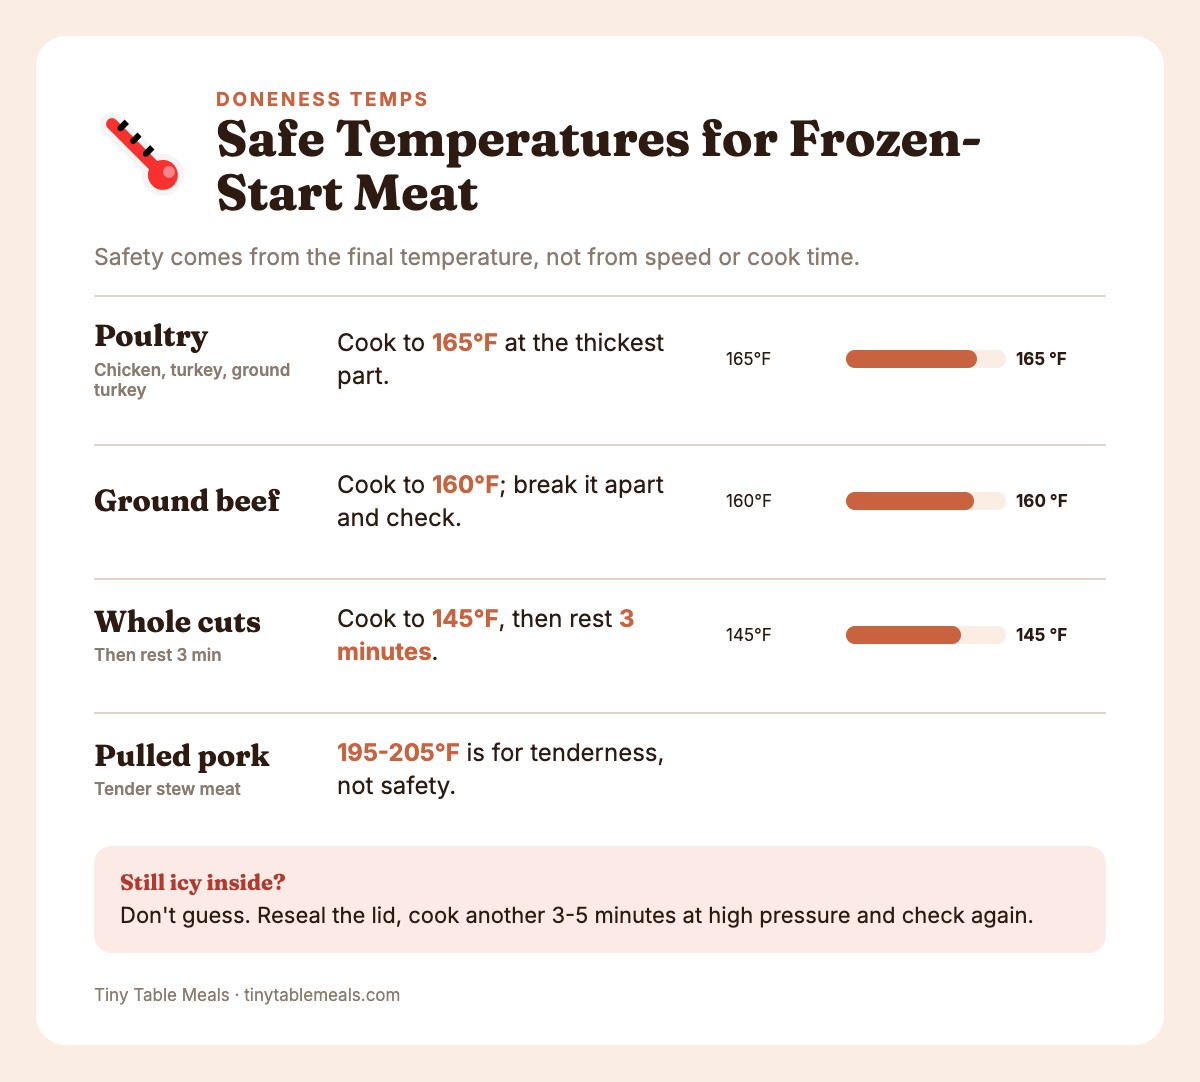
Cooking from frozen is only as safe as your final temperature check. Use the doneness temperatures in the box under the chart, and build these habits:
- Use a meat thermometer every time. Chart times are starting points, so check the thickest part before serving.
- Don’t stack or clump proteins. A dense block of fused frozen chicken breasts traps ice in the center and cooks unevenly no matter how long you run it. That pink middle is a freezing problem, not a cooking problem.
- Thaw whole chickens and uncut roasts first. Don’t cook them from frozen in the pot. For freezer stock, cut roasts into chunks no thicker than about 3 inches before freezing.
- Skip Delay Start for meat, and don’t store food on Keep Warm. Raw or frozen meat shouldn’t sit in the pot waiting for a timer. Keep Warm is fine while everyone serves themselves, but don’t leave the rest on it for the evening.
- Handle leftovers like any other cooked food. Divide big batches like chili and pulled pork into shallow containers so they cool quickly. Refrigerate within 2 hours (1 hour if it’s above 90°F) and eat within 3-4 days. Cooked leftovers keep 2-3 months in the freezer; thaw them in the fridge and reheat to 165°F throughout.
- Refreeze raw meat only if it thawed in the fridge. Cook or refreeze it within 1-2 days for poultry, ground meat and stew meat, or 3-5 days for roasts and chops, and expect a little texture loss. Meat thawed in cold water or the microwave should be cooked right away, and never thaw meat on the counter.
Still icy or translucent in the center after the recommended time? Don’t guess. Reseal the lid, cook another 3-5 minutes at high pressure and check again.
7 Frozen Dump Meal Recipes for the Instant Pot
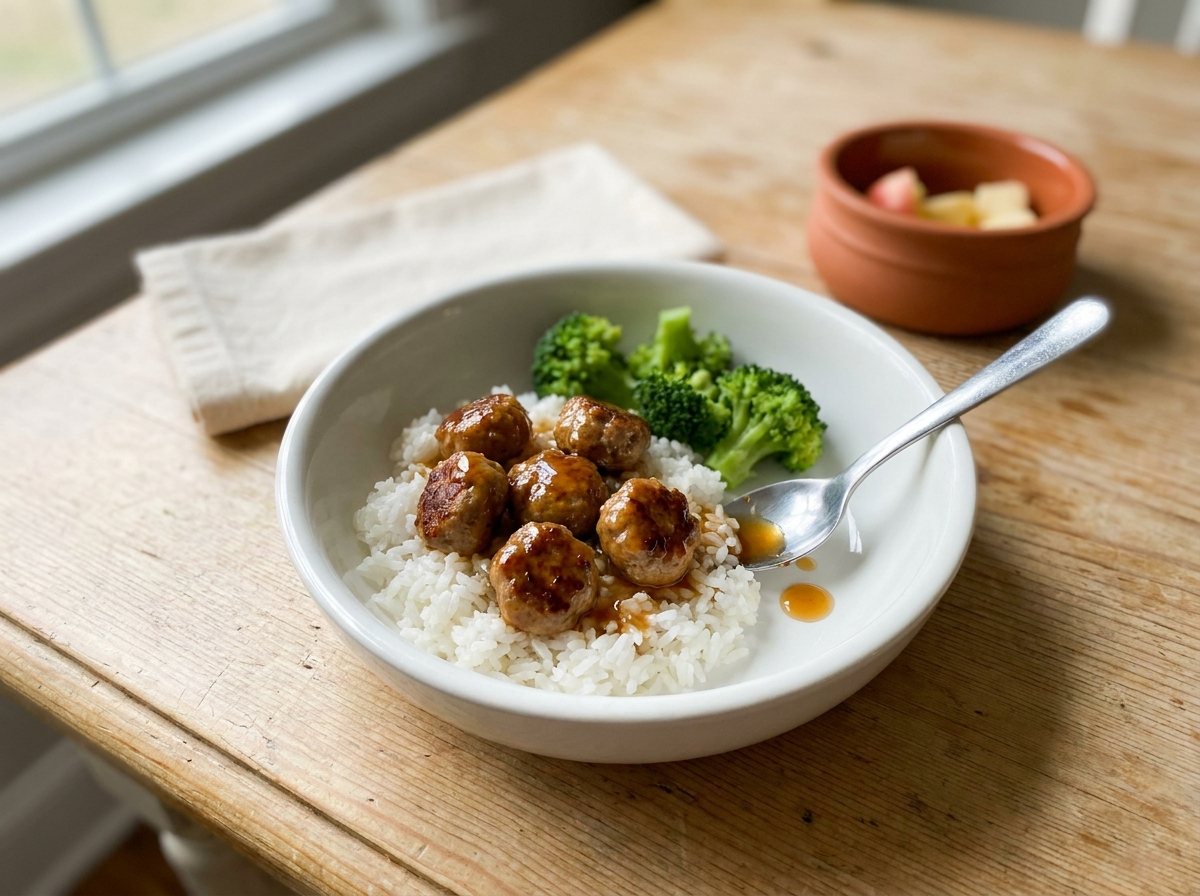
All seven follow the four-part formula above. Six start from fully frozen, separated pieces; the pulled pork works best thawed in the fridge overnight. Total times include about 10-25 minutes for the pot to come to pressure. Each recipe serves 4-6 unless noted.
| Recipe | Protein | Pressure time | Release | Approx. total |
|---|---|---|---|---|
| Salsa Verde Chicken Tacos | Chicken thighs | 12 min | 10 min natural | About 45 min |
| Beef and Bean Chili | Beef stew cubes | 22 min | 15 min natural | About 1 hour |
| Honey Garlic Meatballs | Meatballs | 7 min | Quick | About 35 min |
| Creamy Tuscan Chicken | Chicken breasts | 13 min | 5 min natural, then quick | About 45 min |
| Pulled Pork | Pork shoulder chunks, thawed in the fridge | 45-50 min (65 from frozen) | 20 min natural | About 1.5 hours (2 from frozen) |
| Coconut Curry Chicken | Chicken thighs | 12 min | 10 min natural | About 45 min |
| Turkey and Rice Skillet | Ground turkey | 10 + 4 min | Quick, then 10 min natural | About 1 hour |
Safety firstFor every recipe: keep pieces separated and check the temperature in the thickest piece (doneness temperatures are in the box under the chart).
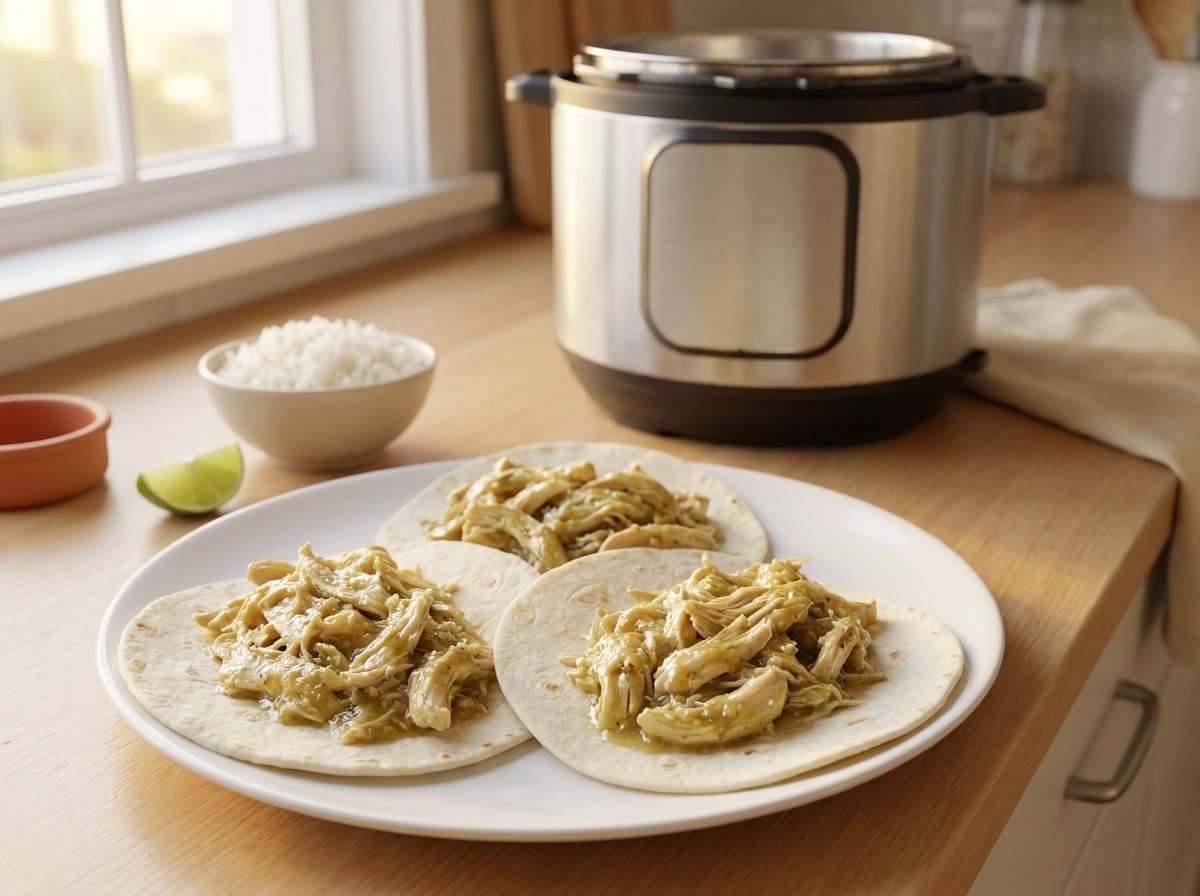
1. Salsa Verde Chicken Tacos
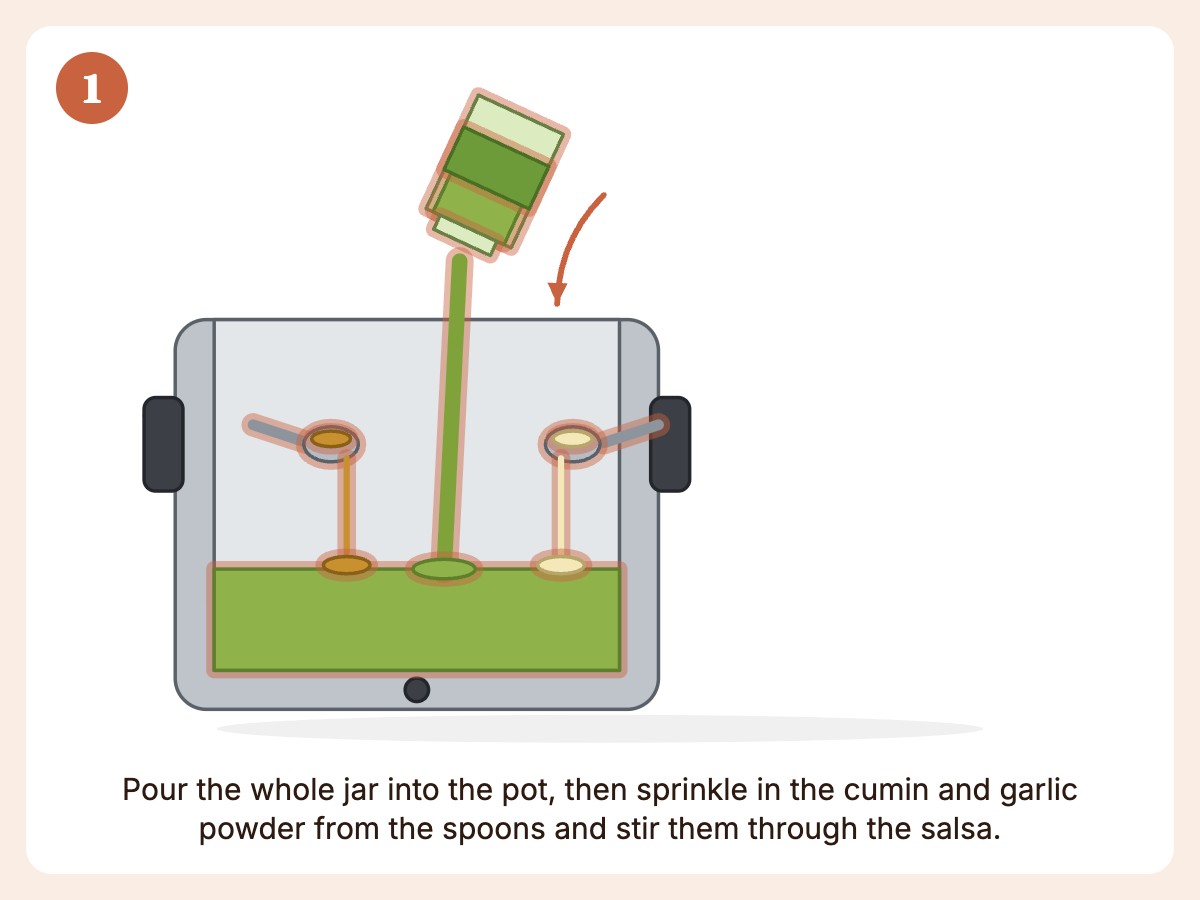
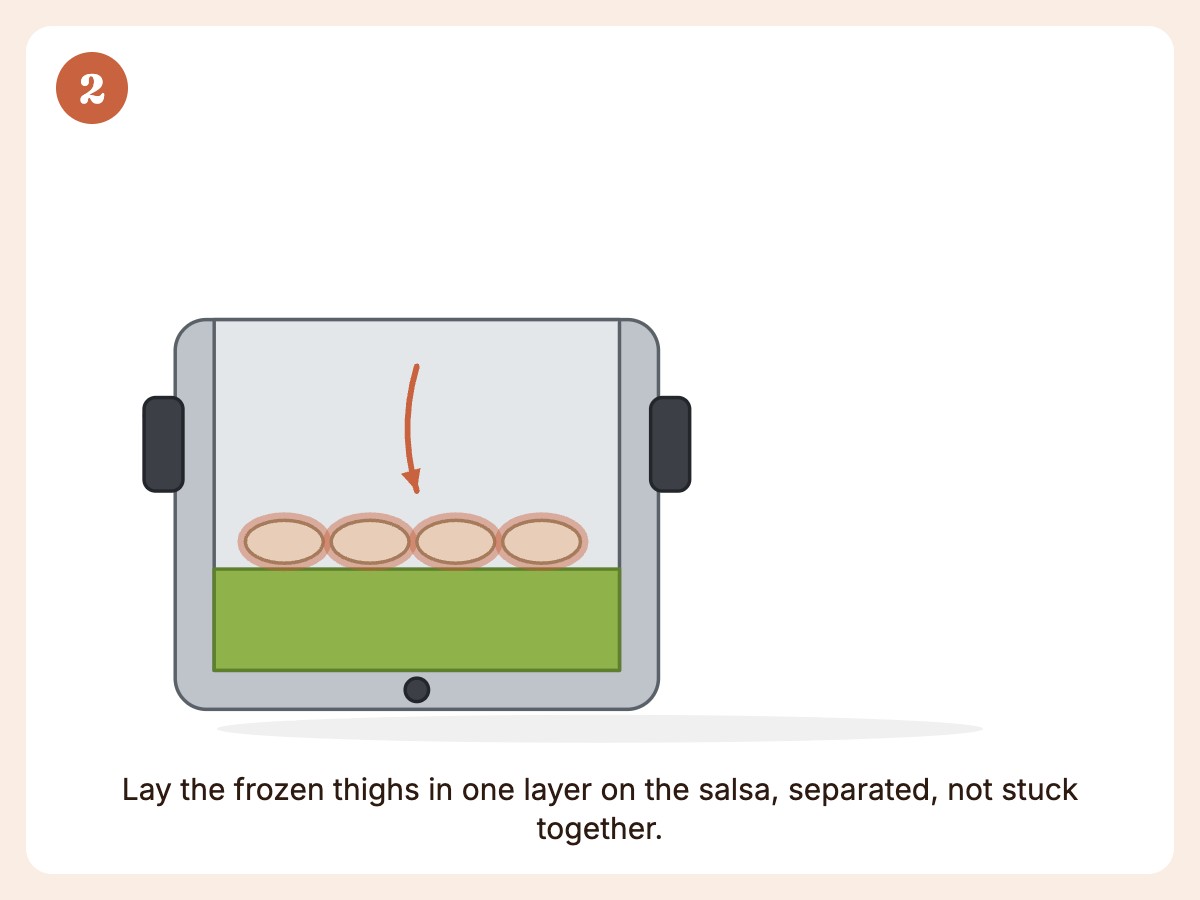
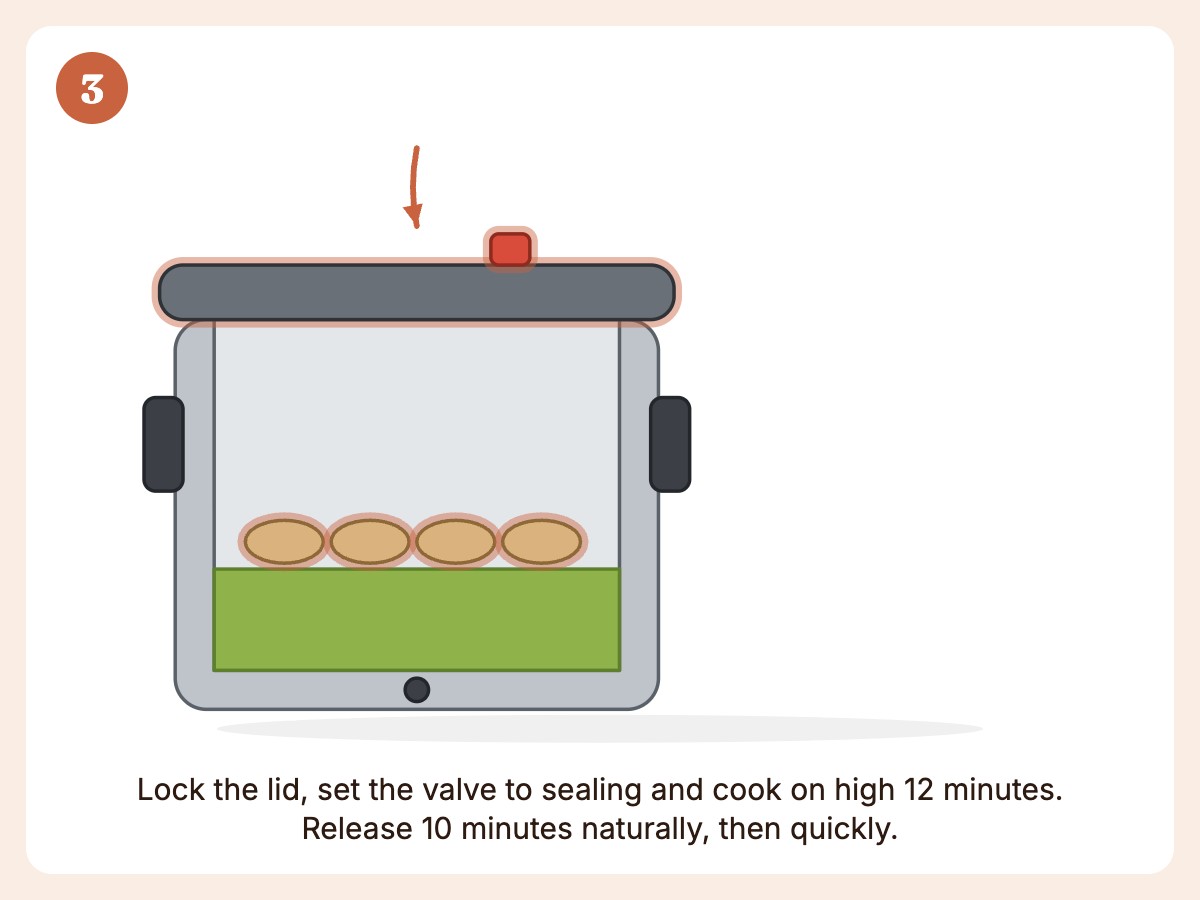
- 2 lbs frozen boneless chicken thighs, separated
- 1 jar (16 oz) salsa verde
- 1 tsp cumin, 1 tsp garlic powder
- Layer. Pour the salsa into the pot and stir in the spices. Add the chicken in a single layer, pieces not fused.
- Cook. High pressure 12 minutes, 10 minutes natural release, then quick release.
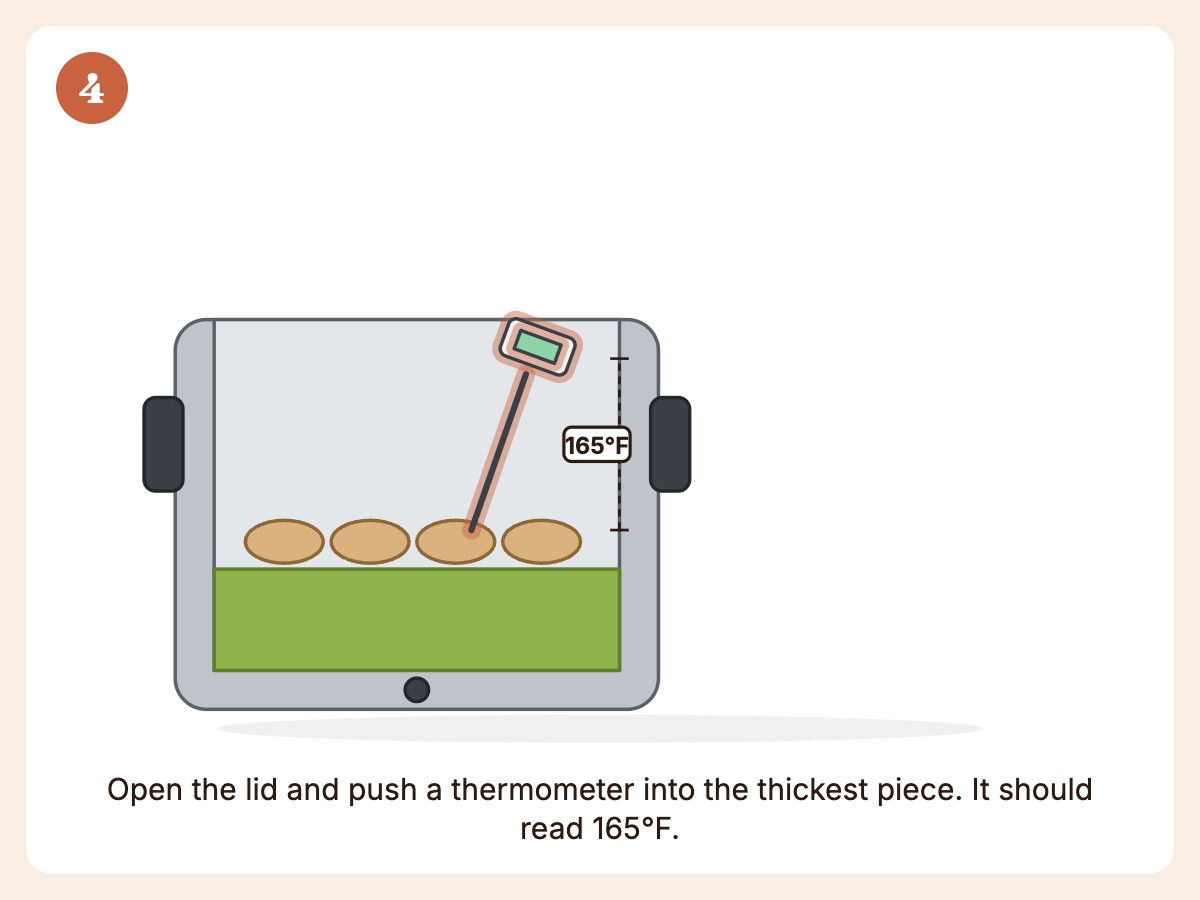
- Check. The thickest piece must reach 165°F. If not, reseal and add 3-5 minutes.
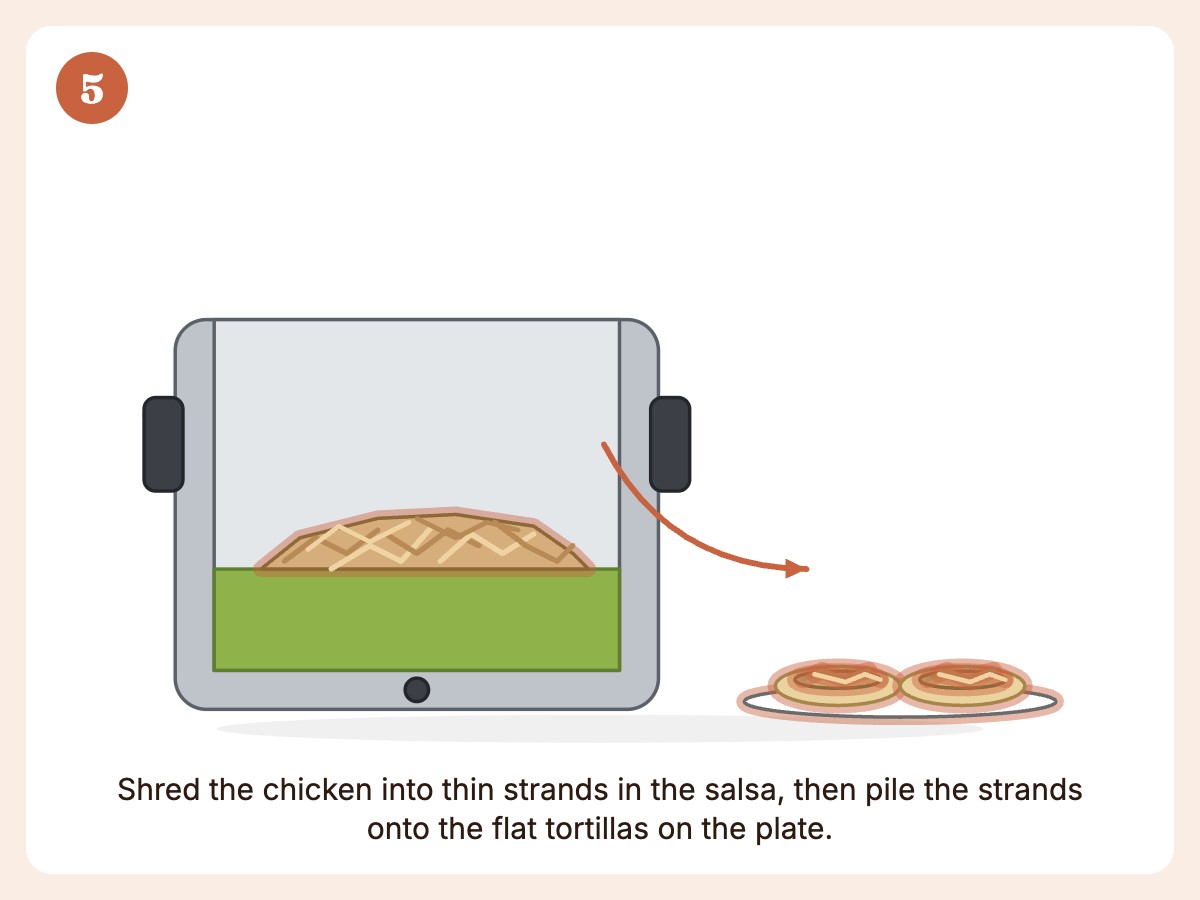
- Serve. Shred with two forks and pile into tortillas or over rice.
2. Hearty Beef and Bean Chili
- 1.5 lbs frozen beef stew cubes, separated
- 1 can crushed tomatoes, 1 can drained black beans, 1 cup broth
- 1 tbsp chili powder, 1 tsp smoked paprika, 1 diced onion (fresh or frozen)
- Layer. Broth first, then the beef cubes and onion, sprinkled with the spices. Spoon the tomatoes and beans on top. Do not stir.
- Cook. High pressure 22 minutes, 15 minutes natural release (beans are starchy).
- Check. 145°F is the safety floor; stew meat is tender at about 195-205°F. If it’s tough, reseal and add 5 minutes.
- Serve. Stir and simmer on sauté if you want it thicker.
3. Honey Garlic Meatballs
- 1.5 lbs frozen meatballs, about 1-1.5 inches across, separated
- ⅓ cup low-sodium soy sauce, ⅓ cup honey, 2 minced garlic cloves, ½ cup broth
- Layer. Stir the soy sauce, honey, garlic and broth together in the pot. Add the meatballs on top.
- Cook. High pressure 7 minutes, then quick release. Meatballs bigger than 1.5 inches need 2-3 minutes more.
- Check. Test the center of several meatballs, starting with the biggest: 165°F, or 160°F for homemade all-beef meatballs. If any fall short, reseal and add 2-3 minutes.
- Serve. Thicken the sauce on sauté mode 3-4 minutes, stirring often, and serve over rice with steamed broccoli stirred in.
Safety firstNever give honey to babies under 12 months (infant botulism risk), and cooking doesn’t make it safe. The meatballs cook in the sauce, so there’s no honey-free portion to set aside. If a baby under 12 months eats with you, swap the honey for the same amount of brown sugar for the whole pot, or cook a few meatballs separately in plain water.
4. Creamy Tuscan Chicken
- 2 lbs frozen chicken breasts, separated
- 1 cup broth, 1 tsp Italian seasoning, 2 minced garlic cloves
- ½ cup cream and a handful of spinach
- Layer. Broth and seasonings first, then the chicken in a single layer.
- Cook. High pressure 13 minutes, 5 minutes natural release, then quick release. Breasts thicker than 1.5 inches need about 3 more minutes.
- Check. The thickest breast must reach 165°F. If not, reseal and add 3-5 minutes.
- Finish. Shred or slice the chicken. Stir in the cream and spinach on sauté mode, stirring often, until wilted. Dairy always goes in after pressure cooking.
5. Pulled Pork for Sandwiches
Safety firstThis recipe starts from pork chunks thawed in the fridge overnight, because shoulder is the slowest cut in this post to heat through. Cook it straight from frozen only if your manual allows a cut this size, and check the temperature in several chunks either way.
- Up to 3 lbs pork shoulder, cut into chunks no thicker than 3 inches before freezing, frozen separated, then thawed in the fridge overnight
- 1 cup broth, ½ cup barbecue sauce, 1 tbsp brown sugar, 1 tsp smoked paprika
- Layer. Broth first, then the pork chunks. Mix the barbecue sauce, sugar and paprika and pour over the top.
- Cook. High pressure 45-50 minutes for thawed chunks (65 minutes from frozen), then 20 minutes natural release.
- Check. Confirm at least 145°F in several chunks, starting with the thickest. For shredding it needs about 195-205°F; if it doesn’t shred, reseal and add 10 minutes.
- Serve. Shred and mix with extra barbecue sauce. Pack leftovers into shallow containers so they cool quickly; they keep 3-4 days in the fridge or 2-3 months in the freezer.
6. Coconut Curry Chicken
- 2 lbs frozen chicken thighs, separated
- 1 can coconut milk, ½ cup broth, 2 tbsp red curry paste, 1 tbsp fish sauce
- 1 bag frozen mixed vegetables
- Layer. Stir the broth and fish sauce in the bottom of the pot. Add the chicken in a single layer, then spoon the curry paste and coconut milk on top. Do not stir.
- Cook. High pressure 12 minutes, 10 minutes natural release.
- Check. The thickest piece must reach 165°F. If not, reseal and add 3-5 minutes.
- Finish. Stir in the frozen vegetables on sauté mode for 3-5 minutes, stirring often and scraping the bottom, until they’re steaming hot. Cook them longer for little ones, until soft enough to squish, and serve over rice.
7. Weeknight Turkey and Rice Skillet
- 1.5 lbs frozen ground turkey, frozen flat to fit the pot floor (or as two flat packs; see the notes under the chart)
- 1 cup rice (rinsed), 2 cups broth, 1 can diced tomatoes, 1 tsp taco seasoning
- Layer. Pour 1 cup broth into the pot, add the frozen turkey, and sprinkle with the taco seasoning.
- Cook the turkey. High pressure 10 minutes, then quick release.
- Check. Open the lid, break the turkey up and confirm 165°F. If it isn’t there yet, reseal and add 2-3 minutes.
- Add the rice. If the turkey released a lot of fat, spoon it off first. Stir in the rice and the remaining 1 cup broth, then pour the tomatoes on top. High pressure 4 minutes, 10 minutes natural release.
- Serve. Fluff and top with shredded cheese for picky eaters.
These use pantry staples, so you can build a rotation without a special grocery trip.
Safety firstFor babies and toddlers: shred meat finely or cut it small (quarter the meatballs), mash beans, mash or flatten peas, cook vegetables until they squish easily, and cool food before serving. For babies under 12 months, cook a few pieces of protein separately in plain water or no-salt-added broth. Regular and low-sodium broth, soy sauce, fish sauce and salsa are all too salty for them.
Allergens to watch for in these recipes:
- Fish: fish sauce in the curry, plus anchovies in Worcestershire if you add it
- Soy and wheat: soy sauce in the honey garlic meatballs
- Milk: cream in the Tuscan chicken and the cheese topping on the turkey skillet
- Egg, milk and wheat: common in store-bought meatballs and in homemade ones made with breadcrumbs
- Shellfish: possible in some curry pastes and fish sauces
- Coconut: coconut milk in the curry; if your child has a tree nut allergy, ask your allergist about coconut
Check the labels on jarred sauces, broths and seasoning blends too. Introduce each allergen on its own before serving it in a mixed dish, and follow your pediatrician’s guidance.
Troubleshooting: Mushy Veggies, Underdone Centers, and Other Fixes
Even with a solid formula, frozen dump meals occasionally go sideways. Here’s how to fix the most common issues without starting over.
| Problem | Likely Cause | Fix |
|---|---|---|
| Center of meat still pink or icy | Protein was frozen in a solid clump, or cut was too large for the time given | Reseal, cook 3-5 more minutes at high pressure; next time freeze in a thinner layer |
| “Burn” notice on the display | Not enough liquid, or thick sauce sitting directly on the bottom of the pot | Release pressure, add ½ cup liquid, deglaze the bottom with a wooden spoon before restarting |
| Vegetables turned to mush | Delicate vegetables added at the start instead of after cooking | Add frozen vegetables after pressure release next time; sauté 2-4 minutes with the lid off |
| Sauce too thin or watery | Extra liquid released from frozen protein during cooking | Simmer uncovered on sauté mode 5 minutes, or stir in a 1 tbsp cornstarch + 2 tbsp water slurry |
| Ground meat cooked in one solid gray lump | Frozen as a dense block instead of a flat layer | Release pressure, open the lid, break up the meat and confirm 160°F beef / 165°F turkey before continuing; freeze flat next time |
| Rice or grains cooked unevenly alongside protein | Liquid ratio too low for combined ingredients | Use 1.5-2 cups liquid whenever grains are cooking alongside protein, not the standard 1 cup |
| Dish tastes flat or under-seasoned | Frozen ingredients dilute seasoning more than fresh | Taste and adjust salt, acid (lime or vinegar), and spice after cooking, right before serving |
Keep this table handy for your first month or so of frozen dump meals. After that you’ll spot these patterns before they happen.
Sample Week of Freezer-to-Instant-Pot Dinners
A stocked freezer and a formula you trust make a busy fall much easier. Our guide to quick family dinners for fall sports season covers getting food on the table before practice. Freezer-to-Instant-Pot meals cover the nights you didn’t plan ahead.
A realistic week might look like:
- Sunday prep: Move the pork-shoulder bag to the fridge Saturday night. On Sunday, cook the Pulled Pork for dinner and a pot of Beef and Bean Chili (stew-cube bag) for Wednesday. Cool both in shallow containers and freeze leftover pork in portions.
- Monday: Salsa Verde Chicken Tacos from a bag of frozen thighs, about 45 minutes total.
- Tuesday: Honey Garlic Meatballs over rice from the meatball bag, about 35 minutes and one pot to wash.
- Wednesday: Sunday’s chili from the fridge, reheated to 165°F.
- Thursday: Creamy Tuscan Chicken from the chicken-breast bag, about 45 minutes total.
- Friday: Coconut Curry Chicken (thigh bag) or the Turkey and Rice Skillet (ground-turkey puck), whichever bag you have.
A well-stocked freezer also means fewer emergency takeout orders. Buy proteins in bulk when they’re on sale, then portion and freeze them for Instant Pot cooking. Our budget meal planning guide shows how to plan the rest of the week around them.
Want more variety before things get busy? Our freezer-friendly back-to-school dinners roundup is a good next stop for expanding your rotation beyond the seven recipes above.
Freeze proteins flat and separated, keep the timing chart on the fridge and check the temperature every time. Do that, and a night with nothing thawed still ends with dinner on the table.
Frequently Asked Questions
Is it actually safe to cook frozen meat in an Instant Pot?
Often, yes, if your manual allows it, the pieces are separated and you use frozen-start times like the ones in our chart. Safety comes from the final temperature, not from speed: 165°F for poultry, 160°F for ground beef and 145°F with a 3-minute rest for whole cuts. Check with a thermometer rather than relying on time alone.
Do I need to add extra liquid when starting from frozen instead of thawed?
Not usually more than your manual’s minimum (typically 1 cup for a 6-qt and 1.5 cups for an 8-qt), since frozen ingredients release moisture as they cook. Where you do need more liquid is when cooking grains or rice alongside protein: bump up to 1.5-2 cups in those cases.
Can I freeze a whole uncut roast and cook it from frozen?
Skip this one. The center of a large uncut roast, like a whole pork shoulder or a big chuck roast, won’t reach a safe temperature within a reasonable Instant Pot cook time. Thaw it in the fridge first, or cut roasts into chunks no thicker than about 3 inches before freezing so they cook within the chart times. For pork shoulder, thawing the chunks in the fridge overnight is still my default.
Why did my Instant Pot give me a “Burn” notice with a frozen dump meal?
This almost always means there wasn’t enough thin liquid at the bottom of the pot, or a thick sauce was sitting directly against the heating element before pressure built. Release pressure, scrape the bottom of the pot clean with a wooden spoon, stir in an extra ½ cup of broth or water, and restart the cook cycle.
Can I put frozen vegetables in with the protein from the start?
Hardy vegetables like potatoes and large carrot chunks hold up fine on cooks of about 20 minutes or less. Delicate vegetables like broccoli, green beans, and bell peppers turn mushy under the full cook cycle — stir those in after you release pressure and sauté for 2-4 minutes instead.
How is this different from just using the slow cooker function on my Instant Pot?
The slow-cook setting works like any slow cooker, so thaw meat in the fridge before using it. The frozen-start times in this guide are for pressure cooking only; see the Instant Pot vs. slow cooker comparison above.
My chicken was still slightly pink in the center after cooking — what went wrong?
First check the thickest piece with a thermometer; color alone isn’t a reliable test, and 165°F means it’s done. If it reads lower, the pieces were probably frozen together in one dense clump, so the center never fully thawed. Reseal and pressure cook 3-5 more minutes, then check again. Next time, freeze pieces flat and separated.
Can I double a frozen dump meal?
Sometimes. Keep the protein in a single separated layer rather than stacked, and don’t exceed the max fill line (two-thirds full, or half for foamy foods). Expect to need more time, and check the safe temperature at the thickest point before serving.