Easy Latkes Recipe Kids Can Help Make This Hanukkah
Learn how to make crispy latkes with your kids using an age-by-age job chart and a safer oven-fried option.
- Assign specific tasks based on your child's age using the job chart.
- Keep hot oil handling strictly an adult job for safety.
- Try the 425°F oven-fried method to skip stovetop oil entirely.
- Let kids handle tactile steps like scrubbing, squeezing, and mixing.
This post contains affiliate links. As an Amazon Associate I earn from qualifying purchases.
The first year my kids helped with latkes, I handed my five-year-old a box grater and turned around to find the olive oil. I heard a very small “oh.” Nobody was hurt, but I decided I needed a plan.
Latkes are cheap, hands-on, and a great holiday food to cook with kids. They also come with a skillet of hot oil, which most kid-friendly advice skips over.
Below you’ll find an age-by-age job chart for kids 3 to 8, a classic skillet recipe with the kid jobs marked, and an oven-fried version that keeps hot oil off the stovetop. Toppings, fixes, make-ahead tips, and a few more easy Hanukkah recipes for kids round it out.
Good to knowQuick answer: Mix 2 pounds grated, well-squeezed russet potatoes with 1 small grated onion, 2 eggs, 3 tablespoons flour or matzo meal, 1 teaspoon salt, and 1/4 teaspoon pepper. Prep takes about 30 minutes. Shallow-fry in 350-375°F oil for 3 to 4 minutes per side. Or bake at 425°F on preheated, oiled pans for 15 minutes, flip, and bake 10 to 12 minutes more. Kids handle the scrubbing, squeezing, mixing, and shaping; hot oil stays an adult job.
In this article (15 sections)
- Latke Recipe for Kids: Why It Works as a Cooking Project
- The Age-by-Age Job Chart
- Before You Start: Setup That Saves Your Sanity
- Ingredients and Tools
- Classic Latkes, Step by Step (With Kid Jobs Marked)
- The Oven-Fried Version (Oil-Free on the Stovetop)
- Toppings and a Latke Bar Kids Can Build
- More Easy Hanukkah Food Ideas for Kids
- Troubleshooting Common Latke Problems
- Make-Ahead, Freezing, and Reheating
- Allergy and Dietary Swaps
- A Few Tips for Cooking Latkes With Different Ages at Once
- Making It a Hanukkah Tradition
- Frequently Asked Questions
- Your Latkes Don’t Have to Be Perfect
Latke Recipe for Kids: Why It Works as a Cooking Project
The steps are separate and tactile. Scrubbing, grating, squeezing, stirring, scooping, and flipping are each their own job. A preschooler can do the squishy ones. An older kid can do the ones that need more control.
Mistakes are cheap. A lopsided latke tastes the same as a perfect one, and a few potato shreds on the floor cost almost nothing. That takes the pressure off you and the kids.
The payoff is fast. From shredded potato to something golden on a plate takes under an hour. Younger kids lose interest in anything that takes longer than that.
The flavors are familiar. A latke is crispy potato, which most kids will try, and applesauce and sour cream are easy wins for wary eaters. Kids also get to choose their own toppings.
Beyond dinner, the project quietly teaches:
- Measuring, counting, and sequence (two eggs, one teaspoon of salt, and you can’t flip what you haven’t cooked)
- Cultural and family connection. If you celebrate Hanukkah, cooking latkes together is a lovely way to pass the holiday down. If you don’t, it’s a respectful, delicious way to learn about a friend’s tradition or to bring something to a neighbor’s party.
A quick note on that last point. Latkes are traditionally fried in oil because the Hanukkah story centers on a small amount of oil that lasted eight days. That’s why the oil is part of the meaning, not just the cooking method. The oven-fried version below is a practical choice for families with little kids. It is still a latke, and it keeps the flavor and the tradition of making them together. If you want the full symbolic experience, you can do the skillet version yourself while the kids handle everything else, and I’ve written that approach out too.
The Age-by-Age Job Chart
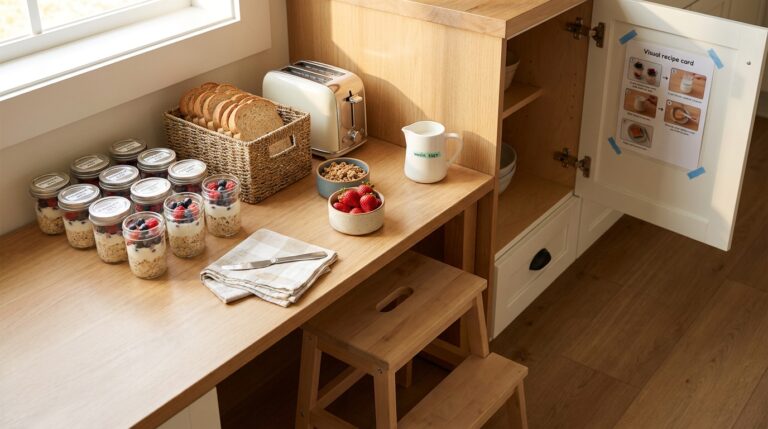
I’ve sorted jobs by what small hands can really do, not by what looks cute in a photo. Copy each child’s row onto a sticky note and tape it to a cabinet door so everyone knows their job before the potatoes come out.
Ages are a guide. Kids vary a lot, so use your own judgment about your own kid. If you’ve taught your seven-year-old to crack eggs and your five-year-old can’t be trusted near a spoon yet, adjust.
| Job | Ages 3-4 | Ages 5-6 | Ages 7-8 |
|---|---|---|---|
| Washing and scrubbing potatoes | Scrub with a vegetable brush in a bowl of water | Scrub and dry with a towel | Scrub, dry, and peel with a Y-peeler |
| Grating | Press the food processor’s start button while the adult’s hand stays on the machine; help pour out shreds only after it’s unplugged and the disc is removed | Grate soft zucchini or cucumber only, wearing a cut-resistant glove with an adult beside them. The adult grates the potatoes or runs the processor | Grate potatoes on a box grater with a cut-resistant glove, adult nearby |
| Squeezing out water | Squish shreds in a clean dish towel (they love this) | Squeeze with both hands over the sink | Squeeze the towel into a twist, wring hard |
| Cracking and mixing | Stir dry ingredients with a big spoon; pour in pre-measured flour | Crack eggs into a separate bowl, then fold everything together | Measure, crack, whisk eggs, and mix the whole batter |
| Shaping | Press a scoop of batter flat on a cold, lined tray | Scoop with a cookie scoop onto the cold tray and flatten with a spatula | Scoop, shape thin and even, and space them out on the cold, lined tray |
| Flipping (oven-fried) | Watch from a safe distance and call “Flip!” | Adult only. Kid calls out “Flip!” or hands over the spatula | Flip with the pan out of the oven on a heatproof surface, adult right beside them in oven mitts |
| Flipping (skillet) | Adult only. Kid is the “timer keeper” at a safe distance | Adult only. Kid waits behind the taped line and carries cooled latkes to the table later | Adult only for hot oil, no exceptions. Kid stays on the floor behind a taped line a few feet from the stove and tells the grown-up when the edges look brown |
| Plating and topping | Spoon applesauce onto plates | Build a topping bar with small bowls | Set the table, arrange latkes, and serve everyone |
The rule about hot oil
I’ll say it directly: in the skillet version, hot oil is an adult job at every age. Even a careful eight-year-old is not ready to flip food in a pan of 350-degree oil. Oil spatters, pans slide, and a sleeve can brush a burner. Kids can do a lot in the latke process, but frying isn’t on the list.
If that feels like a big limit on the fun, it doesn’t have to. The kids do the grating, squeezing, mixing, and shaping, which is most of the work and most of the fun. And the oven-fried version below lets older kids flip with an adult right beside them.
Safety firstHot oil is adult-only at every age. Mark a taped line on the floor a few feet from the stove and keep kids behind it. Turn pan handles inward, keep a lid nearby for flare-ups, and never use water on an oil fire.
A word on graters
Box graters are the part that makes parents nervous, and for good reason. Here is how I handle it:
- Use a food processor for the first pass if you have one. The shred disc does a pound of potatoes in about a minute. The adult does the feeding. Kids watch from a step back and press the start button while your hand stays on the machine. They help pour out the shreds only once it’s unplugged and the disc is removed.
- Hand grating is a practice job. Ages 5 and 6 grate only soft vegetables like cucumber or zucchini, wearing a cut-resistant glove with you right beside them. Until about age 7, the grown-up grates the potatoes or runs the processor.
- Buy a cut-resistant glove. They cost a few dollars and are well worth it, especially for a child using a grater for the first time. Have them wear it on the hand holding the potato. Our gift guide for kids who love to cook sorts real kitchen tools by age.
- Grate a chunk, not a nub. The injuries happen when the last small bit of potato gets pushed against the blade. Teach “stop when about an inch of potato is left” and use the leftover nub in the soup pot.
For a broader look at which kitchen tasks suit which ages, our age-by-age guide to teaching kids to cook covers knife skills, stove safety, and the order I introduce them.
Before You Start: Setup That Saves Your Sanity
Latkes are messy in a specific way. Potato starch is slippery, and the water that comes out of grated potatoes ends up everywhere. A little setup helps.
Set up stations, not one big counter
Kids do better when each job has its own spot:
- Washing station at the sink with a scrub brush and a bowl
- Grating station on a rimmed baking sheet, so shreds stay corralled
- Squeezing station with a clean dish towel and a big bowl underneath
- Mixing station with the batter bowl, measured ingredients, and spoons
- Shaping station with the lined pan or tray
A rimmed sheet pan under the grater is the single most helpful trick I know. Everything that falls lands on it, and you can scoop it back into the bowl.
Cover the floor and the sleeves
Old towels or a splash mat under little feet will save you a mopping session. Roll up sleeves, tie back hair, and put everyone in an apron. Potato starch water can leave gray stains, so an apron helps.
Wash hands and plan for raw egg
The batter contains raw egg. Set a rule: hands get washed after cracking eggs and before touching anything else. Kids are very good at following rules they understand, and “the egg has germs that cooking will take care of, but our hands need soap” makes sense to most four-year-olds.
Safety firstNo tasting raw batter and no licking spoons. Wash hands and wipe surfaces after anyone handles raw egg.
Ingredients and Tools
This makes about 16 small latkes, which feeds four people with a few left over.
Ingredients
- 2 pounds russet potatoes (about 4 medium). Russets are starchy, which makes crispier latkes.
- 1 small yellow onion, grated or chopped in the food processor (adult job)
- 2 large eggs
- 3 tablespoons all-purpose flour or matzo meal (both contain wheat; use certified gluten-free potato starch for a gluten-free version)
- 1 teaspoon kosher salt, plus more for sprinkling
- 1/4 teaspoon black pepper
- Neutral oil for frying (about 1/2 cup for the skillet version) or 3 tablespoons for the oven-fried version
Toppings
- Applesauce (homemade or store-bought)
- Sour cream or plain Greek yogurt
- Chopped chives
- Smoked salmon for older kids and adults only (skip it for babies, toddlers and pregnant guests; fully cooked flaked salmon is a safer swap)
- A sprinkle of flaky salt
Tools
- Box grater or food processor with a shred disc
- Clean cotton dish towel or cheesecloth
- Large mixing bowl
- Cookie scoop or 1/4 cup measure
- Thin metal spatula
- Large rimmed baking sheets (two), plus parchment
- Cut-resistant glove (optional but recommended)
- Wire rack set over a baking sheet for draining
Classic Latkes, Step by Step (With Kid Jobs Marked)
This is the skillet version. If you’re skipping straight to the oven-fried one, scroll down. Steps 1 to 5 are the same for both.
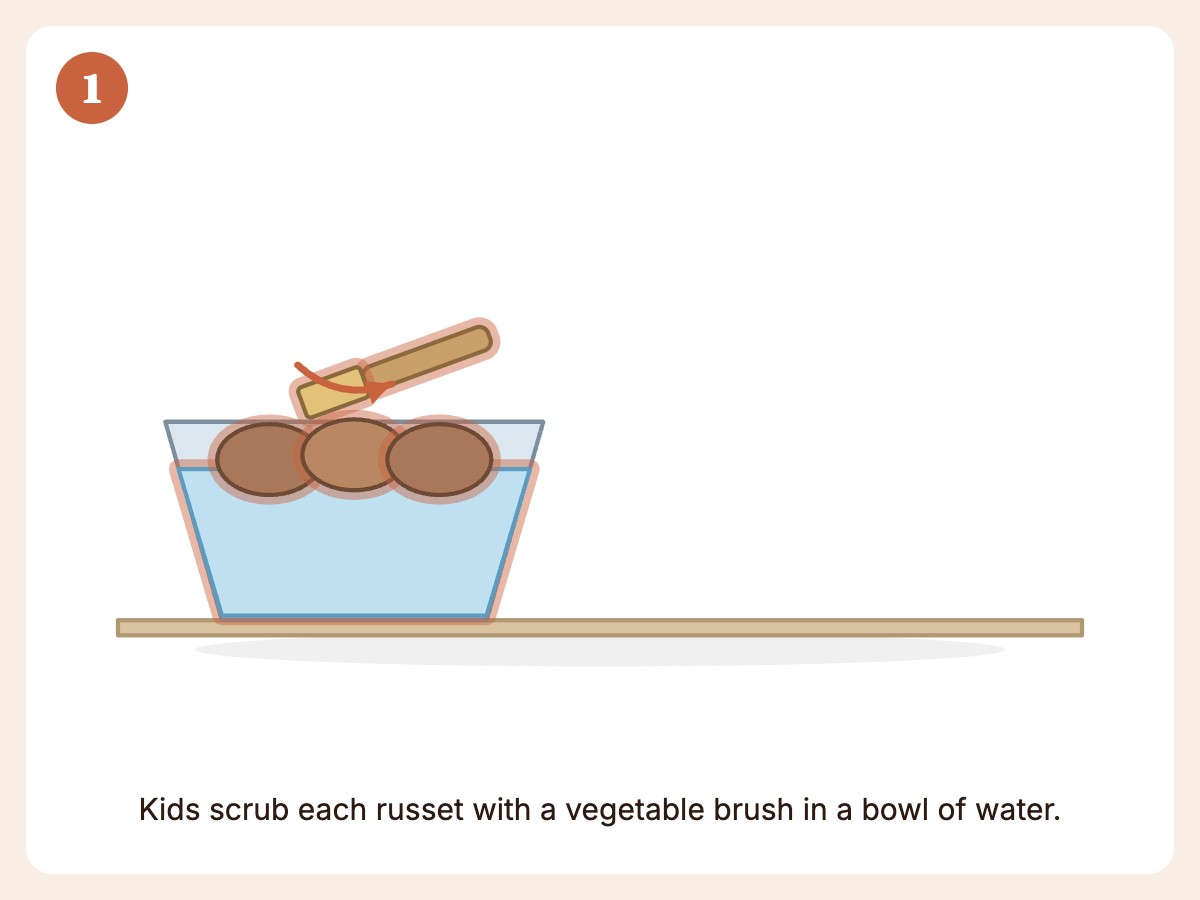
Step 1: Scrub and prep the potatoes (kid job)
Little kids can scrub the potatoes in a bowl of water with a vegetable brush. This is a good job for a three-year-old because it’s hard to do wrong, and it keeps them busy for about ten minutes.
For an older child, give them a Y-peeler and a bowl for the peels. Peeling is optional. Leaving the skin on adds fiber and some rustic texture, and kids who object to “brown bits” can have a peeled batch.
Step 2: Grate the potatoes (ages 7-8 with supervision; adult job for younger kids)
Use the food processor or box grater, following the tips above. As you finish, put shreds into a big bowl. Pile them onto the middle of your dish towel.
Grate the onion alongside the potatoes, or chop it in the food processor. It adds flavor and moisture. This one is an adult job.
Step 3: Squeeze the water out (kid job, the best one)
This is the step that makes or breaks a latke. Wet shreds turn into steamed, gummy pancakes. Dry shreds turn into crispy ones.
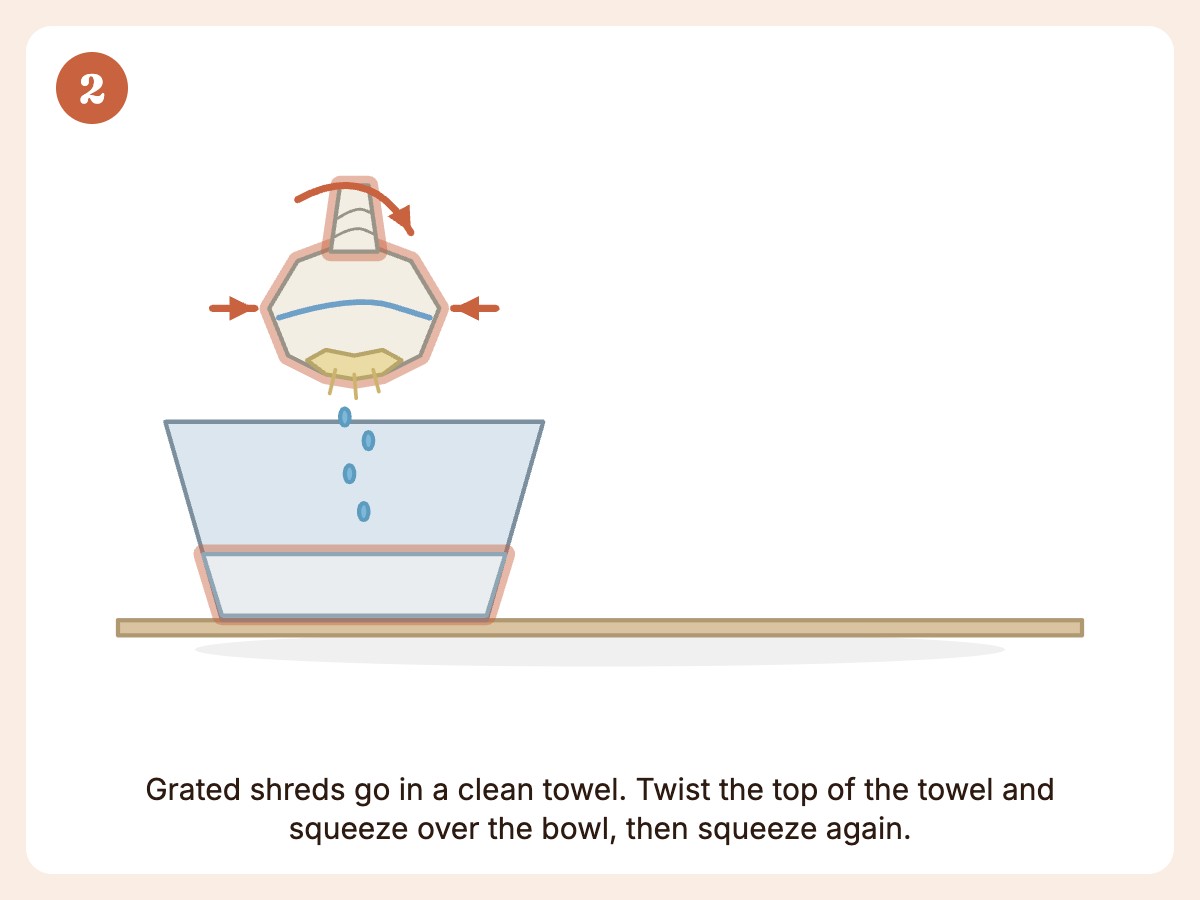
Gather the towel up around the potatoes like a bundle and squeeze over the bowl. Then squeeze harder. Kids love this step because it’s physical and the results are visible: water pours out, and the potato pile gets noticeably smaller.
A few pro tips:
- Squeeze twice. After the first squeeze, fluff the shreds and squeeze again. The second round usually releases another few tablespoons.
- Use your hands, not just a towel. An eight-year-old’s grip is often stronger than you’d think.
TipSave the starch. Let the squeezed liquid sit for a couple of minutes so the white starch settles at the bottom of the bowl. Pour off the water and scoop the starch back into your potatoes. It helps bind the batter, so you may need less flour.
Step 4: Mix the batter (kid job)
Put the squeezed potatoes and onion into a dry bowl. Add:
- 2 eggs (cracked into a separate small bowl first, so shells can be fished out)
- 3 tablespoons flour or matzo meal
- 1 teaspoon salt
- 1/4 teaspoon pepper
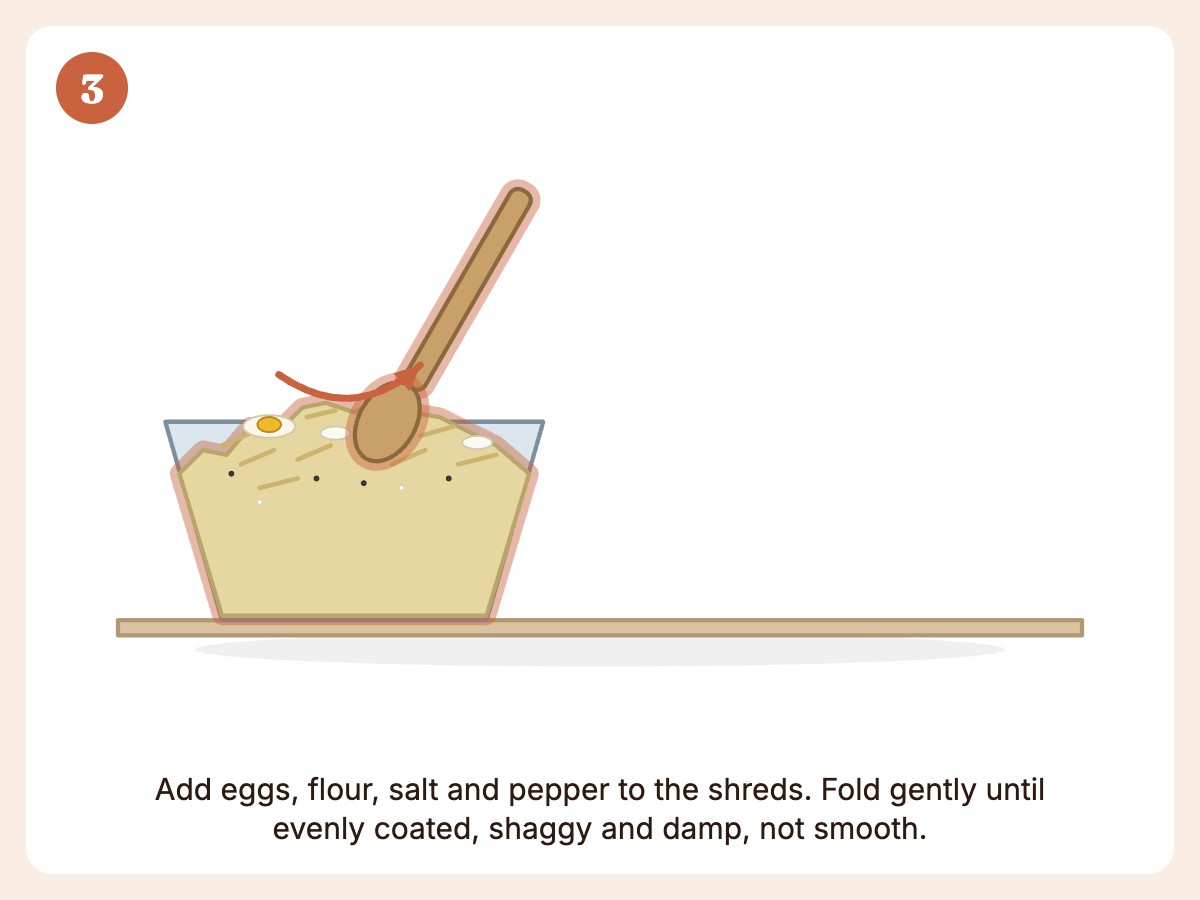
Give kids big spoons and let them fold everything together until it looks evenly coated. Three-year-olds can stir the flour and seasonings. Five- and six-year-olds can crack the eggs (into their own bowl, with an adult standing by). Seven- and eight-year-olds can measure the ingredients and mix the whole batter.
Everyone washes hands after cracking eggs, and nobody tastes the raw batter.
The mixture should look like a shaggy, damp potato salad and hold together when pressed in your hand. If it feels soupy, squeeze a little more water out. If it won’t hold together, stir in the reserved starch or another tablespoon of flour or matzo meal.
Step 5: Shape the latkes (kid job)
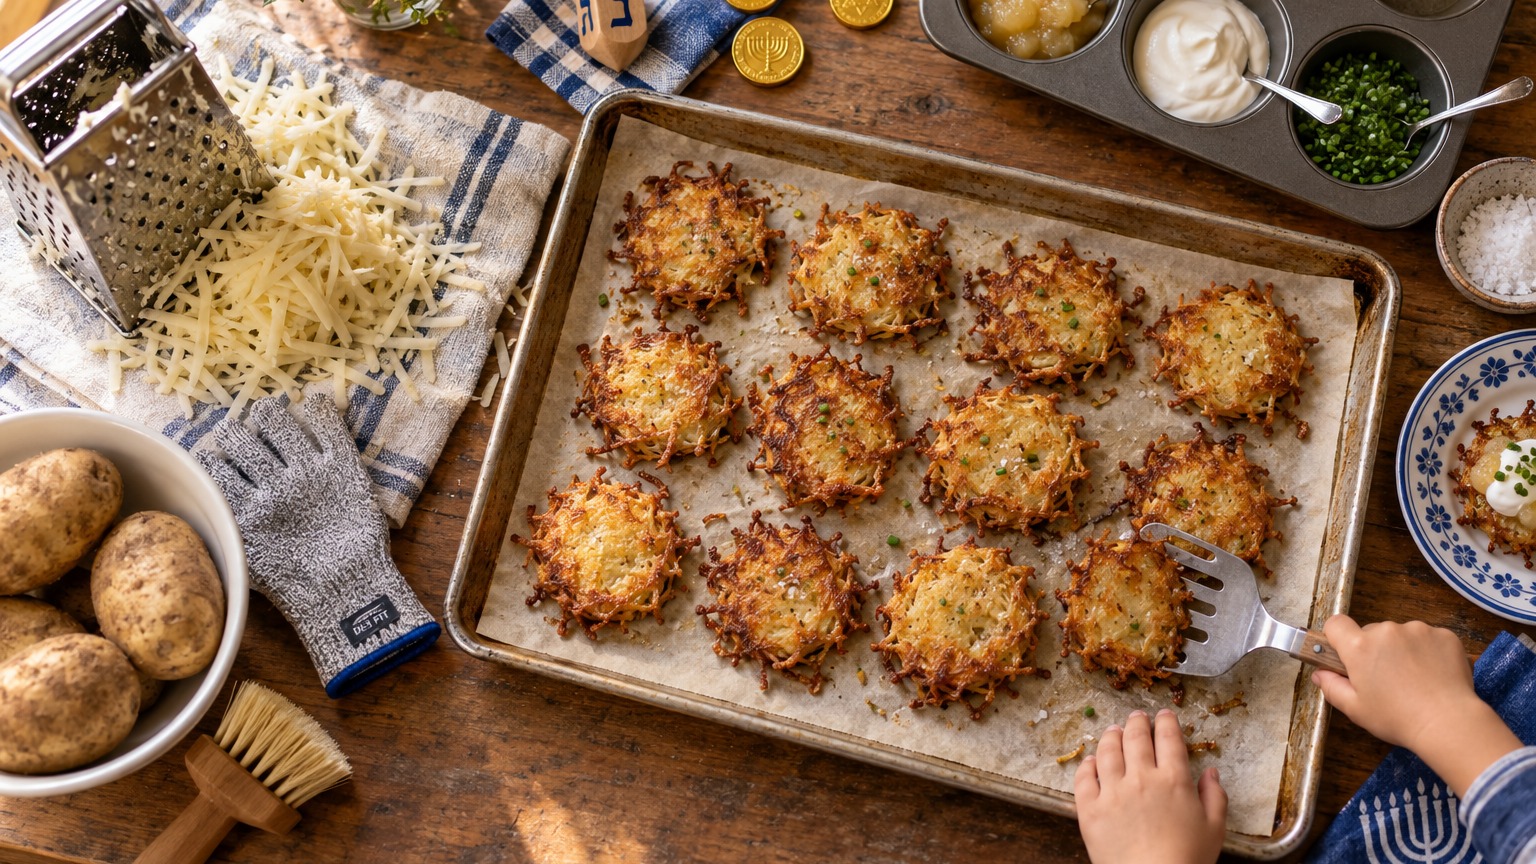
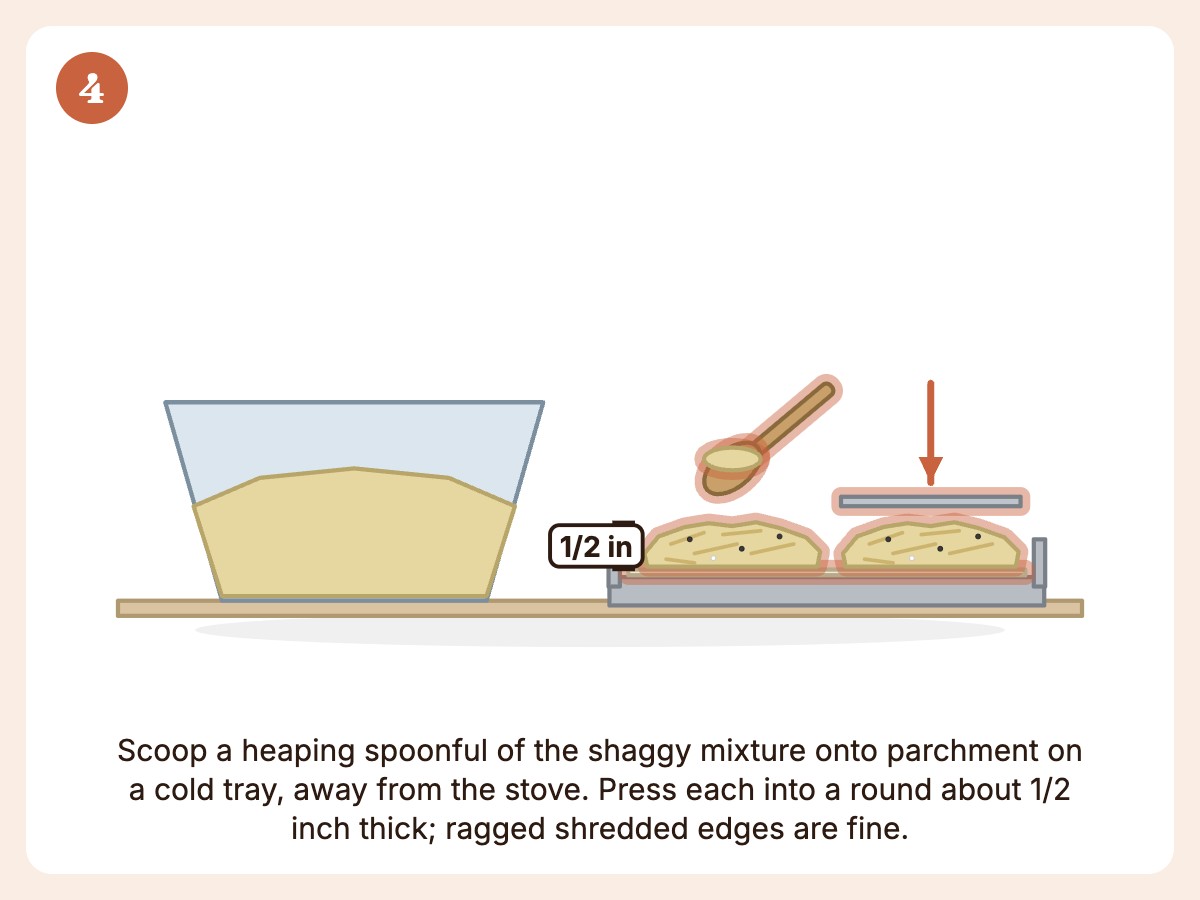
Scoop with a 1/4 cup measure or a cookie scoop. For both versions, kids shape the latkes on parchment on a cold tray, well away from the stove, and press them flat with a spatula. The adult then slides them into the skillet or onto the hot pans.
Thin latkes crisp faster and more evenly than thick ones. Aim for about 1/2 inch thick. Thicker ones tend to be crunchy outside and mushy inside.
Step 6: Preheat and prep the pan (adult job)
For the skillet version, heat about 1/2 cup of oil in a large heavy skillet (cast iron works well), enough to coat the bottom in a thin layer. Bring it to 350-375°F on a thermometer over medium-high heat, and add a splash more between batches if it runs low. It should shimmer, and a test shred dropped in should sizzle immediately without smoking.
Safety firstKeep a lid nearby to smother any flare-up, and never put water on an oil fire. Turn the pan handle inward and keep kids behind the taped line.
Step 7: Fry the latkes (adult job, kids as helpers from a distance)
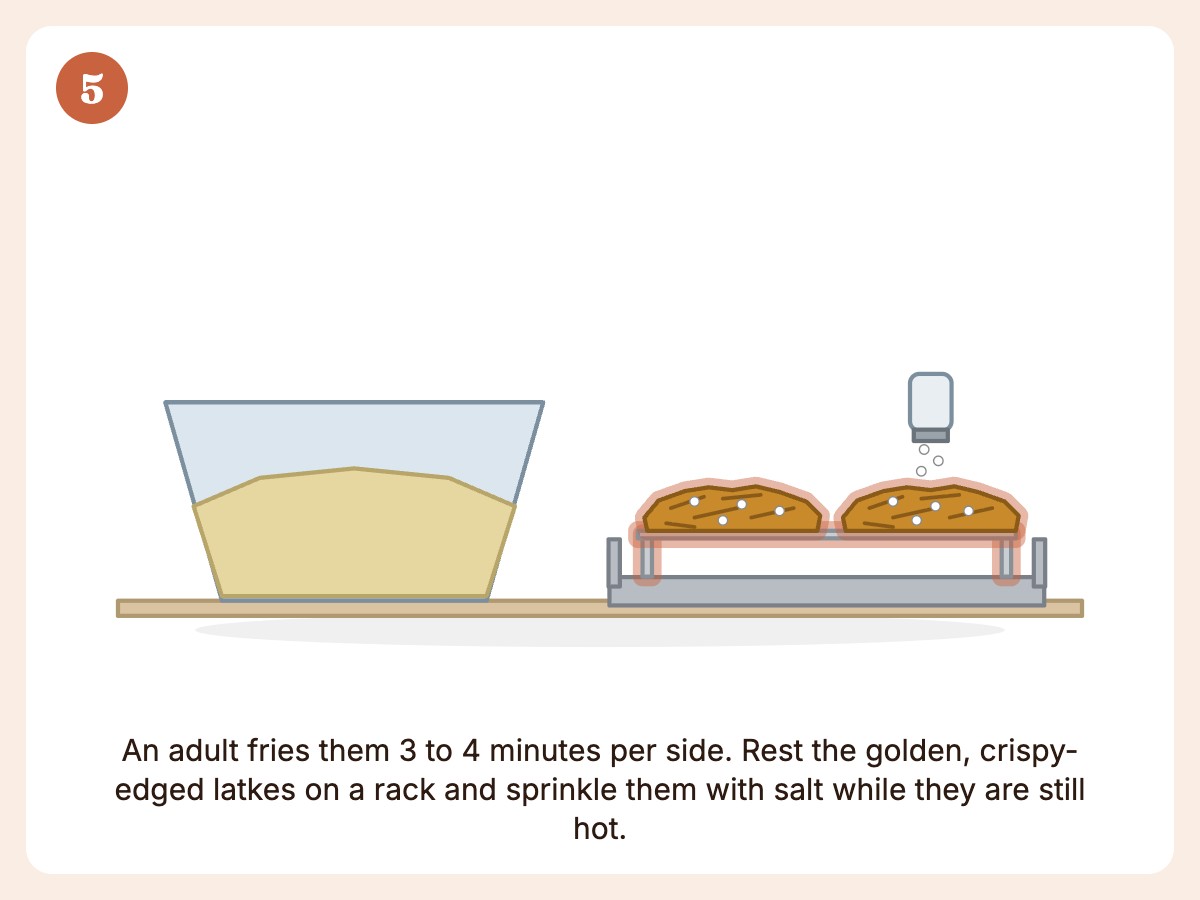
Carefully slide the latkes into the hot oil, four to five at a time, without crowding. Fry 3 to 4 minutes per side, flipping once, until deep golden and crispy at the edges.
This is where kids can be the timers and the quality-control team. Have them stand behind the taped line on the floor, a few feet from the stove, holding the timer, and let them announce when it’s time to check.
The adult moves the cooked latkes to a wire rack set over a baking sheet on the counter, away from the stove, and sprinkles them with a pinch of salt while they’re hot. A rack keeps the bottoms crisp, where paper towels can make them steam and soften. Kids carry them to the table only after they’ve cooled for several minutes.
Step 8: Plate and serve (kid job)
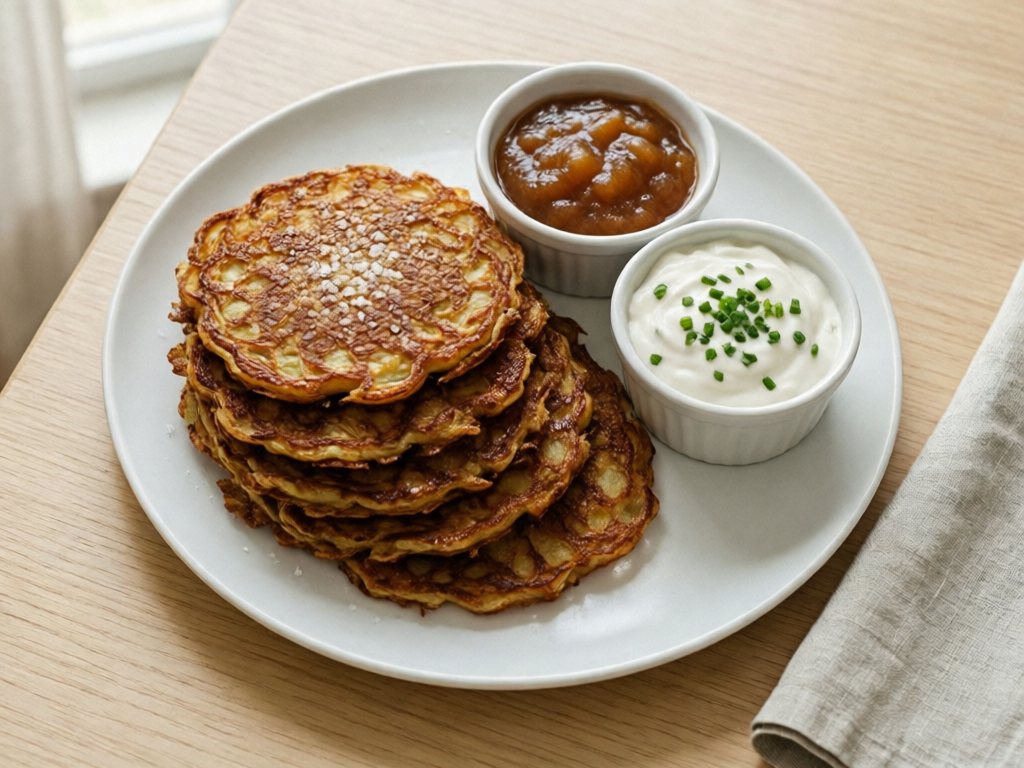
Let the kids set up a topping bar: small bowls of applesauce, sour cream, and chives, plus a stack of napkins. Kids who build their own plate are often more willing to take a first bite of something new.
The Oven-Fried Version (Oil-Free on the Stovetop)
This is the version I make most often when my kids are helping. It isn’t a perfect copy of a skillet latke, but it’s close, and it makes the whole process safer and calmer. You’ll lose the lacy, frilly edges that come from frying. You gain a kitchen where older kids (7 to 8) can flip latkes with an adult right beside them once the pan is out of the oven.
Steps 1 to 5 are identical to the classic recipe. Here’s what changes.
Safety firstKids shape latkes on parchment on a cold tray. The adult slides the latkes off the parchment onto the hot pans and does the first flips. Ages 7-8 flip only with the pan out of the oven on a heatproof surface and an adult beside them in oven mitts.
Oven-fried latkes: ingredients
Use the same base batter, plus 3 tablespoons neutral oil for the pan (avocado, canola, or light olive oil all work).
Oven-fried latkes: method
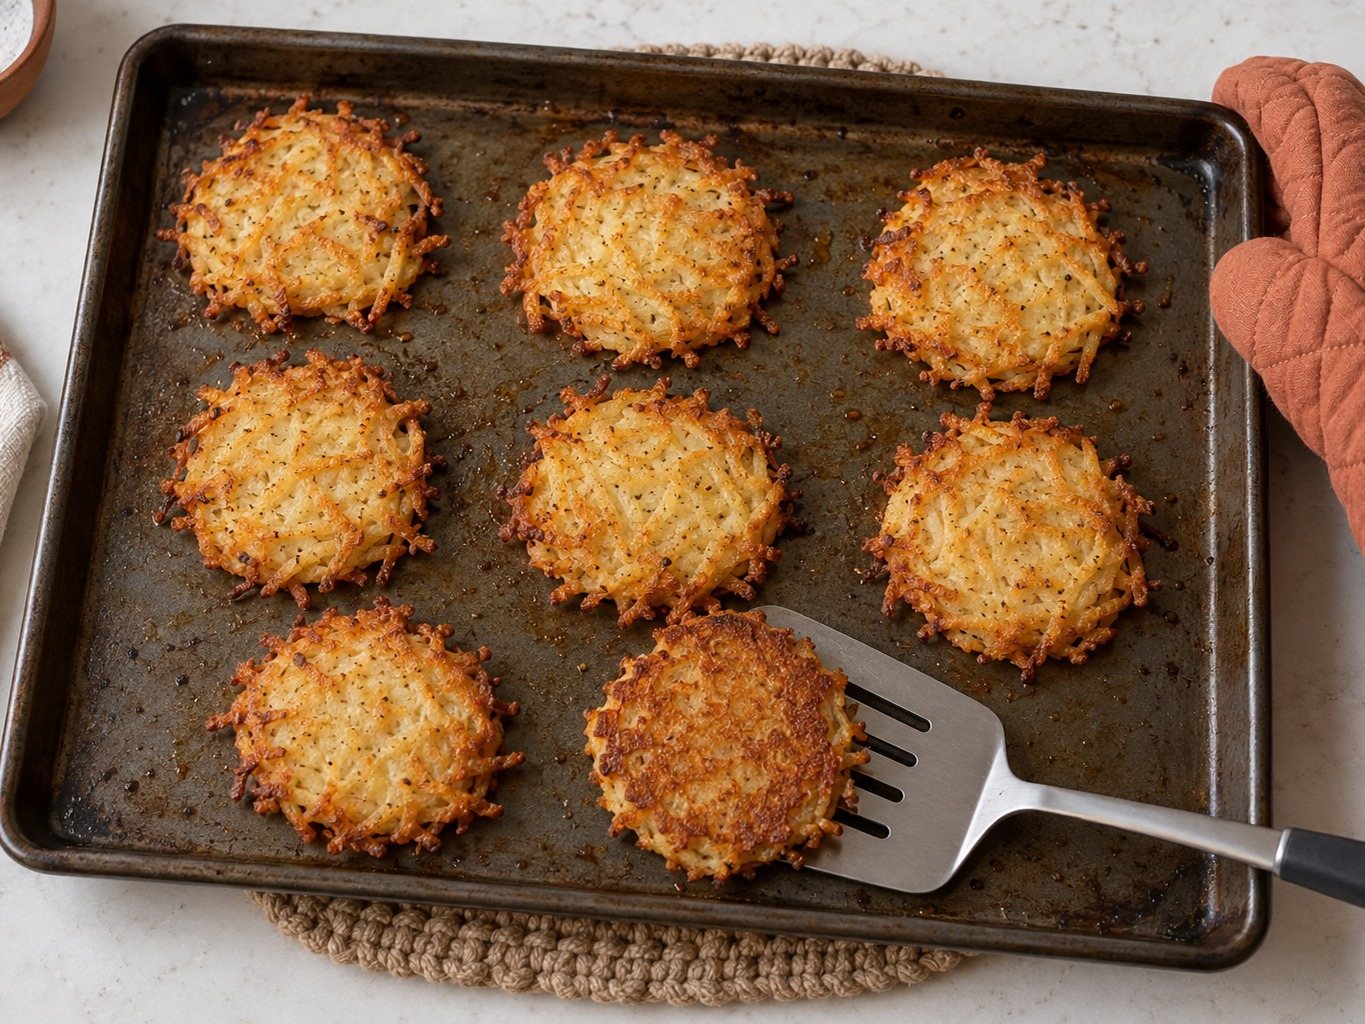
- Preheat the oven to 425°F. Put two rimmed baking sheets in the oven while it heats, which takes about 15 minutes. Start it while the kids squeeze and mix. Hot pans are the secret to a crisp bottom.
- Add oil to the hot pans. When the oven is ready, carefully pull out the sheets (adult job) and drizzle 1 1/2 tablespoons oil onto each. Tilt to coat. Be careful, because the oil may spit.
- Shape on a cold tray. Kids scoop the batter onto parchment on a cold tray in flat mounds, leaving 1 inch between, and press each one down to about 1/2 inch thick. The adult then slides the latkes off the parchment onto the hot pan and discards the parchment. Work in two rounds, or use three pans, since 16 latkes won’t fit on two. Never have kids place batter directly onto a freshly heated pan.
- Bake 15 minutes. The bottoms should be golden and release easily.
- Flip. Using a thin metal spatula, flip each latke. Ages 7 to 8 can do this with the pan out of the oven on a heatproof surface and an adult right beside them in oven mitts. Younger kids call out “flip!” from a step back.
- Bake another 10 to 12 minutes, until both sides are deep golden and the edges are crisp.
- Rest 2 minutes on the pan before serving, then season with salt.
What to expect from the oven version
- Texture: Crispy bottoms, tender centers, and slightly drier edges than skillet latkes. They hold their shape well, and they reheat beautifully.
- Time: 25 to 27 minutes of baking per round, hands-off except for the flip. Two rounds take about 55 minutes, and you can wash dishes while they bake. Preheating the oven and pans adds about 15 minutes, so start it during prep.
- Cleanup: One pan per tray. No oil splatter on your stovetop, no pan of leftover oil to dispose of.
- Oil: Much less than frying. Going lower can cause sticking at 425°F, so don’t cut the oil further.
A note on the air fryer
If you have an air fryer, it can make a good small batch of latkes. I’ve covered the technique and times in our air fryer recipes for families roundup. The short version: cook thin 1/2-inch latkes at 375°F for about 10 minutes, flip, and cook another 6 to 8 minutes. Work in batches so they don’t touch, because crowding makes them steam.
Oven-fried vs. skillet: which one should you make?
| Skillet-fried | Oven-fried | |
|---|---|---|
| Kid involvement | Everything except the frying | Everything, including flipping for ages 7-8 with an adult beside them |
| Texture | Lacy, crisp, deeply golden | Crisp bottoms, tender centers |
| Mess | Oil splatter, stovetop cleanup | Minimal |
| Oil used | About 1/2 cup | About 3 tablespoons |
| Cook time | 30 to 40 minutes, all of it active at the stove | 25 to 27 minutes per round (about 55 for two), plus about 15 minutes to preheat; mostly hands-off |
| Best for | Tradition, flavor, older kids watching | Younger kids, big batches, calm kitchens |
My own rule: I fry in the skillet when I’m cooking the Hanukkah dinner with no kids near the stove, and I bake when the kids are the cooks.
Toppings and a Latke Bar Kids Can Build
Letting kids set up and choose their own toppings is half the fun, and it gives picky eaters some control over what ends up on the plate.
The basics
- Applesauce. The classic sweet pairing. Cinnamon applesauce is a hit with most kids.
- Sour cream or plain yogurt. Cool and tangy. Greek yogurt is a high-protein swap.
- Ketchup. Honestly, many kids like it. I’m not here to judge.
Savory add-ons
- Finely chopped chives or scallions
- Fully cooked flaked salmon with a squeeze of lemon (skip smoked salmon for babies, toddlers and pregnant guests)
- Soft cheese, like cream cheese or goat cheese
- A fully cooked egg with a firm white and yolk, on top for dinner
Sweet add-ons
- Pear or apple slices (very thin or cooked soft for under 4)
- A drizzle of honey (never for babies under 12 months)
- A dusting of cinnamon sugar
Setting up the bar
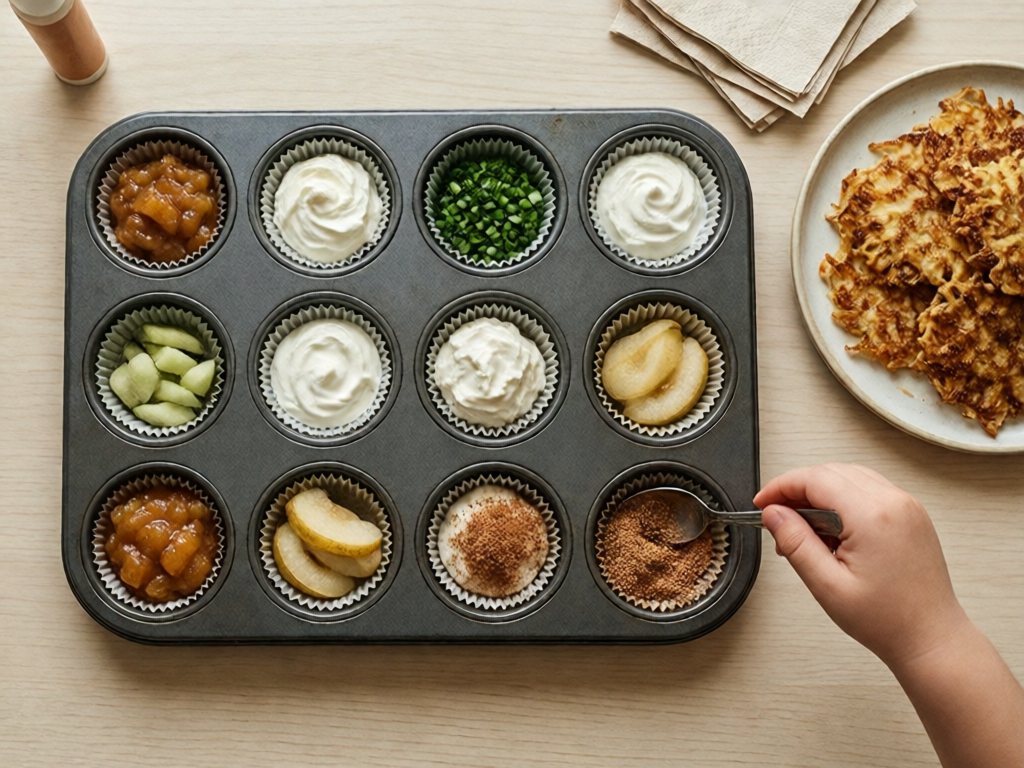
Use a muffin tin as a topping tray. Each cup holds a different topping, small hands can reach, and cleanup is easy. Label cups with a sticky note or a drawing if you have pre-readers helping set up.
If you’re working on getting a hesitant eater to try new things, a topping bar is a low-pressure way to do it. Offer one new topping alongside the familiar ones and don’t comment on whether it gets used. Our guide on food chaining goes deeper on that approach.
More Easy Hanukkah Food Ideas for Kids
These sides, desserts and snacks round out a Hanukkah table, and most have a job a child can do.
Safety firstFor children under 4: skip whole nuts and hard sprinkles, and unwrap all gelt. Slice apples and pears very thin or cook them soft. Shred or finely chop brisket and chives, cut mini latkes into small pieces, and stay close while they eat. For babies, introduce new allergens (egg, dairy, wheat, fish, nuts) one at a time at home, per your pediatrician’s guidance.
Dishes that pair well with latkes
- Roasted carrots and parsnips. Kids can toss the cut vegetables with oil and salt on a sheet pan. Roasting brings out sweetness.
- A simple green salad with a mild dressing. Let kids tear the lettuce.
- Baked chicken or sliced brisket. Traditional mains that reheat well. Shred or finely chop brisket for children under 4.
- Cheese blintzes or noodle kugel. Many families have a favorite recipe. Kids can pour and stir for kugel.
Dessert ideas
- Sufganiyot-style baked doughnuts. Jelly-filled doughnuts are traditional. A baked doughnut version cuts the frying, and kids can fill them with a squeeze bottle of jam.
- Chocolate coins (gelt) bark. Melt chocolate, spread on parchment, and let kids press in unwrapped gelt and sprinkles. Break into small pieces when set. For under 4, skip whole nuts and hard sprinkles.
- Blue-and-white yogurt parfaits. Layer vanilla yogurt with blueberries. Easy for even a three-year-old to assemble.
Snack-sized ideas
- Mini latkes (use a tablespoon scoop) for lunchboxes, cut small for under 4
- Dreidel-shaped sandwiches cut with a cookie cutter
- Very thin or cooked-soft apple slices with cinnamon
For more family cooking projects around the season, our around-the-world dinner nights guide has ideas for exploring other holiday and cultural foods. If the kids want to keep cooking, try our holiday cookie baking guide for kids.
Troubleshooting Common Latke Problems
My latkes fall apart
Usually too much moisture or too little binder. Squeeze the potatoes harder, add the reserved starch from the bottom of the liquid, and consider adding an extra tablespoon of flour or matzo meal. Also make sure you’re not flipping too early. Wait until the bottom is deeply golden and the latke releases from the pan easily.
They’re gray or brown
Potatoes oxidize quickly once grated. To slow it down, grate the onion in with them (the onion helps a little), work fast, and don’t let the batter sit for long. If you need to wait, cover the shreds with cold water, then drain and squeeze completely dry before mixing. Graying is harmless and cooking covers most of it, but toss any potatoes that smell off.
They’re soggy in the middle
Make them thinner and cook them longer. A latke thicker than 1/2 inch often doesn’t cook through before the outside burns. In the oven, use a hotter oven and make sure the pan is preheated.
They’re greasy
In the skillet, oil that isn’t hot enough soaks in. Make sure it shimmers before you add the batter. Drain on a wire rack, not paper towels, and don’t stack the finished latkes while hot.
They burn on the outside but are raw inside
Lower the heat and cook slightly longer. Medium heat usually works better than high once the pan is up to temperature.
The kids lost interest halfway through
Normal! Split the job. Do the grating and squeezing with them, then let them go play while the latkes cook. Call them back for plating. Their involvement doesn’t need to cover every step to count.
Make-Ahead, Freezing, and Reheating
For a school-night Hanukkah dinner, cook the latkes on the weekend and reheat them on the night.
Make ahead
Cool latkes on a wire rack, then cover and refrigerate them within 2 hours. They keep up to 1 day, in a single layer or with parchment between layers. Reheat as below.
Freeze
- Freeze cooled latkes on a baking sheet in a single layer for about an hour, until solid.
- Transfer to a freezer bag, pressing out as much air as possible.
- Freeze for up to 2 months.
Reheat
Reheat on a wire rack set over a baking sheet at 400°F for about 10 minutes (about 15 from frozen). The air fryer works as well, about 5 minutes at 375°F. Reheat until steaming hot (165°F). Avoid the microwave, since it makes them limp.
The mini-latke lunchbox
Freeze small tablespoon-sized latkes. Thaw two or three in the fridge overnight, then pack them in a lunchbox with an ice pack and have your child eat them within a few hours. Pair with a small tub of applesauce.
Allergy and Dietary Swaps
| Need | Swap |
|---|---|
| Gluten-free | Matzo meal contains wheat. Use certified gluten-free potato starch in place of flour or matzo meal |
| Egg-free | Try 2 tablespoons potato starch plus 2 tablespoons water per egg, or 1/4 cup unsweetened applesauce for both eggs. Results vary and egg-free latkes are more delicate, so make them small and flip gently |
| Dairy-free | Skip the sour cream, use coconut yogurt or applesauce |
| Lower-sodium | Cut the salt in half and add herbs |
| Nut-free | The base latkes are nut-free, but check the oil and any toppings, and skip the nuts in the gelt bark |
| Lower-fat | Use the oven-fried method |
If you’re cooking for a child with a food allergy, double-check labels, especially on packaged matzo meal, which may be processed alongside other allergens. Check with your child’s doctor or allergist for guidance specific to your family.
A Few Tips for Cooking Latkes With Different Ages at Once
If you have kids of several ages (I do), mixing jobs works well.
- Pair a little one with a bigger one. The older child grates while the younger one squeezes. Each gets a job suited to their size.
- Give the oldest child a leadership role. “You’re the head chef today. You read the recipe and tell us what’s next.” Older siblings tend to take it seriously.
- Rotate jobs between batches. If you’re making two or three trays, let the kids switch roles so no one is stuck on the least exciting task.
- Plan one job for the kid who just wants to watch. Some days a child doesn’t want to touch anything wet and sticky. That’s okay. The “plating chef” and “topping bar manager” jobs are real work too.
- Keep one finished latke aside as a taste test. Let it cool for a few minutes, then break it open together to check it’s cooked through.
Making It a Hanukkah Tradition
If your family celebrates, three small habits turn latke night into a tradition:
- Make latkes on one of the eight nights, rather than all of them. A single cooking night feels special.
- Invite a grandparent or friend to share their own latke tricks. Kids love hearing, “This is how my grandma did it.”
- Write the recipe down in your own handwriting, with notes like “This year: Maya grated, Eli squeezed.” It becomes a family document.
If you don’t celebrate Hanukkah, cooking latkes with kids is a nice way to learn about the holiday alongside a friend or neighbor. Reading a picture book about Hanukkah while the latkes bake adds context, and it shows kids that food is one way people share their culture.
Frequently Asked Questions
What age can kids start helping make latkes?
Kids as young as three can scrub potatoes, stir dry ingredients, squeeze shredded potatoes in a towel, and spoon toppings. Ages five and six can crack eggs, scoop batter, and shape latkes. Seven- and eight-year-olds can often grate potatoes with a cut-resistant glove and an adult nearby, and mix the whole batter. They can also flip oven-baked latkes with the pan out of the oven on a heatproof surface and an adult right beside them. Hot oil is an adult job at every age, so skip the stovetop for kids and use the oven-fried version if you want them to do the flipping.
How do I make latkes without frying them?
Bake them at 425°F on preheated, lightly oiled sheet pans. Use about 3 tablespoons of oil total, scoop the batter into flat mounds about 1/2 inch thick, bake 15 minutes, flip, and bake another 10 to 12 minutes until golden and crisp. They’re not identical to skillet latkes, since the edges are less lacy, but they’re crisp, flavorful, and much easier to make with kids. An air fryer also works in small batches.
Why are my latkes falling apart?
Excess moisture is the usual culprit. Squeeze the grated potatoes in a clean dish towel until they stop dripping, then do it again. Let the squeezed liquid settle and add the white starch from the bottom back to the batter, as it acts as a natural binder. Make sure your pan or oil is hot before the batter goes in, and don’t flip until the bottom is deep golden. If it’s still crumbly, add another tablespoon of flour or matzo meal.
Can I make latke batter ahead of time?
It’s best to cook the batter right away, because grated potatoes release water and turn gray as they sit. If you need to prep ahead, grate the potatoes and keep the shreds submerged in cold water for up to a few hours, then drain and squeeze them completely dry before mixing. A better plan for busy days is to cook the latkes fully ahead of time, then freeze and reheat them in a 400°F oven.
What are some other easy Hanukkah recipes for kids besides latkes?
Good options include baked jelly doughnuts that kids fill with jam, chocolate gelt bark with sprinkles, blue-and-white yogurt parfaits, roasted carrots and parsnips, noodle kugel (kids can pour and stir), and apple slices with cinnamon. Dreidel-shaped sandwiches are also a fun lunchbox idea. Most of these have jobs that fit preschoolers through early elementary kids.
My child is a picky eater. Will they eat latkes?
Often, yes, because latkes are crispy fried potato, which is a familiar flavor and texture for many kids. Cooking them together helps even more, since many children are more willing to taste food they’ve helped make. Set up a topping bar so they control what goes on their plate, and offer one new topping alongside familiar ones without pressure. If they don’t want to eat any latkes, that’s fine. Their involvement can still count as exposure.
What are the best potatoes for latkes?
Russet potatoes are the standard choice because they’re high in starch and low in moisture, which gives the crispiest results. Yukon Golds work too and give a creamier center, though the latkes may be a little less crisp. Avoid waxy potatoes like red potatoes, which hold more water and make denser latkes. You can mix in a little grated sweet potato or zucchini for variety, but squeeze out the extra moisture well.
Your Latkes Don’t Have to Be Perfect
The first batch of latkes my kids helped make came out lopsided. Some were too thick, one was shaped like a lopsided heart, and one had a suspicious hole in it. We ate every one of them, with far too much applesauce, and my son announced it was the best dinner we’d ever had.
That’s the whole point. You’re not trying to produce a magazine photo. You’re giving your child a real job in the kitchen, a few new skills, and a story they’ll tell for years. Pick the version that fits your family, whether that’s skillet or oven-fried, scrub the potatoes together, and enjoy the mess. Happy Hanukkah, and happy cooking.