Self-Feeding Milestones: A Fork and Spoon Skills Chart by Age
This article provides a self-feeding skills chart by age, from 9 months to 3 years, to help you track your child's spoon and fork development. You'll find specific milestones, practice foods, and tips for teaching utensil use.
- Track your child's self-feeding progress with age-banded spoon and fork skill checklists.
- Learn typical milestones for children from 9 months to 3 years, noting individual pace.
- Discover practice foods, appropriate tools, and tips for teaching fork use.
- Understand that milestones are 'around' ages, not deadlines; your child develops uniquely.
This post contains affiliate links. As an Amazon Associate I earn from qualifying purchases.
Last fall my ten-month-old picked up a spoon of sweet potato and flipped it upside down on the way to her mouth. She sucked the bare handle happily. The sweet potato landed on her bib, her knee, and, somehow, the dog.
I remember thinking two things at once: “She’s doing it wrong,” and “She’s doing it exactly right.”
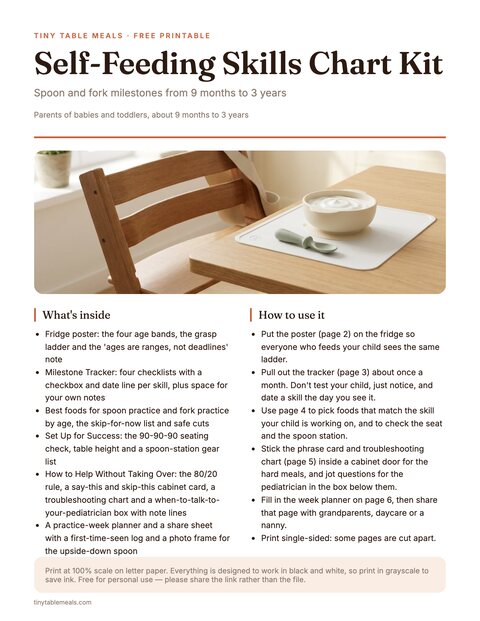
Free printable · 6 pages
Self-Feeding Skills Chart Kit
A fridge poster of the four age bands and the grasp ladder, a milestone tracker with date lines, spoon and fork practice foods with safe cuts, a seating and spoon-station checklist, say-this and skip-this phrases with a troubleshooting chart and a pediatrician box, and a practice-week planner with a share sheet for grandparents, daycare or a nanny.
Free. Your download link appears right here. You'll also join the Sunday Supper Plan. Unsubscribe anytime. Privacy
That second thought took me a while to believe. Self-feeding is a staircase of small skills, and every child climbs it at their own speed.
Below is the chart I wish I’d had: a copy-and-paste spoon and fork skills checklist for each age band from 9 months to 3 years. You’ll also find practice foods, the right tools, how to teach a fork, quick fixes for common problems, and when to ask your pediatrician.
In this article (17 sections)
- Self-Feeding Milestones by Age: Spoon and Fork Skills Chart
- Spoon and Fork Skills at 9 to 12 Months: Fingers First, Spoon as a Toy
- Spoon and Fork Skills at 12 to 18 Months: The “Me Do It” Era Begins
- Spoon and Fork Skills at 18 to 24 Months: Real Scooping and First Fork Stabs
- Spoon and Fork Skills at 2 to 3 Years: From Stabbing to Real Eating
- How Utensil Skills Actually Develop
- Choosing the Right Spoons, Forks, and Bowls
- Setting Up Your Child’s Body for Success
- How to Help Without Taking Over
- Foods That Make Practice Easier (and Harder)
- Safety Notes You Shouldn’t Skip
- When to Talk to Someone
- Troubleshooting: Common Problems and Quick Fixes
- A Sample Week of Utensil Practice
- Making It Part of Real Life
- Frequently Asked Questions
- One Spoonful at a Time
Self-Feeding Milestones by Age: Spoon and Fork Skills Chart
Here’s the whole thing in one place. Each band has a short checklist. Copy the table into a note, a document, or a chat with your partner or childcare provider, then tick the “Seen it?” box (or whatever works for you) as skills appear.
Remember to read the dates as “around,” not “by.” Every age here is a typical range, not a deadline. Skills arrive early, late, and out of order, and healthy kids do all three.
Band 1: About 9 to 12 months
| Skill | Seen it? | Date |
|---|---|---|
| Picks up soft food with a whole-hand (palmar) grasp | ☐ | |
| Uses thumb and finger together (pincer grasp) to pick up small soft pieces | ☐ | |
| Holds a spoon handle and brings it toward the mouth (even upside down) | ☐ | |
| Opens mouth when a preloaded spoon approaches | ☐ | |
| Lets go of food on purpose (drops, tosses, or places it) | ☐ | |
| Dips a spoon into a thick food like yogurt or oatmeal | ☐ | |
| Brings an open cup or straw cup to the mouth with help | ☐ |
Band 2: About 12 to 18 months
| Skill | Seen it? | Date |
|---|---|---|
| Takes a preloaded spoon and gets it to the mouth with food still on it (some of the time) | ☐ | |
| Scoops from a shallow bowl with a spoon, with lots of spills | ☐ | |
| Holds spoon in a fist, palm up or sideways (palmar-supinate grasp) | ☐ | |
| Pokes at soft foods with a fork (may not lift anything yet) | ☐ | |
| Feeds self most finger foods without help | ☐ | |
| Tries to hold an open cup with both hands | ☐ | |
| Lets you know “I want to do it” (pushes your hand away, grabs the spoon) | ☐ |
Band 3: About 18 to 24 months
| Skill | Seen it? | Date |
|---|---|---|
| Scoops and brings the spoon to the mouth with most food staying on | ☐ | |
| Turns the wrist so the spoon stays more level | ☐ | |
| Stabs soft food (banana slices, cooked pasta, small soft pieces of cooked carrot) with a fork | ☐ | |
| Gets forkfuls to the mouth some of the time | ☐ | |
| Drinks from an open cup with only small spills | ☐ | |
| Uses a straw | ☐ | |
| Chooses spoon vs. fork vs. fingers depending on the food | ☐ |
Band 4: About 2 to 3 years
| Skill | Seen it? | Date |
|---|---|---|
| Uses a spoon independently for soups, cereal, and yogurt with minimal spills | ☐ | |
| Switches to a more fingers-forward grip (digital-pronate) on spoon or fork | ☐ | |
| Stabs and lifts foods with a fork most of the time | ☐ | |
| Uses a fork to scoop soft foods (rice, flattened peas) with a push from a finger or the side of the plate | ☐ | |
| Pours from a small pitcher into a cup with help | ☐ | |
| Optional, more typical nearer 3: spreads soft butter or cream cheese with a blunt child-safe knife, with hands-on adult supervision | ☐ | |
| Sits through a meal and feeds self most of it | ☐ |
A good rhythm is to pull this out about once a month. Don’t test your child. Just notice. If you see a new skill over breakfast, pencil it in.
If a box stays empty for a while, that’s information too. Skip ahead to Troubleshooting: Common Problems and Quick Fixes for what to try, or to When to Talk to Someone for signs it’s worth a call to your pediatrician.
Spoon and Fork Skills at 9 to 12 Months: Fingers First, Spoon as a Toy
At this age, your baby’s main tools are their fingers. The spoon is mostly an object to explore. That’s not a failure of spoon skills. It’s the warm-up for them.
What you’re likely to see
- The raking grasp turns into a pincer. Around 9 to 12 months, sometimes earlier, many babies move from scooping food into the palm to picking up small pieces between thumb and forefinger. That pincer grasp is the foundation of fork skills later.
- A spoon goes straight to the mouth, usually handle first, sometimes bowl first. Both are normal.
- Dropping is a skill. Babies at this age are learning to release, which sounds silly until you realize that’s the same muscle control they’ll need to let go of a fork or drop a berry into a bowl.
How to support it
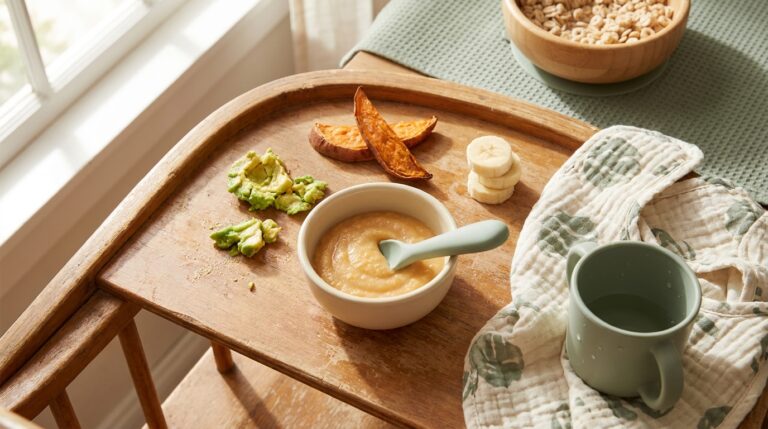
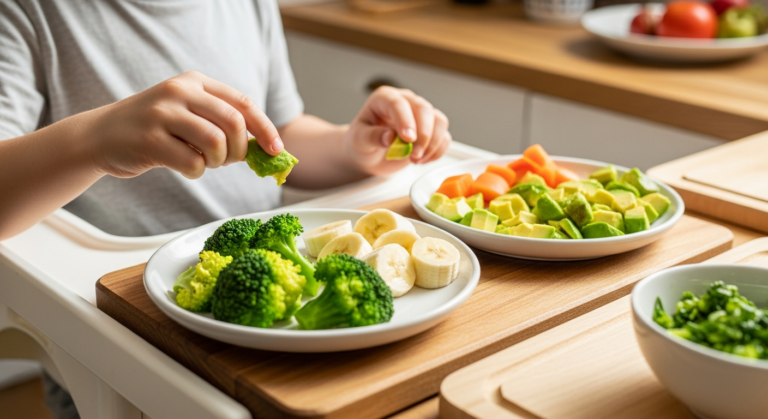
Offer a preloaded spoon. Load a short, wide-handled spoon with something thick that sticks: Greek yogurt, hummus, mashed avocado, oatmeal, mashed sweet potato. Rest it on the tray or hand it to your baby handle-first.
Thick foods cling to the bowl even when the spoon tips, which gives your baby a better chance of a successful bite.
Keep finger foods going. If you’ve started with baby-led weaning, you’re already doing the best possible prep for later fork skills. Our baby-led weaning guide covers safe shapes and sizes, which is the same thinking that carries into utensil practice.
Safety firstOnce the pincer grasp shows up, offer soft, pea-sized pieces that squish easily between your fingers. That sits well inside the 1/2-inch rule in the Safety Notes below, which applies to every child under 4. Keep your baby seated and watch every bite.
Offer two spoons. One for your baby to hold and mash around, one for you to offer bites with. Giving your baby a spoon to hold in their own fist often reduces the grabbing at yours.
Add a small cup. Put about 1 to 2 tablespoons (15 to 30 ml) of water in a small open cup or straw cup at meals, and help your baby steady it. A few small sips are plenty before 12 months.
Let them be messy. Sweet potato on the face is part of the process.
Good practice foods at this stage
| Food | Why it works |
|---|---|
| Thick yogurt | Sticks to the spoon, doesn’t run |
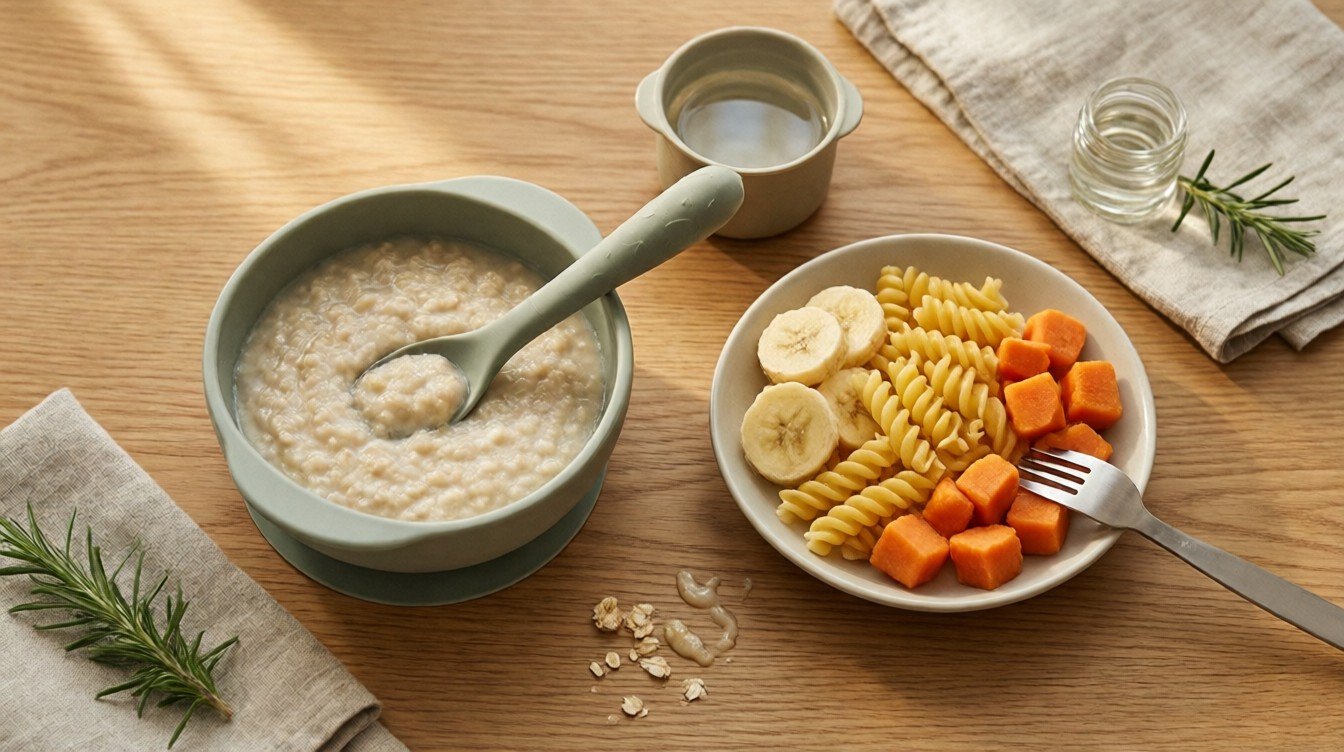
| Oatmeal or porridge, cooked thick | Clings; forgiving when tilted |
| Mashed avocado | Heavy and sticky; great for a first dip |
| Hummus | Holds its shape on a spoon |
| Mashed sweet potato or butternut | Sticky, naturally sweet, familiar |
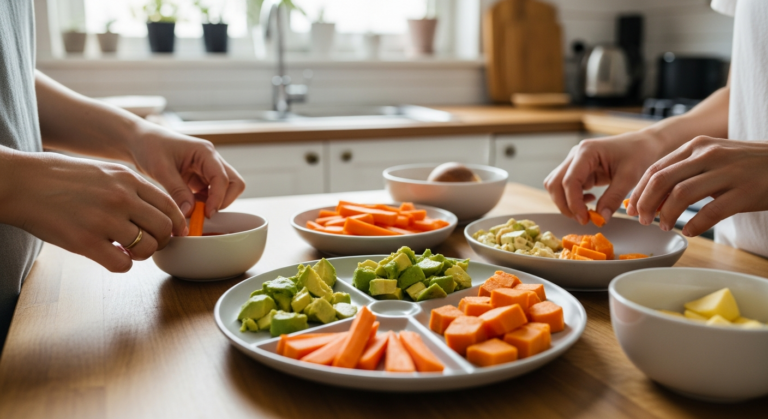
| Soft cooked pasta spirals | Easy to pick up with the pincer, and a first fork target later |
What not to worry about yet
- A baby who prefers fingers to spoons. This is typical.
- Hands in the bowl instead of a spoon. That’s sensory learning.
- Spoon in the mouth, but all the food falling off on the way. Skill comes later.
Spoon and Fork Skills at 12 to 18 Months: The “Me Do It” Era Begins
Somewhere around the first birthday, many toddlers start insisting on doing it themselves. They reach for the spoon, push yours away, and suddenly mealtime has opinions.
What you’re likely to see
- A fist-around-the-handle grip. Fingers wrap, thumb overlaps, palm often faces up. It’s called a palmar-supinate grasp, and it looks awkward because it is. It’s also exactly right for this age.
- Scoops that miss. Your toddler may load the spoon well, then tip it before the mouth. Or tip it before loading. Or both.
- Fork poking. The fork is mostly a tool for tapping food and watching what happens. Some toddlers get a piece to stick, which is a thrilling surprise to all involved.
- Strong opinions about who holds the spoon. If you’ve ever tried to take the spoon back, you know.
How to support it
Stick with preloading for a while. This is the stage where preloaded spoons shine. Fill the spoon, set it on the plate pointing toward your child, and let them pick it up.
The scoop is a harder skill than the lift, so separating them gives your toddler a win on the part they can do.
Use a shallow, wide bowl or a plate with a lip. A bowl with a curved wall or a divided plate gives your child something to push against, so food ends up on the spoon instead of across the table.
Let them practice with thick foods first, then thinner ones. Start with yogurt, oatmeal, mashed beans, and mashed potatoes. Move to cooked rice, small pasta, and shredded chicken. Save brothy soups for later.
Offer a short-handled, child-sized fork alongside the spoon. A silicone or soft-tipped fork is gentlest at this age. You don’t have to teach anything. Just put it on the tray. Soft foods like banana slices, cooked pasta, or small soft pieces of tofu are good targets.
Keep one finger-food option on every plate. This gives your toddler a no-pressure option if the spoon becomes frustrating. When a child is working on a hard skill, an easy way to get calories in keeps mealtime from falling apart.
Setting up a spoon station
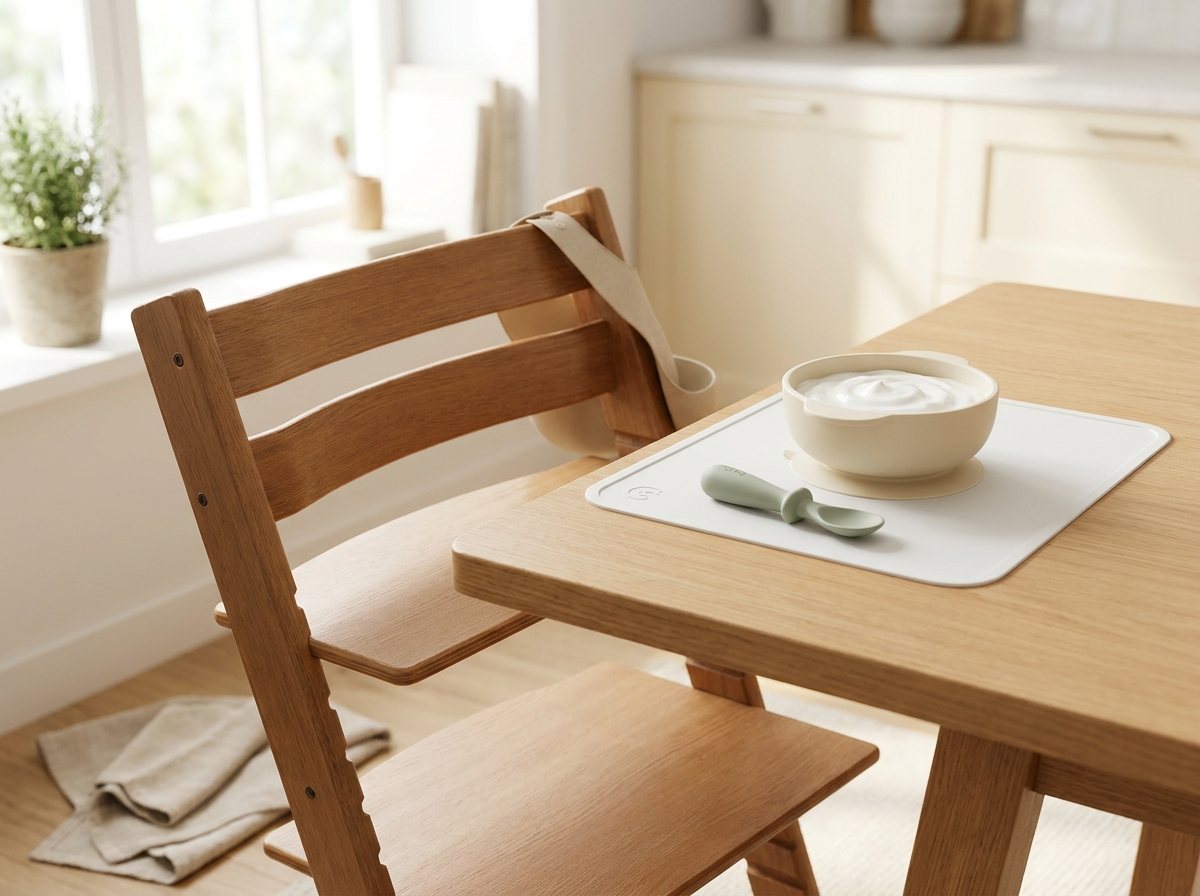
Here’s what I’ve found helps most at this age:
- A chair with a footrest so feet aren’t dangling
- A small, wide-bowled spoon with a chunky handle
- A silicone mat or a suction bowl (or a rimmed tray) so the bowl doesn’t slide
- A bib that catches (the pocket kind), or a long-sleeved smock
- A towel under the chair you can shake outside afterward
When to step in
If your toddler is hungry and frustrated, step in. A hungry child is not in a learning mood. Offer a few bites yourself, then hand the spoon back. This isn’t going back on your word. It’s reading the room.
Spoon and Fork Skills at 18 to 24 Months: Real Scooping and First Fork Stabs
Between a year and a half and two, many toddlers move from “spoon as a toy” to “spoon as a tool.” The wrist starts to rotate. Most scoops reach the mouth. Fork stabbing becomes a real skill.
What you’re likely to see
- Most of the scoop makes it. Spills are still common, but a lot of the food now arrives.
- Wrist rotation improves. The spoon stays more level between bowl and mouth.
- Fork stabs succeed. Your toddler may spear a banana slice, a piece of soft pasta, or a cooked carrot coin, and lift it to the mouth.
- Preferences appear. Some days the fork is the star. Other days it’s strictly fingers. That’s fine.
Fork foods: what works and what doesn’t
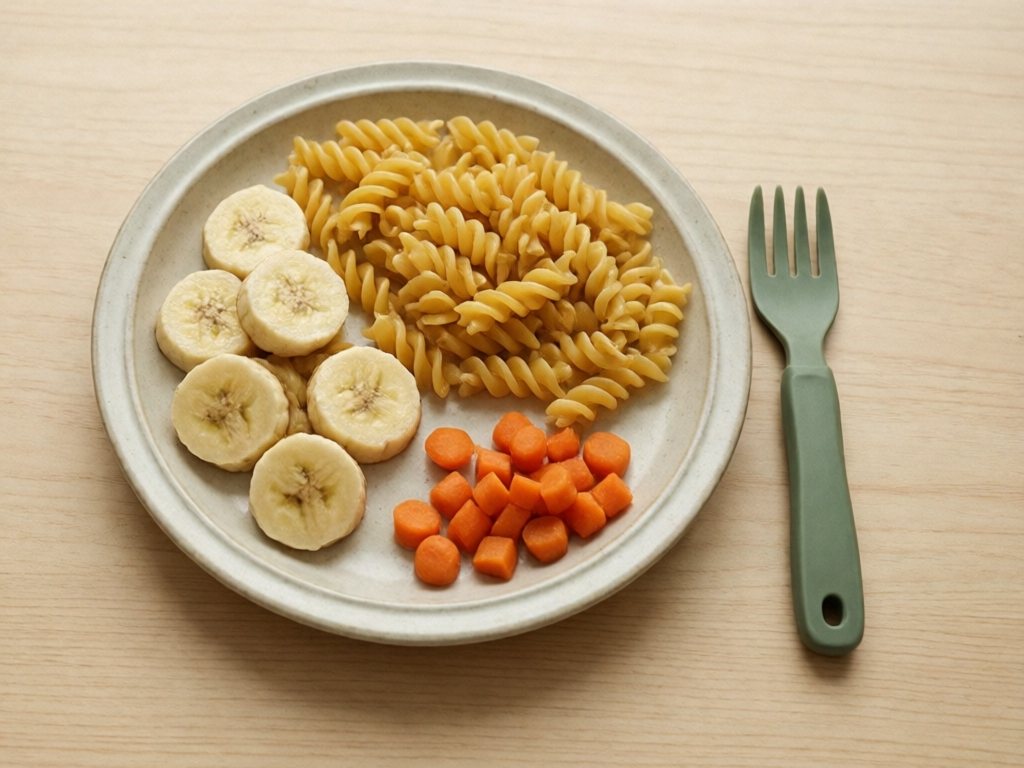
The key to early fork success is picking foods that are soft enough to pierce, firm enough to stay on the tines, and big enough to spot.
Safety firstCut pieces about 1/2 inch or smaller and soft enough to squish between your fingers, or grate or shred firmer foods finely. That’s the same rule for every child under 4. Keep your child seated, and watch every bite.
| Great for early fork practice | Why | Skip for now |
|---|---|---|
| Banana slices (thick coins) | Soft, easy to pierce, don’t slide off | Whole grapes (choking risk; also hard to stab) |
| Cooked pasta (rotini, penne, shells) | Holds a tine, forgiving | Slippery noodles like thin spaghetti |
| Soft cooked carrot or sweet potato, in small pieces | Pierce well, stay put | Raw carrot sticks (too hard to pierce, choking risk) |
| Small soft tofu pieces or finely chopped cooked egg | Easy to spear | Crumbly cheeses that fall apart |
| Pancake or waffle squares | Soft, flat, sturdy | Very syrupy pieces that slide off |
| Very soft steamed broccoli, small florets | The stem makes a handle; offer with an adult watching | Raw broccoli |
| Soft meatballs, cut into pieces about 1/2 inch or smaller | Soft and dense | Large hard chunks of meat |
For more on cutting common foods so they’re easier to stab and safer to swallow, see our guide to toddler-safe snack shapes. It works any time of year, not just October.
How to teach fork stabbing without “teaching”
You don’t need a lesson. Here’s what actually works:
- Let your child watch you. At a family meal, spear a piece of food slowly and say “stab, lift, chew.”
- Offer one stabbable food at a time. A plate with six different foods is overwhelming. A bowl of soft pasta with a fork next to it is an invitation.
- Use a fork with blunt, short tines and a chunky handle. Sharp metal forks are harder to control and uncomfortable if they poke a lip.
- Hold your hand over theirs once, then let go. A single “feel how it goes” moment is plenty. Repeated hand-over-hand can feel like a power struggle.
- Celebrate attempts, not just results. “You stabbed it!” lands better than “Now bring it to your mouth.”
Open cups and straws
Open cups and straws can be introduced from about 6 months, so this practice may have started back in the 9 to 12 month stage. It keeps building now. Once your child is past 12 months, offer about 2 to 4 ounces (60 to 120 ml) of water at meals in a small, sturdy open cup, plus a short straw in a small cup.
If you’re also feeding a baby under 12 months, keep their cup to about 1 to 2 tablespoons (15 to 30 ml) of water. Spills will be common at every age. Practice is the whole point.
Spoon and Fork Skills at 2 to 3 Years: From Stabbing to Real Eating
By two, many children can handle most of a meal on their own. The next year is about refining: neater scooping, more reliable stabbing, and the shift from fist grips to finger grips.
What you’re likely to see
- A fingers-forward grip. Instead of a fist, your child may hold the spoon with fingers extended down the handle and the palm facing down (the digital-pronate grasp). This frees the wrist to turn and tip.
- Efficient spoon use. Cereal, yogurt, and soups mostly go where they’re supposed to. Thin liquids still spill.
- Fork use that actually delivers. Most kids can stab and lift food reliably, and some can push food onto a fork against the edge of the plate.
- First spreading skills (optional). Nearer 3, a blunt, child-safe knife can spread soft butter or cream cheese on a cracker, always with an adult right beside your child.
- Strong preferences about utensils. Some kids this age insist on a particular spoon. If it works, go with it.
What to practice
Foods that need a push. Rice, flattened peas, shredded cheese, and small pieces of chopped chicken all require a scoop-and-push rather than a stab. Give your child a plate with a rim or a bowl with sloped sides and they’ll figure out how to use the wall as a helper.
Safety firstWhole peas are small and round, which makes them a choking risk for little ones. For children under 4, press peas with the back of a fork until they’re flattened before serving.
Soups and brothy foods. Fall is a great time to practice. A thick, smooth soup is easier than a thin broth. Try our fall soup recipes kids will eat, which are blended or lightly chunky so spoon practice has a payoff.
Pouring. Offer a small pitcher with a little water or milk so your child can pour into their own cup. It builds the same wrist control used for spoons.
Spreading. Soft butter on toast, cream cheese on a bagel, hummus on a cracker. A blunt spreader or a butter knife with a rounded tip is plenty, with an adult close by.
What’s still hard at this age
- Cutting firm foods like meat or raw vegetables. That’s still an adult job.
- Neat eating of thin soups, cereal with milk, or saucy pasta.
- Sitting for a full meal. Many two-year-olds need a break halfway through.
How Utensil Skills Actually Develop
Using a spoon looks like one skill. It’s really four or five stacked together:
- Reaching and grasping. Getting a hand to the utensil and holding on.
- Hand-to-mouth control. Knowing where the mouth is and getting there on purpose.
- Wrist rotation. Keeping the bowl of the spoon level, which is the part that takes the longest.
- Scooping and loading. Filling the spoon from a bowl instead of having a grown-up do it.
- Aiming and timing. Opening the mouth at the right moment and clearing the spoon.
A fork adds a sixth: stabbing with enough force and accuracy to actually spear a piece of food and keep it on the tines.
The grasp ladder
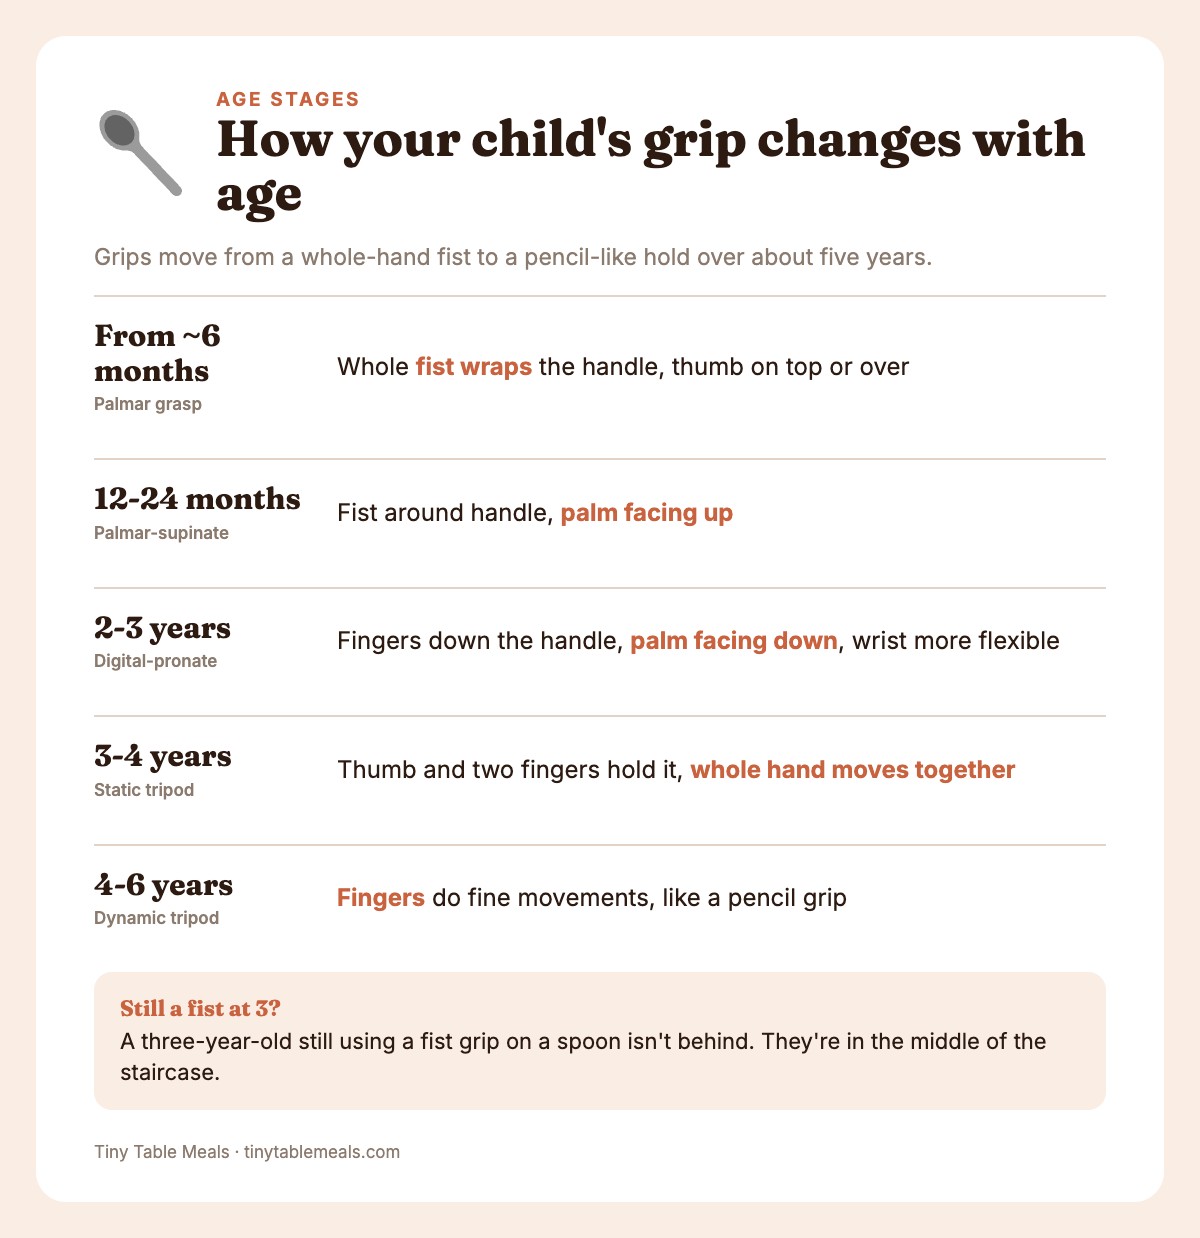
Occupational therapists describe a few common grip patterns that children move through. You don’t need to memorize the names, but the rough pattern helps you know what’s normal at each stage.
| Grasp | What it looks like | Approximate timing |
|---|---|---|
| Palmar grasp | Whole fist wraps around the handle, thumb on top or wrapped over | Starts around 6 months |
| Palmar-supinate grasp | Fist around the handle with the palm facing up | Roughly 12 to 24 months |
| Digital-pronate grasp | Fingers extend down the handle, palm facing down, wrist more flexible | Roughly 2 to 3 years |
| Static tripod | Thumb and first two fingers hold the utensil, but the whole hand moves together | Roughly 3 to 4 years |
| Dynamic tripod | Fingers do the fine movements while the hand stays steady, like a pencil grip | Roughly 4 to 6 years |
Notice how long this runs: the pencil-style dynamic tripod grip doesn’t usually settle in until around 4 to 6 years.
Why the mess is part of the learning
Spills and misses are how kids calibrate. When the spoon tips and the yogurt slides off, your child’s brain gets direct feedback about angle and speed.
Taking over to be faster removes that practice. It’s a bit like learning to ride a bike while someone else holds the handlebars the whole time.
That doesn’t mean you can never help. Help should be the exception and practice the rule, and the sections above show where that line sits at each age.
Choosing the Right Spoons, Forks, and Bowls
You don’t need a drawer full of baby gear. A few well-chosen items make a real difference.
Spoons
| Feature | Why it matters |
|---|---|
| Short, chunky handle | Easier to grip with a fist |
| Shallow, soft bowl | Gentle on gums and teeth; releases food easily |
| Slightly angled or curved neck (optional) | Can help keep the bowl level for some kids |
| Silicone or soft-coated tip | Gentler on gums; check the coating is firmly attached |
At the beginning, any short spoon with a thick handle will do. Many parents like to keep two or three in rotation so there’s always a clean one when the first goes flying.
Forks
| Feature | Why it matters |
|---|---|
| Blunt tines | Pierces soft food but won’t poke a lip |
| Short, wide handle | Easier to hold in a fist |
| Sturdy material | Cheap plastic can snap. Choose silicone or soft-tipped forks for under 2, and child-size blunt metal forks for older toddlers, with supervision |
Bowls and plates
- Suction or non-slip bases keep dishes in place while your child pushes and scoops.
- High sides give food something to push against.
- Divided plates can help with sorting, but some kids prefer an open plate. Try both.
- Small bowls work better than big ones. A little food in a small bowl is less overwhelming than a lot in a large one.
Cups
A small, sturdy open cup with straight sides is easiest to control. Short straws in a small cup are great for practice. Many families keep both so kids can choose.
Setting Up Your Child’s Body for Success
Utensil skills depend on a stable body. If a child is slouching, dangling their feet, or reaching, there’s less attention left for the fork.
The 90-90-90 setup
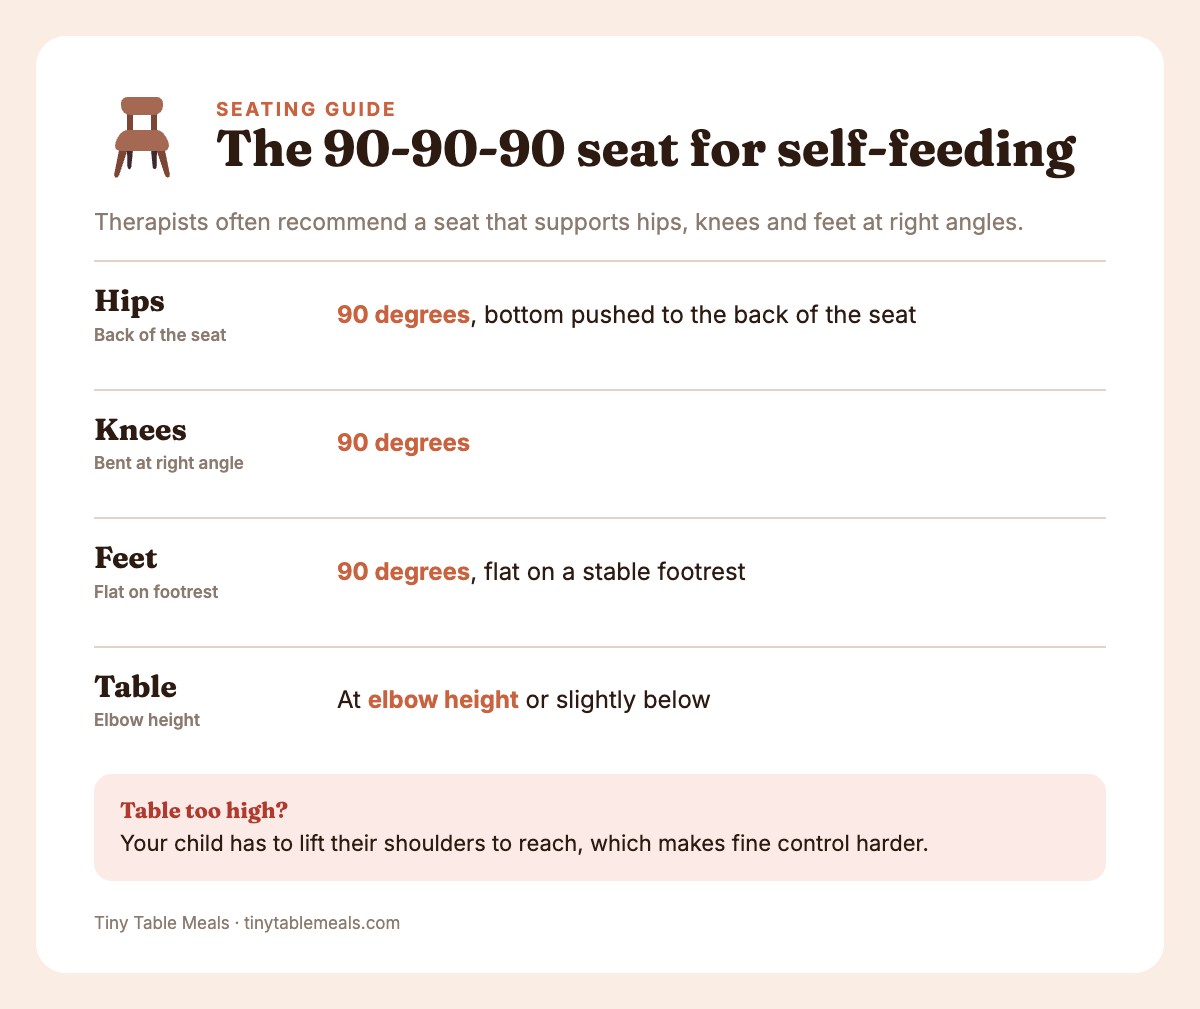
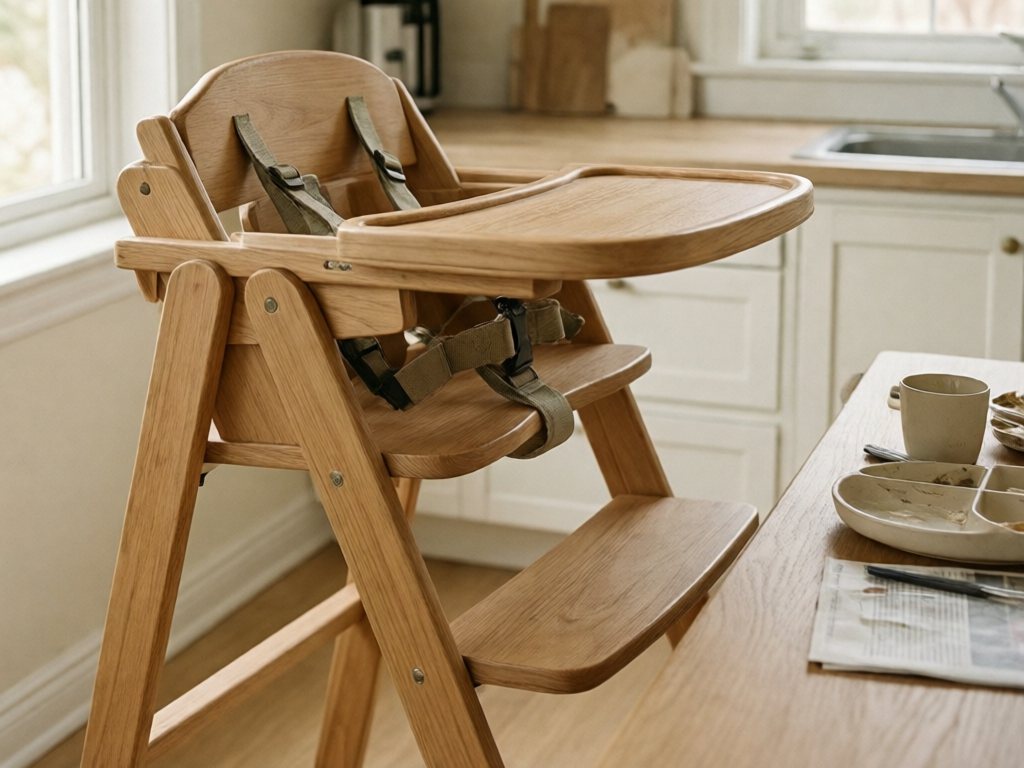
Therapists often recommend a seat that supports:
- Hips at 90 degrees (bottom pushed to the back of the seat)
- Knees at 90 degrees
- Feet at 90 degrees, flat on a footrest
A high chair with an adjustable footrest does this well. For a toddler at a table, use a booster or chair with a stable, non-slip footplate, with your child buckled in.
Table height
The tabletop should land at about elbow height, or slightly below. If it’s too high, your child will have to lift their shoulders to reach, which makes fine control harder.
Why it matters
A child who isn’t stable uses their whole body to hold on. A child who is stable can focus on their hand. It’s a small adjustment with a surprisingly big payoff.
How to Help Without Taking Over
One of the trickiest parts of this stage is figuring out when to step in. Here’s a simple way to think about it.
The 80/20 rule of mealtime help
Let your child do most of the work, and help with the part they can’t do yet.
- If your child is scooping well but struggles to get food onto the spoon, preload the spoon.
- If your child is stabbing but the food is too hard to pierce, cut it softer or smaller.
- If your child is exhausted or very hungry, offer a few bites yourself, then hand the spoon back.
- If your child is refusing to eat because they’re frustrated, let them use their hands for a while.
Who decides what
A framework that has helped a lot of families is the division of responsibility: the grown-up decides what food is served, when, and where, and the child decides whether to eat it and how much. Utensil practice fits right inside this. You decide that a fork is on the table. Your child decides whether to use it. Our guide to the division of responsibility in feeding explains how to keep meals low-pressure, which makes new skills easier to try.
Phrases that help
- “Do you want to use the spoon or your fingers?”
- “That one fell off. You can try again.”
- “I’ll fill the spoon, you can bring it to your mouth.”
- “Your fork is right there if you want it.”
Phrases to skip
- “Use your fork, not your hands.”
- “You’re making such a mess.”
- “Look how your sister does it.”
- “Three more bites with the fork.”
Pressure around utensils tends to backfire. Kids pick up skills faster when they feel safe to experiment.
Foods That Make Practice Easier (and Harder)
Some foods are practically designed for spoon and fork practice. Others will frustrate even adults.
Best foods for spoon practice
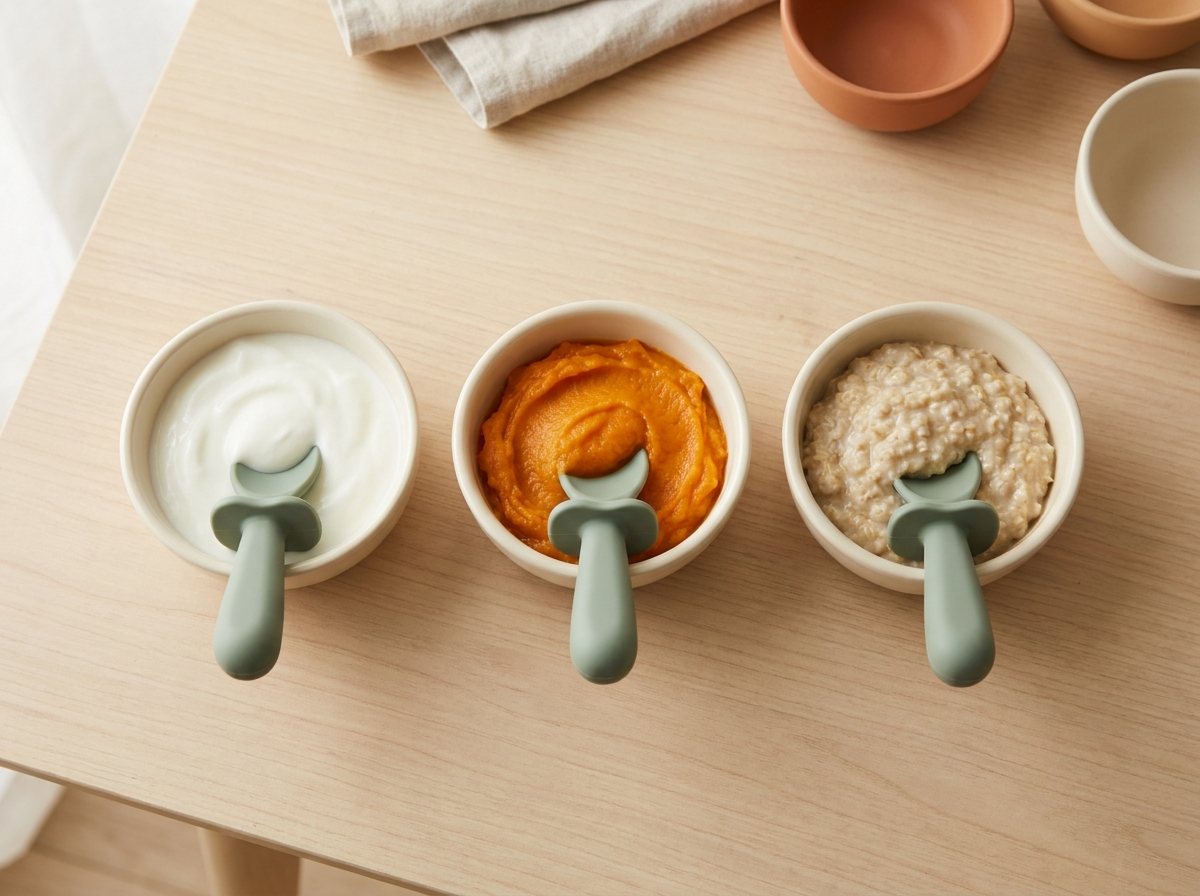
- Thick yogurt
- Oatmeal and cream of wheat
- Mashed potatoes and mashed sweet potatoes
- Hummus and bean dips
- Applesauce (thicker is better)
- Cottage cheese
- Smooth, thick soups
Best foods for fork practice
- Soft pasta (rotini, penne, shells)
- Banana coins
- Cooked carrot, squash, or sweet potato in small soft pieces
- Pancake squares
- Soft meatballs, cut into pieces about 1/2 inch or smaller
- Cooked egg pieces, chopped small
- Small soft tofu pieces
If you’re looking for squash-based ideas that are naturally soft and forkable, our squash recipes kids will eat include butternut, acorn, and spaghetti squash in ways that hold together on a fork.
Hard-mode foods (save these for later)
- Thin broth and brothy soups
- Rice and flattened peas (they scatter and slide)
- Slippery foods like noodles in sauce
- Cereal with milk
- Salads
None of these are off the table. They just need more skill, so offer them alongside an easier food so your child doesn’t feel stuck.
Safety Notes You Shouldn’t Skip
Practicing utensil skills is fun, but it comes with real safety considerations.
- Always supervise. Never leave a young child alone with food, a fork, or a straw cup.
- Keep your child seated. Eating while walking, running, or playing raises choking risk. Children should never walk or run with a fork, spoon, or straw in their mouth.
- Cut foods to safe sizes and shapes. For children under 4, keep pieces about 1/2 inch or smaller and soft enough to squish between your fingers, or grate or shred firmer foods finely. For babies using the pincer grasp, go smaller: soft, pea-sized pieces. Use the table below for foods that need special shapes.
- Check your tools. Cracked plastic, loose silicone, or chewed utensils should be replaced.
- Skip sharp knives. Use only blunt, child-safe knives with an adult nearby.
- Learn infant and child CPR. It’s a good idea for anyone who feeds a baby or toddler, and many hospitals and community centers offer short classes.
| Food | Safer way to serve under age 4 |
|---|---|
| Grapes, cherry tomatoes | Quarter lengthwise |
| Blueberries | Halve or quarter, depending on size |
| Peas | Flatten with the back of a fork |
| Hot dogs and sausages | Cut lengthwise into strips, then small pieces (or skip them) |
| Large chunks of meat | Shred or mince finely |
| Raw apple, raw carrot, other hard fruit and veg | Grate or cook until soft |
| Nut butter | Spread thinly; never spoonfuls |
| Cheese | Thin slices or shredded, not chunks |
| Whole nuts, popcorn, hard candy | Skip until age 4 or older |
If you have questions about what’s safe for your child’s age and development, your pediatrician is the best person to ask.
When to Talk to Someone
You can ask your pediatrician about any self-feeding concern, at any age. The ages below are rough guides, not cutoffs. Bring it up if you notice any of the following:
- Your child isn’t picking up finger foods by about 12 months
- Your child doesn’t try to bring anything to their mouth, or shows no interest in holding utensils by about 15 to 18 months
- Your child consistently gags, coughs, or chokes with textures that should be manageable for their age
- Your child seems to favor one hand strongly before about 12 months, or hand use looks very different between sides
- Your child loses a skill they previously had
- Mealtimes are consistently stressful, with prolonged refusal, very limited intake, or concerns about growth
- Your child refuses almost all textures, or you’re worried about weight gain
- You have a gut feeling that something is off
A pediatrician can check in on development more broadly and, if helpful, refer you to an occupational therapist or feeding specialist. Asking early isn’t overreacting. It’s gathering information.
Troubleshooting: Common Problems and Quick Fixes
| Problem | Likely reason | Try this |
|---|---|---|
| Spoon flips upside down on the way up | Wrist rotation is still developing | Preload with thick food and stay patient; this resolves with practice |
| Child throws utensils | Exploring cause and effect, or signaling “I’m done” | Calmly name it (“Looks like you’re all done”) and end the meal, or offer a different task |
| Won’t use a fork at all | Not ready, or prefers fingers | Keep the fork on the table, model it yourself, and try again in a few weeks |
| Gets frustrated and screams | Skill is too hard for the food | Switch to a thicker or stickier food, or offer finger foods |
| Grabs your spoon | Wants independence | Give them their own spoon; let both of you hold one |
| Eats well with hands, refuses utensils | Fingers are faster and more reliable | Keep offering; skills grow with exposure, not pressure |
| Stabs but can’t lift | Food slides off or fork angle is off | Try a slightly softer, stickier food and a fork with a shorter handle |
| Mess is overwhelming | Normal at this age | Use a splat mat, a silicone bib, and save the messiest foods for outside on a washable mat or the high chair |
A Sample Week of Utensil Practice
You don’t have to plan every bite, but a little structure helps. Here’s a rough one-week rotation for a toddler around 15 to 24 months.
| Day | Breakfast | Lunch | Dinner |
|---|---|---|---|
| Mon | Oatmeal (spoon) | Soft pasta with veggies (fork) | Mashed sweet potato and shredded chicken (spoon + fingers) |
| Tue | Yogurt and mashed banana (spoon) | Cheese quesadilla strips (fingers) | Soft meatballs cut into 1/2-inch pieces or smaller, and very soft steamed broccoli (fork) |
| Wed | Pancake squares (fork) | Hummus, soft pita, peeled cucumber in thin slices (fingers + spoon dip) | Lentil soup, thick (spoon) |
| Thu | Cottage cheese and soft fruit (spoon) | Finely chopped cooked egg and toast fingers (fork + fingers) | Baked salmon flakes and mashed potatoes (spoon + fork) |
| Fri | Scrambled egg (fork or spoon) | Leftover soup (spoon) | Pasta shells and flattened peas (fork + spoon) |
| Sat | Smoothie bowl, thick (spoon) | Quesadilla and avocado (fingers + spoon) | Small soft tofu pieces and rice (fork + spoon) |
| Sun | Waffle squares (fork) | Picnic-style finger foods | Family dinner, whatever’s on the table |
Good to knowServe only foods your child has already tried one at a time (fish, egg, wheat, dairy, and soy are common allergens). Check flaked fish carefully for bones.
The point isn’t perfection. It’s to make sure each day includes at least one meal where a utensil is easy to use, and at least one meal where fingers are welcome.
Making It Part of Real Life
The chart works best when it fits your family, not the other way around.
- Keep it light. Tick off a skill when you see it, then move on. There’s no need to track daily.
- Share it. Send the checklist to grandparents, daycare, or a nanny so everyone’s on the same page about what your child is working on.
- Eat together when you can. Kids learn by watching. A toddler who sees you stab broccoli and lift it to your mouth gets a free lesson at every meal.
If you’re also tracking which foods your baby has tried, our 100 first foods checklist pairs well with this chart. One tracks what goes in, the other tracks how it gets there.
Frequently Asked Questions
When do toddlers start using utensils?
Most babies start showing interest in holding a spoon around 9 to 12 months, but they usually use it more as an object to explore than as a real tool. Between about 12 and 18 months, many toddlers begin getting a preloaded spoon to their mouth with food still on it. By around 18 to 24 months, scooping and fork stabbing become more reliable, and between ages two and three, most children use a spoon and fork for the bulk of a meal.
How do I teach my toddler to use a fork?
Start by letting your child see you use one, and put a short, blunt-tined fork on their plate next to soft, stabbable foods like banana coins, soft pasta, or small pieces of soft cooked carrot. Offer one forkable food at a time so the plate isn’t overwhelming. You can show them once by gently guiding their hand through a stab-and-lift, then let go. Celebrate attempts rather than only successes, and keep finger foods available so meals stay relaxed. Most toddlers get the hang of stabbing between about 18 and 24 months and refine it through age three.
Is it normal for my 2-year-old to still use their hands instead of utensils?
Yes. Many two-year-olds mix hands and utensils, switching depending on the food, their mood, and how hungry they are. Fingers are faster and more reliable, so it makes sense that kids reach for them. Keep offering utensils without pressure, model them yourself, and serve foods that are easy to scoop and stab. If your child shows no interest in holding utensils at all and you have other concerns about their hand use, it’s reasonable to mention it to your pediatrician.
What’s the best first spoon for a baby?
Look for a short spoon with a thick, easy-to-grip handle and a shallow, soft bowl. Silicone-coated or soft-tipped spoons are gentle on gums, and chunky handles are easier for small fists. Preload the spoon with something thick and sticky, like yogurt, oatmeal, or mashed avocado, so food stays put even when the spoon tips. Having a second spoon for you to feed with can also keep your baby from grabbing yours.
Should I use a fork or a spoon first?
Spoon first, for most children. Spoons come with a simpler motion (scoop and lift), while forks need accurate stabbing and enough force to pierce food. That said, you can offer both from around the first birthday. Put a fork on the plate alongside the spoon, let your child explore, and follow their lead. Fork stabbing tends to take off between 18 and 24 months.
Why does my toddler hold the spoon in their fist?
A fist grip is a normal stage. It’s often called a palmar-supinate grasp, and it’s how most toddlers hold utensils between about 12 and 24 months. It usually shifts to a fingers-forward grip over the next year or so, as hand strength and control improve. You don’t need to correct it. Offering thicker spoons with chunky handles, plus plenty of opportunities to practice, is enough.
My toddler throws the spoon. Should I take it away?
Throwing is common at this age, and it’s usually about testing cause and effect or signaling “I’m finished.” A calm, neutral response works best: “Spoons stay on the table. It looks like you might be all done.” If throwing continues, end the meal for now and try again at the next one. If your child is still hungry, you can offer finger foods instead. Avoid big reactions, since attention can make the game more fun.
One Spoonful at a Time
Keep the chart handy, tick off the wins as they show up, and let the spills go. Sweet potato on the dog is just part of learning to eat, and every messy meal is practice that counts.