Sandwich-Free Lunch Ideas Kids Love
Tired of making and packing the same old sandwiches? Discover creative, sandwich-free lunch ideas your kids will love, from Pizza Pinwheel wraps to DIY Bento Boxes, that save time and boost nutrition.
- Transform lunch with 'Pizza Pinwheels' using tortillas, cream cheese, pepperoni, and mozzarella.
- Pack 'Breakfast for Lunch' wraps with cooled scrambled eggs, bacon, and cheese for a fun twist.
- Create 'DIY Lunchables' or 'Deconstructed Tacos' in bento boxes with bite-sized components.
- Use cream cheese in wraps to prevent sogginess and act as a flavorful 'glue' for fillings.
My seven-year-old Emma stared at her lunchbox and declared, “Mom, I’m SO tired of sandwiches!” The dramatic eye-roll that followed could have powered our kitchen appliances for a week. But you know what? She was absolutely right. We’d fallen into the PB&J-turkey-and-cheese rotation trap, and frankly, I was bored making them too.
That moment sparked what became our “Sandwich-Free September” experiment, and let me tell you – it completely transformed our lunch game. Not only did Emma start actually eating her lunch instead of trading it away, but I discovered a whole world of creative, portable meals that were often easier to prep than traditional sandwiches. Some became such hits that my kids’ friends started requesting the recipes from their moms!
The best part? Many of these ideas actually save time during those chaotic morning rushes. When you’re not fumbling with bread that tears or trying to prevent soggy lettuce disasters, lunch packing becomes surprisingly streamlined. Plus, these alternatives often pack more nutrition and keep kids fuller longer than typical sandwich fare.
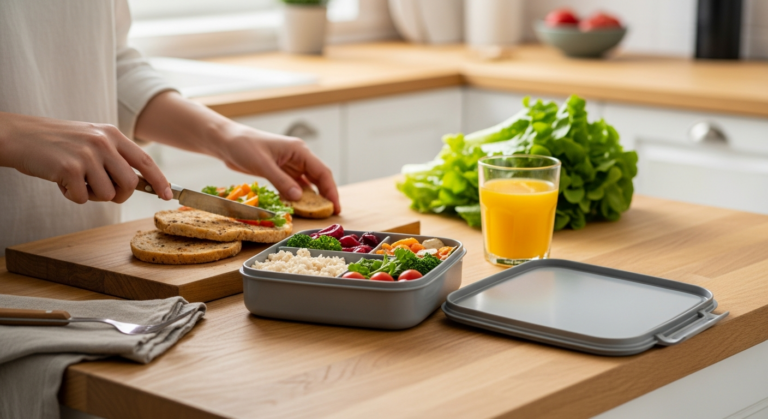
Wrap It Up: Beyond Basic Tortillas
Wraps might seem like just sandwiches in disguise, but the right combination of fillings and wrapping techniques creates something entirely different. The key is thinking beyond lunch meat and using tortillas as edible containers for exciting flavor combinations.
My go-to “Pizza Pinwheels” use large flour tortillas spread with cream cheese mixed with Italian seasoning, then layered with pepperoni and shredded mozzarella. Roll tightly, refrigerate for at least 30 minutes, then slice into 1-inch rounds. The cream cheese acts as both flavor and “glue” to hold everything together, and kids love the spiral pattern when they bite in. Pack 6-8 pinwheels with some cherry tomatoes and cucumber slices for a complete meal.
For adventurous eaters, try “Breakfast for Lunch” wraps using scrambled eggs (cooled completely), crumbled bacon, and shredded cheddar cheese in a whole wheat tortilla. The secret is adding a thin layer of cream cheese to prevent the eggs from making the tortilla soggy. These stay fresh for up to two days in the refrigerator and taste great at room temperature.
Make-Ahead Wrap Tips
- Always place wet ingredients (tomatoes, pickles) between dry ingredients like cheese or lettuce
- Wrap tightly in plastic wrap and store seam-side down in the refrigerator
- Use large burrito-size tortillas for easier rolling and fewer tears
- Let cream cheese come to room temperature before spreading for smoother application
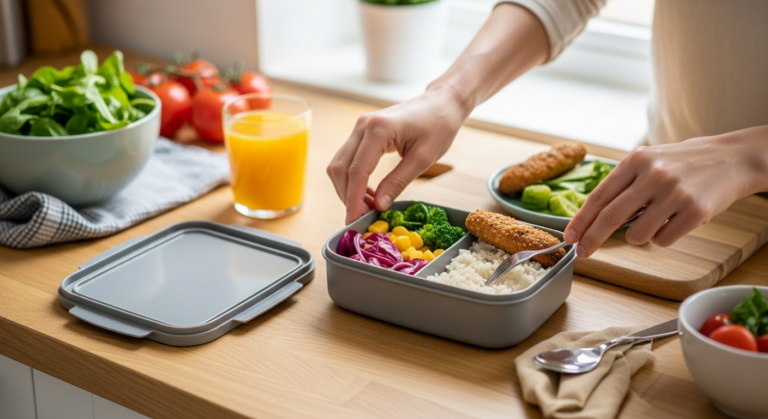
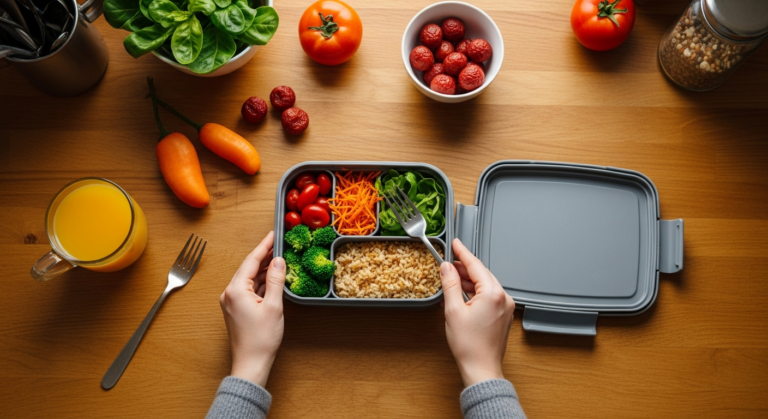
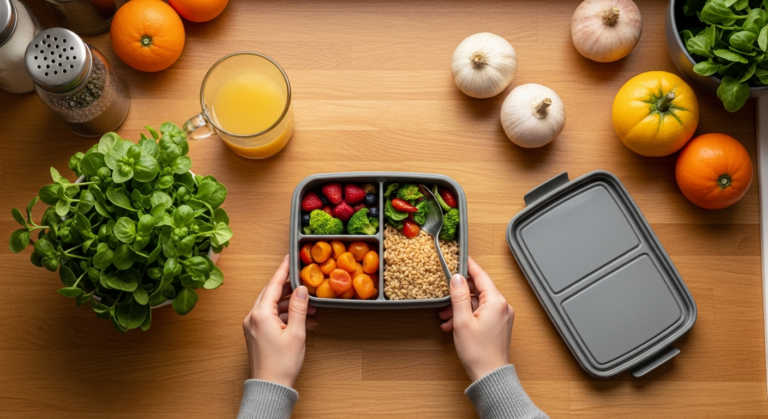
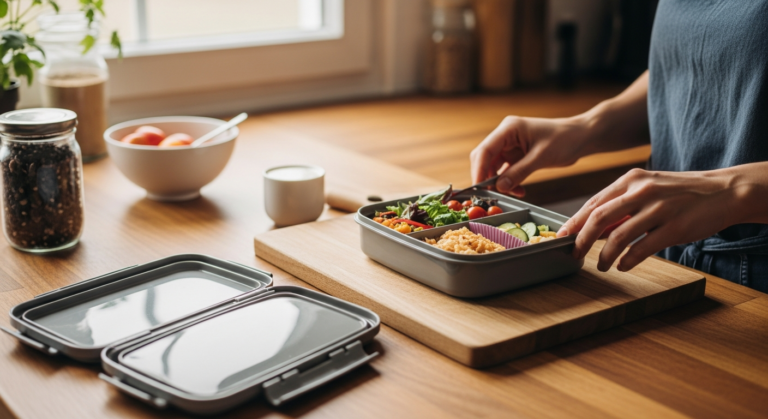
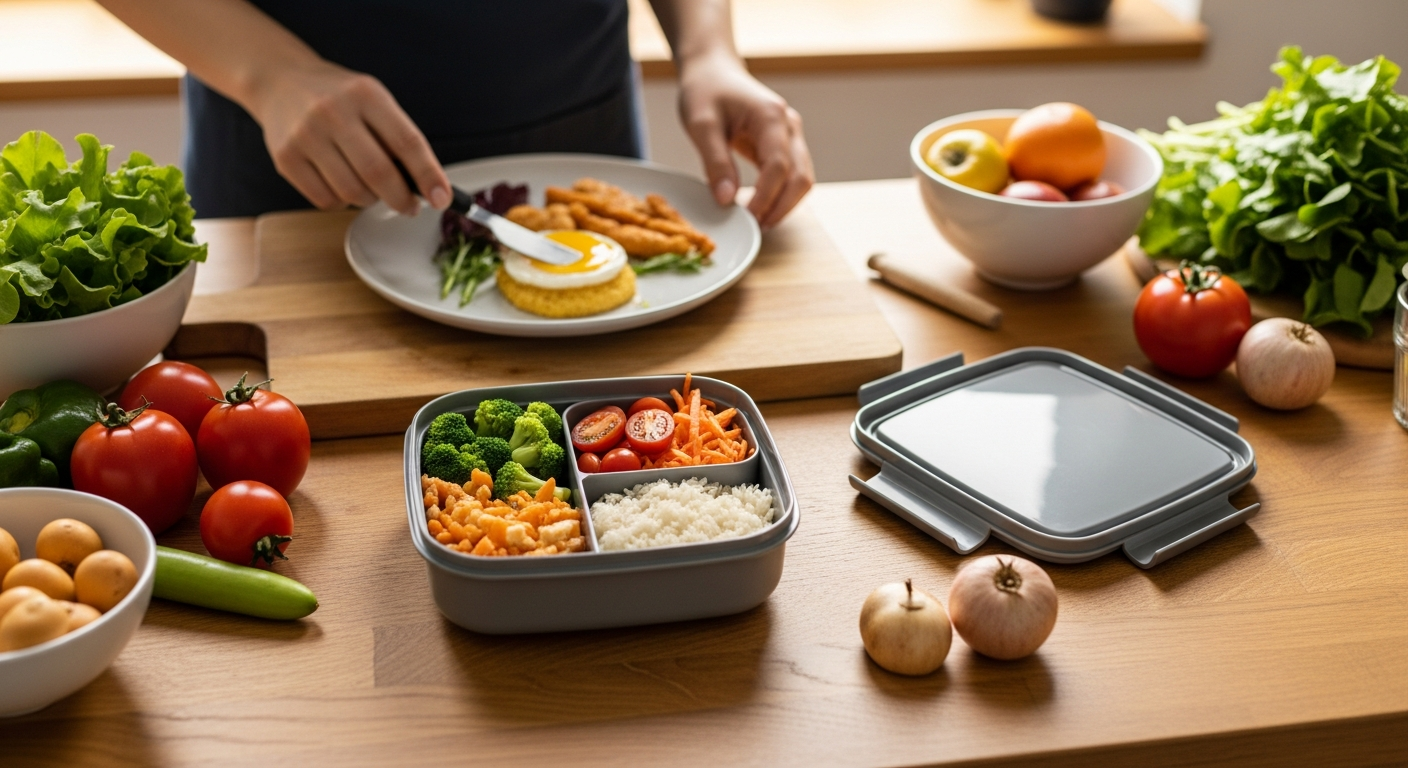
Bento Box Magic: Small Portions, Big Appeal
There’s something magical about food served in small compartments that makes kids eat things they’d normally refuse. You don’t need fancy Japanese bento boxes – any container with dividers works, including muffin tins for younger kids who eat at home.
My “DIY Lunchable” approach uses a compartmented container filled with homemade options: whole grain crackers, cubes of sharp cheddar cheese, sliced turkey rolled into little spirals, grapes cut in half, and a small container of hummus for dipping. The key is cutting everything into bite-sized pieces that feel manageable and fun to eat. Kids love the control of assembling their own combinations.
For something more substantial, try “Deconstructed Tacos” with small portions of seasoned ground beef (cooked with cumin, chili powder, and a pinch of brown sugar), shredded cheese, diced tomatoes, corn kernels, and small soft tortillas or hard taco shells. Include a tiny container of sour cream or guacamole for dipping. The meat mixture can be made in large batches on Sunday and portioned throughout the week.
Greek-inspired boxes work beautifully too: cucumber rounds, cherry tomatoes, kalamata olives (if your kids are adventurous), cubes of feta cheese, pita triangles, and a small container of tzatziki. The variety of textures and bright colors makes lunch feel like a special treat rather than a chore.
Hot and Hearty: Thermos-Friendly Favorites
A good thermos opens up endless possibilities for warm, comforting lunches that rival anything from the school cafeteria. The trick is preheating the thermos with boiling water for 5-10 minutes before adding hot food – this keeps meals safely warm until lunchtime.
“Cheesy Broccoli Rice Bowls” have become legendary in our house. Cook jasmine rice with low-sodium chicken broth instead of water, steam small broccoli florets until just tender, then mix with the rice and plenty of sharp cheddar cheese while everything’s still hot. The residual heat melts the cheese into a creamy sauce. Add a sprinkle of garlic powder and a few drops of hot sauce for kids who like a tiny kick.
Pasta salads served warm hit differently than cold versions. Try penne pasta tossed with butter, parmesan cheese, frozen peas (they’ll cook from the pasta’s heat), and diced ham while the pasta’s still steaming. The butter creates a light sauce that coats everything beautifully, and the peas add color and natural sweetness that kids love.
Thermos Success Strategies
- Fill containers completely – empty space leads to faster cooling
- Heat food slightly hotter than serving temperature to account for some cooling
- Pack wet and dry components separately when possible to prevent sogginess
- Include a note reminding kids to eat hot foods first
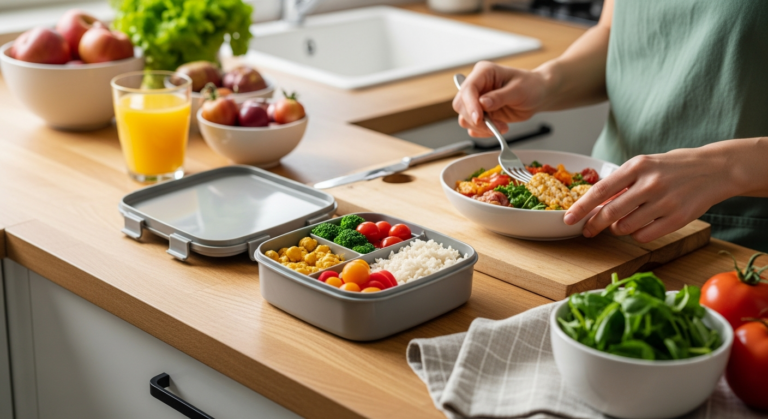
Cold and Crunchy: Salads That Don’t Taste Like Health Food
The word “salad” might make kids run, but call these “bowls” or “mixes” and watch attitudes change. The secret is balancing textures and including enough protein and carbohydrates to keep growing bodies satisfied.
“Crunchy Chickpea Power Bowls” combine canned chickpeas (rinsed and patted dry), diced cucumber, halved cherry tomatoes, shredded carrots, and cubes of mild cheddar cheese. The dressing is simple: olive oil, lemon juice, a touch of honey, and dried oregano mixed in a small container that kids can pour over right before eating. The chickpeas provide protein and fiber, while the vegetables add crunch and color.
For pasta lovers, try “Rainbow Rotini Salad” using tri-colored rotini pasta, diced bell peppers in multiple colors, halved black olives, cubes of mozzarella cheese, and cherry tomatoes. Toss with Italian dressing mixed with a tablespoon of mayonnaise (this makes the dressing creamier and more kid-friendly). Prepare this the night before – the flavors actually improve overnight, and the pasta absorbs some dressing for better flavor throughout.
“Apple Harvest Salad” works especially well in fall: diced crisp apples, chopped walnuts, dried cranberries, and cubes of sharp cheddar cheese over butter lettuce. The dressing is simply apple cider vinegar mixed with honey and a pinch of cinnamon. Pack the dressing separately and include a small ice pack to keep the apples from browning.
Finger Foods and Fun Bites
Sometimes the best lunch is a collection of delicious finger foods that feel more like snacks than a formal meal. This approach works especially well for younger kids or picky eaters who prefer grazing to sitting down for structured meals.
“Meatball Monday” features homemade turkey meatballs (ground turkey, breadcrumbs, egg, and Italian seasoning) baked until golden and served at room temperature with a small container of marinara sauce for dipping. Make a double batch on Sunday and use them throughout the week in different ways – plain for finger food, over pasta for thermos meals, or in wraps.
Homemade “Sausage Balls” disappear faster than I can make them. Mix together ground breakfast sausage, sharp cheddar cheese, and Bisquick baking mix (the ratio is 1 pound sausage to 3 cups mix to 3 cups cheese), roll into walnut-sized balls, and bake at 375°F for 20-25 minutes until golden. They freeze beautifully and can go straight from freezer to lunchbox – they’ll be perfectly thawed by lunchtime.
Don’t overlook upgraded versions of classic finger foods. “Fancy Ants on a Log” uses almond butter instead of peanut butter, adds a drizzle of honey, and tops with dried cranberries or mini chocolate chips alongside the traditional raisins. Cut celery into 3-inch pieces for easier handling, and pack components separately if your child prefers to assemble their own.
Finger Food Packing Tips
- Include small picks or fun forks to make eating more engaging
- Pack dips in leak-proof containers with tight-fitting lids
- Use silicone cupcake liners to separate different items in larger containers
- Choose foods that taste good at room temperature
The transformation in our family’s lunch routine has been remarkable. Emma now looks forward to seeing what’s in her lunchbox, and I’ve discovered that stepping away from sandwich autopilot actually made meal planning more creative and enjoyable. These alternatives often use ingredients we already have on hand, and many can be prepped in larger batches to save time during busy weekdays. Most importantly, they’ve helped us break out of the lunch rut and reminded us that feeding our families can be both nutritious and fun.
Mama Munch
Mama Munch is a food-obsessed parent of two who believes every family deserves simple, nutritious meals — even on the busiest weeknights. With a background in nutrition education and years of navigating picky eaters, allergies, and toddler taste buds, she creates practical recipes and meal strategies that actually work for real families.