Meal Prep Containers: What You Actually Need
Picture this: you’re standing in the kitchen container aisle at Target, completely overwhelmed by the endless rows of plastic promises. Glass versus plastic? Compartments or single sections? Should you invest in that fancy vacuum-seal system, or will those dollar store containers actually do the job? I’ve been there, friends – clutching my coffee and wondering if I really need seventeen different sizes of meal prep containers to feed my family properly.
After years of trial and error (and way too many moldy leftovers discovered in the back of my fridge), I’ve learned that successful meal prepping isn’t about having the most containers – it’s about having the right containers. The ones that actually fit your family’s eating habits, your refrigerator space, and yes, your budget too. Let me save you from my early mistakes and share what you truly need to make meal prep work for real families, not Instagram perfection.
Because here’s the truth: that beautiful set of matching glass containers might look gorgeous on social media, but if they don’t stack properly in your packed fridge or they’re too heavy for your kids to handle, they’re not going to make your life easier. The best meal prep container system is the one you’ll actually use, week after week, even when life gets chaotic.
The Essential Container Types Every Family Actually Needs
Let’s start with the foundation – the containers that earn their keep in real kitchens. You don’t need forty-seven different styles, but you do need variety that matches how your family actually eats.
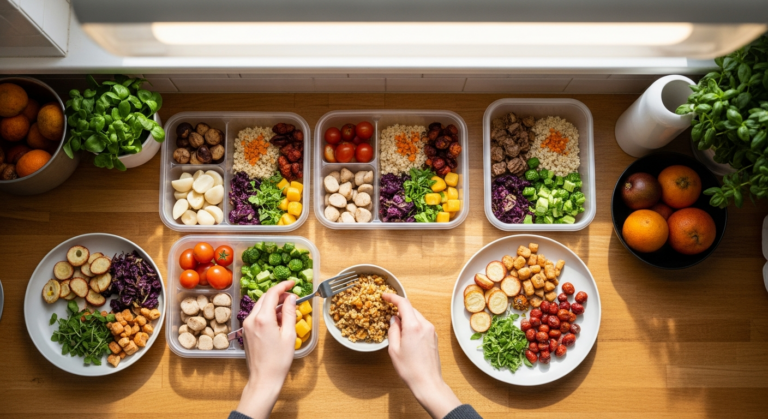
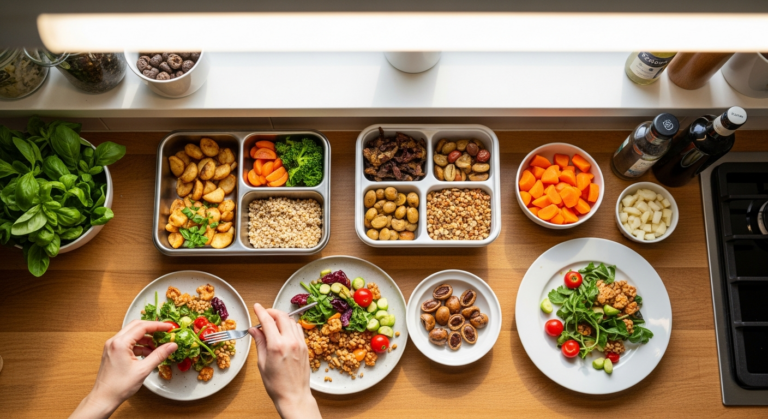
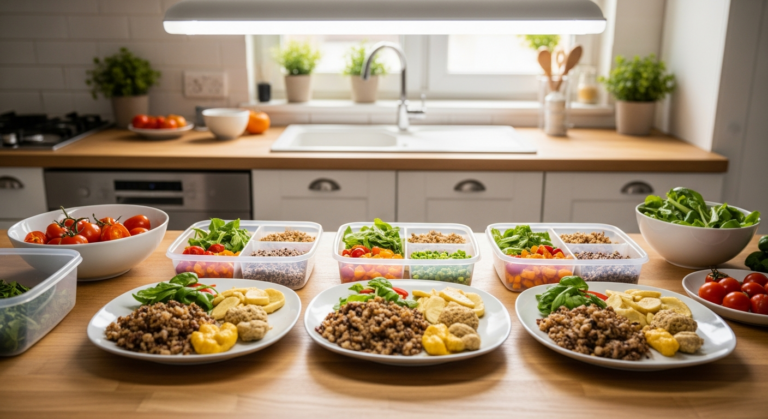
Large Single-Compartment Containers (32-64 oz) are your workhorses for batch cooking. These are perfect for storing that big pot of chili you made Sunday afternoon, or the quinoa salad that’ll serve as lunch bases all week. I use mine constantly for soups like my go-to chicken and white bean soup – I can fit about four adult servings in one container, and it reheats beautifully whether you’re warming it on the stovetop or microwaving individual portions.
Medium Divided Containers (16-24 oz with 2-3 compartments) solve the “everything touching” problem that plagues so many families. My kids will happily eat carrots and hummus, but not if the hummus has leaked all over everything. These are ideal for lunches like turkey and cheese roll-ups in the main compartment, cherry tomatoes in one small section, and pretzels in another. The dividers keep flavors separate and textures intact.
Small Single Containers (8-12 oz) might seem unnecessary, but they’re perfect for sauces, dressings, and kid-sized portions. I use these for storing homemade ranch dressing, marinara sauce for dipping, or single servings of overnight oats. They’re also great for prepping snack portions – washing and cutting grapes once and dividing them into small containers means grab-and-go snacks all week.
Glass vs. Plastic: The Real Story
The internet loves to pit glass against plastic like it’s some kind of container cage match, but honestly? You probably need both, and here’s why.
Glass containers excel at reheating and storing acidic foods. My homemade tomato sauce doesn’t stain glass the way it turns plastic containers permanently orange. Glass heats evenly in the microwave, so your leftover lasagna doesn’t end up with cold spots and molten edges. I reach for glass when I’m prepping foods that need to go straight from fridge to microwave to table – like individual portions of baked ziti or containers of soup.
But glass is heavy, especially when full, and it breaks. I learned this lesson when my seven-year-old dropped a full glass container of pasta salad on our tile floor. The cleanup was epic, and not in a good way.
Plastic containers are lightweight, kid-friendly, and freezer-safe. They’re perfect for school lunches because they won’t add extra weight to already heavy backpacks. Most quality plastic containers can handle temperature changes better than glass – I can move them from freezer to fridge without worry. They’re also more budget-friendly when you’re building your initial collection.
The key is choosing BPA-free plastic containers with secure, leak-proof lids. Look for containers marked with recycling codes 1, 2, 4, or 5 – these are the safest options for food storage. Avoid putting them in the dishwasher’s heated dry cycle, which can warp cheaper plastics and compromise the seal.
My Hybrid Approach
I keep glass containers for hot foods and anything tomato-based, plus foods I’m storing for more than a few days. Plastic handles everything else – cold salads, fresh fruit, sandwiches, and anything the kids need to transport themselves. This system gives me the benefits of both materials without the downsides of committing to just one.
Size Strategy: Matching Containers to Your Family’s Reality
Container sizing isn’t just about storage capacity – it’s about portion control, waste reduction, and actually fitting everything in your refrigerator. Here’s how I think about sizing for different needs.
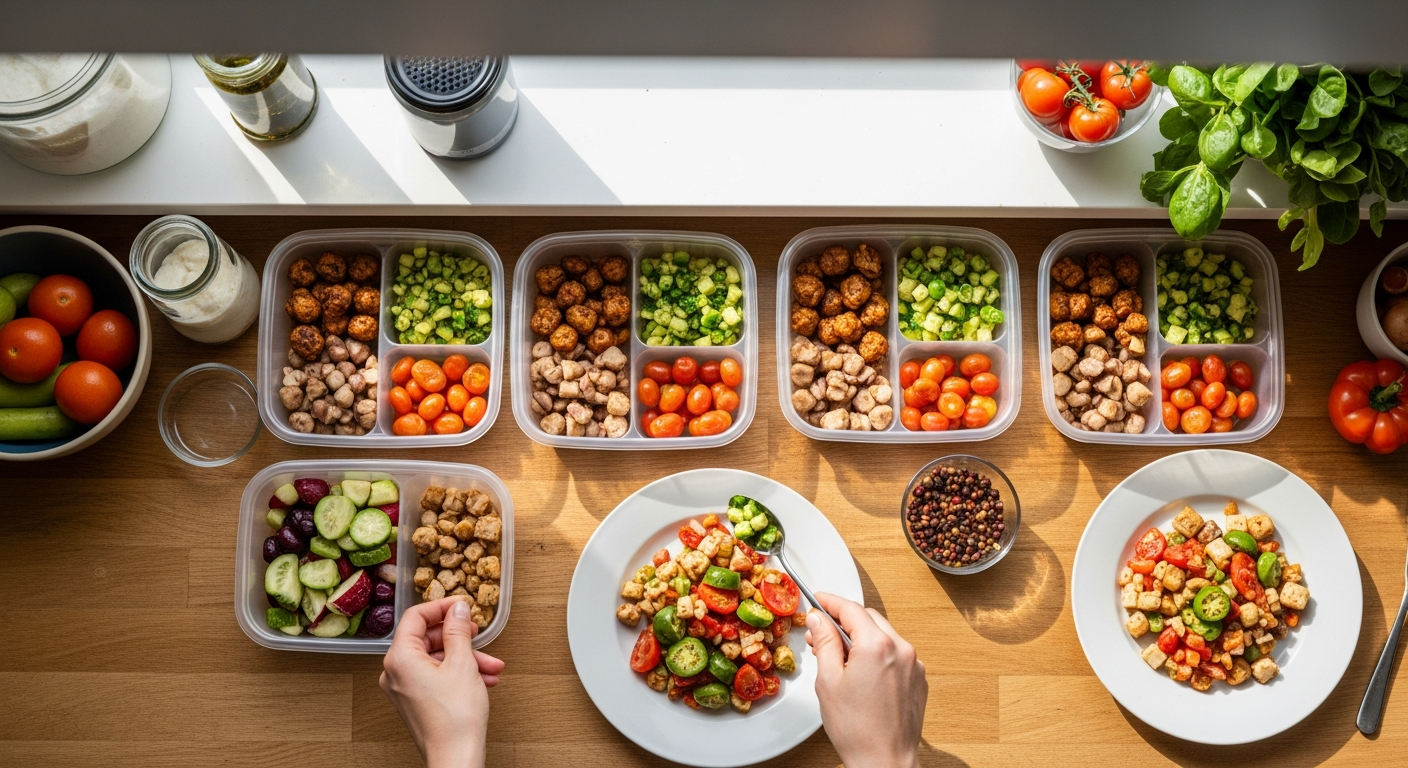
For batch-cooked grains and proteins, I rely on large containers that hold 6-8 servings. When I roast two sheet pans of chicken thighs on Sunday (seasoned simply with olive oil, salt, pepper, and garlic powder), they all fit in one large container. Throughout the week, I pull out 2-3 pieces at a time for quick dinners. The same approach works for brown rice, quinoa, or roasted vegetables.
Individual meal portions need medium containers that hold about 2-3 cups total. These work perfectly for complete meals like my make-ahead burrito bowls: cilantro-lime rice on the bottom, black beans, seasoned ground turkey, corn, diced tomatoes, and a small container of guacamole tucked alongside. Each container is a complete lunch that just needs two minutes in the microwave.
Small containers handle the details that make meal prep actually convenient. Chopped herbs stay fresh longer in small, airtight containers. Salad dressings, grated cheese, toasted nuts, and other toppings each get their own small container so family members can customize their meals.
The Goldilocks Principle
Too-large containers encourage overeating and create food waste when people can’t finish oversized portions. Too-small containers mean you’re constantly washing dishes and running out of prepared food. The right size container should hold a satisfying portion with just a little room at the top – enough food to feel satisfied, but not so much that half gets thrown away.
Special Features That Actually Matter
The meal prep container market is full of bells and whistles, but most families only need a few key features to make their system work smoothly.
Leak-proof lids are non-negotiable if you’re packing lunches or storing anything with sauce. I test new containers with water before using them for food – fill them up, flip them upside down, and give them a gentle shake. If water leaks out, soup definitely will too. Look for lids with silicone gaskets or rubber seals around the edges.
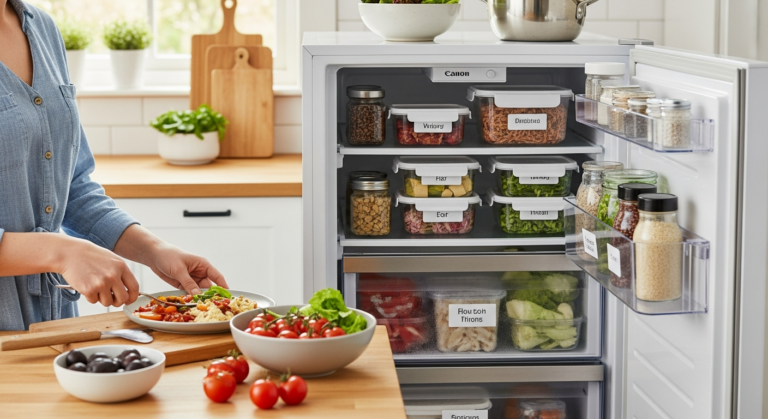
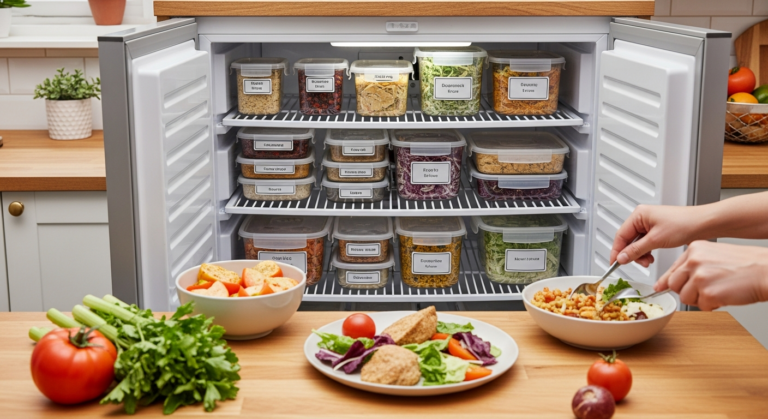
Stackable design saves precious refrigerator space. My fridge is already packed with milk, leftovers, and the mysterious science experiments my kids call “art projects.” Containers that nest neatly when empty and stack securely when full make the most of limited space. Rectangular containers stack better than round ones and fit more efficiently in most refrigerators.
Microwave and dishwasher safety might seem obvious, but double-check before buying. Some containers are microwave-safe but can’t handle the dishwasher’s heated dry cycle. Others are fine in the dishwasher but will warp or melt in the microwave. I look for containers clearly marked as safe for both, which eliminates guesswork during busy weeks.
Features You Can Skip
Built-in ice packs sound convenient but add bulk and weight to lunch boxes. Separate ice packs are more flexible and don’t take up precious container space. Similarly, containers with built-in utensil storage often sacrifice food space for a feature most kids will forget to use anyway.
Building Your Container Collection on a Budget
You don’t need to buy everything at once, and you definitely don’t need to spend a fortune to get started with meal prep. I built my current collection gradually, adding pieces as I figured out what my family actually used.
Start with a basic set that includes 4-6 medium containers, 2-3 large ones, and 6-8 small containers. This gives you enough variety to prep a few different meals without overwhelming your storage space or your budget. Many stores sell starter sets that include multiple sizes for less than buying individual containers.
Buy additional pieces as needed rather than guessing what you might use someday. After a few weeks of meal prep, you’ll quickly see where you need more containers. Maybe you’re constantly running out of small containers for snacks, or you wish you had more large ones for batch cooking. Let your actual usage guide your purchases.
Mix and match brands strategically. While matching sets look nice, you can save money by choosing the best value in each size category. Just make sure lids and bases are clearly labeled or distinctly different so you don’t waste time playing the matching game every time you pack lunches.
Smart Shopping Tips
End-of-summer sales often include great deals on lunch containers when stores clear out back-to-school inventory. Dollar stores carry perfectly adequate small containers for items like dressings and snacks, though I’d invest in higher-quality containers for daily use and reheating. Restaurant supply stores sometimes sell to the public and offer commercial-grade containers at reasonable prices.
Making Your System Work Long-Term
The best container collection in the world won’t help if it’s scattered across your kitchen in chaos. A few simple organizational strategies keep everything running smoothly, even during the busiest weeks.
Designate specific storage spots for clean containers, lids, and packed meals. I keep empty containers in one cabinet, with lids stored in a shallow drawer organizer so I can see all the sizes at once. Packed meals get their own shelf in the refrigerator, making it easy for family members to grab what they need.
Prep containers along with food. While Sunday’s chili is simmering, I wash and dry the containers I’ll need for portioning it out. This prevents the “I made all this food but now I’m too tired to deal with containers” problem that derails so many good intentions. Having containers ready makes it easy to portion and store food while I’m already in cooking mode.
Involve kids in age-appropriate ways. My younger kids can match lids to containers and help pack simple items like fruit or crackers. Older kids can assemble their own lunch containers from prepped ingredients. This builds independence while reducing your workload – and kids are more likely to eat foods they helped prepare.
The goal isn’t perfection; it’s creating a system that makes feeding your family easier and less stressful. Start with basic containers that fit your budget and cooking style, then adjust as you learn what works for your family. Remember, the best meal prep container is the one that helps you get nutritious, tasty food on the table with less daily stress – everything else is just details.